
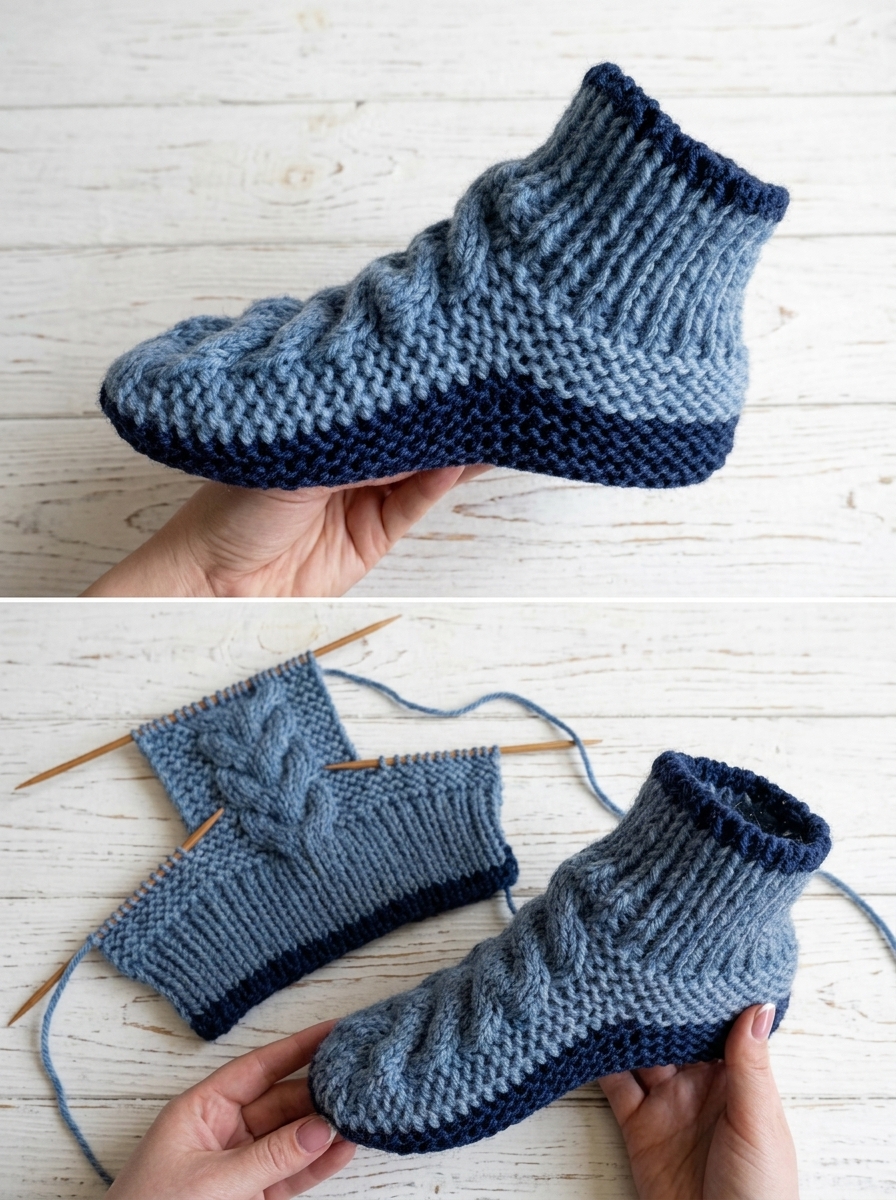
These cozy knitted slippers are perfect for keeping your feet warm on chilly mornings and relaxing evenings at home. With their beautiful blue-gray yarn, chunky cable detail, ribbed ankle cuff, and contrasting navy sole, they look stylish while feeling wonderfully soft and comfortable.
If you enjoy making handmade gifts, this easy knitted slipper pattern is a lovely project to add to your knitting collection. The textured stitches give the slippers a cozy handmade appearance, while the cable detail adds a beautiful finishing touch.
In this tutorial, you will learn how to knit the slipper upper, shape the toe, create the ankle cuff, and assemble the finished slipper step by step.
Easy Knitted Slippers Pattern Details
- Skill level: Advanced beginner
- Project type: Knitted ankle slippers
- Construction: Knitted pieces assembled with seams
- Style: Chunky textured slippers with cable detail
- Suggested sizes: Adult small, medium, and large, with adjustments
- Language: US knitting terms
- Techniques: Knit stitch, purl stitch, ribbing, cable knitting, shaping, and seaming
Important: These instructions are a suggested construction guide inspired by the photo, not a verified stitch-for-stitch reproduction of the original slippers. Make a gauge swatch and check the fit as you work.
Materials You Will Need
Gather these supplies before beginning your knitted slippers.
- Medium-weight or chunky yarn in blue-gray
- A small amount of navy yarn for the sole and edging
- Knitting needles appropriate for your yarn, usually 5–6 mm
- A cable needle
- Yarn needle for sewing the pieces together
- Stitch markers
- Scissors
- Measuring tape
Choose a soft, durable yarn that feels comfortable against your feet. Wool blends or washable acrylic yarn are practical options for everyday house slippers.
Knitting Abbreviations
- CO: Cast on
- BO: Bind off
- K: Knit
- P: Purl
- St(s): Stitch(es)
- RS: Right side
- WS: Wrong side
- K2tog: Knit two stitches together
- C4F: Slip 2 stitches to a cable needle and hold in front, knit the next 2 stitches, then knit the 2 stitches from the cable needle
- Rep: Repeat
Step 1: Knit a Gauge Swatch
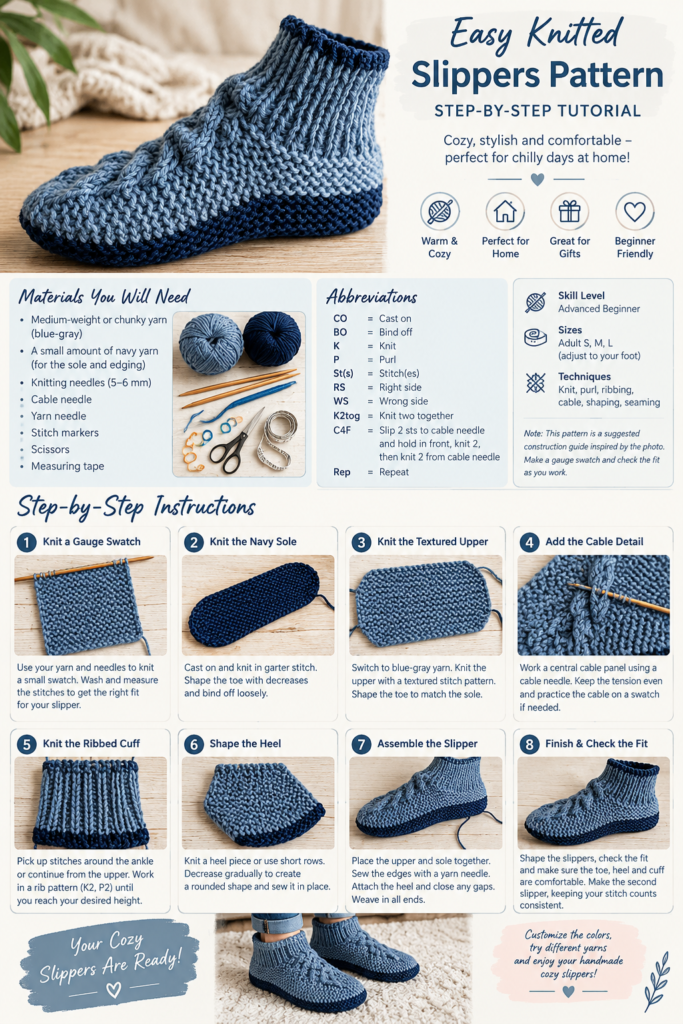
Before starting, knit a small swatch using your chosen yarn and needles.
Wash or block it according to the yarn label, then measure the stitches across 10 cm (4 inches).
Your gauge will determine how many stitches you need for the slipper. For a comfortable fit, measure the intended wearer’s foot length and the circumference around the widest part of the foot.
A dense, flexible fabric is ideal because slippers need to hold their shape without feeling stiff.
Step 2: Knit the Navy Sole
Using navy yarn, cast on a number of stitches that gives you the desired sole width. For an adult slipper, you can begin with approximately 30–36 stitches in chunky yarn, depending on your gauge and foot size.
- Knit the first row.
- Continue knitting every row to create a garter-stitch sole.
- Work until the piece measures approximately the length of the foot, allowing for the toe and heel shaping.
- For a rounded toe, decrease one stitch near each end of selected rows.
- Continue until the toe has a gentle curve.
- Bind off loosely.
For a more durable slipper, you can knit a separate sole and attach it to the upper. The finished sole should fit the foot comfortably without stretching excessively.
Step 3: Knit the Textured Upper
Switch to blue-gray yarn for the main body of the slipper.
- Cast on stitches to match the width of the foot and the planned sole.
- Work several rows in garter stitch for a soft, textured appearance.
- Continue knitting in garter stitch, or alternate knit and purl rows to create a bumpy texture.
- Shape the toe gradually with decreases if your construction requires it.
- Keep checking the piece against the sole so the edges line up.
The textured upper is an important feature of these slippers. It creates a thick, cozy fabric that contrasts beautifully with the dark sole.
Step 4: Add the Cable Detail
The raised cable running along the top of the slipper gives it a decorative, handmade finish.
- Identify a central group of six stitches for the cable.
- Work the surrounding stitches in your chosen textured stitch pattern.
- On a cable row, slip two stitches onto the cable needle and hold them in front.
- Knit the next two stitches, then knit the two stitches from the cable needle.
- Knit the remaining cable stitches according to your chosen cable pattern.
- Repeat the cable crossing every few rows to create a twisted braid effect.
Keep the cable tension even. Avoid pulling the yarn too tightly at the crossings, as this can make the fabric narrower.
Tip: Practice the cable on a small swatch first. The exact cable stitch count and crossing frequency can be adjusted to match your yarn thickness.
Step 5: Knit the Ribbed Ankle Cuff
The tall ribbed cuff helps the slipper sit comfortably around the ankle.
- Pick up stitches evenly around the ankle opening, or continue knitting the cuff from the upper if your chosen construction allows.
- Join the navy yarn if you want a dark contrasting edge at the top.
- Work in a rib pattern such as K2, P2.
- Continue until the cuff reaches your preferred height, approximately 8–12 cm for a cozy ankle style.
- Bind off loosely in pattern so the opening can stretch over the foot.
For a snug cuff, use a slightly smaller needle if necessary, but make sure the opening remains comfortable to put on and take off.
Step 6: Shape the Heel
The heel should cup the back of the foot and prevent the slipper from slipping off.
Depending on your construction, the heel can be shaped using short rows or by knitting a separate heel piece.
For a simple separate heel:
- Pick up or cast on stitches across the back of the slipper.
- Knit a small rectangular piece in garter stitch or the same textured pattern as the upper.
- Decrease gradually near the lower edges if needed to create a rounded shape.
- Bind off and check the heel against the foot.
- Adjust the height or width before sewing it into place.
A properly fitted heel should cover the back of the foot without pulling the ankle cuff down.
Step 7: Assemble the Slipper
Now it is time to bring all the knitted pieces together.
- Place the upper and sole with their right sides aligned as appropriate for your construction.
- Use a yarn needle and matching yarn to sew the edges together.
- Keep the seam flat and even, especially around the toe.
- Attach the heel securely.
- Close any remaining gaps along the back or underside.
- Weave in all loose yarn ends on the inside of the slipper.
Try the slipper on before securing every seam. Make small adjustments if the toe feels tight or the heel sits too high.
Repeat all steps to make the second slipper, keeping the stitch counts and measurements consistent.
Step 8: Finish and Check the Fit
Gently shape the slippers with your hands and let them rest flat. Follow the care instructions for your yarn if you decide to wash or block them.
Check these details before wearing:
- The toe has enough room to move comfortably.
- The heel stays in place when walking.
- The cuff stretches without squeezing the ankle.
- The seams feel smooth against the skin.
- The sole is sturdy enough for indoor use.
For extra grip, consider adding a suitable non-slip fabric treatment or a separate grippy sole. Knitted soles can be slippery on smooth floors, so test them carefully before walking around.
Tips for Making Beautiful Knitted Slippers
Choose the right yarn. Soft, durable yarn helps the slippers retain their shape.
Keep both slippers consistent. Write down your stitch counts, measurements, and cable-row intervals after completing the first slipper.
Check the fit frequently. Feet vary in length and width, so measurements are more reliable than following a generic stitch count.
Avoid tight seams. A flexible seam helps the slipper move naturally with the foot.
Customize the colors. Try cream and brown, dusty pink and gray, or forest green and charcoal for a different look.
Frequently Asked Questions
Are these knitted slippers suitable for beginners?
They are best for advanced beginners who already know how to knit and purl. The cable detail, shaping, and assembly may require a little practice.
Can I make these slippers without cables?
Yes. Replace the cable panel with garter stitch, seed stitch, or a simple rib pattern for an easier version.
How do I make the slippers larger or smaller?
Adjust the stitch count according to your gauge and foot width, and change the length to match the foot measurement. Make sure the sole and upper remain compatible.
Which yarn is best for knitted slippers?
A sturdy wool blend or washable acrylic yarn works well. Choose a yarn that is soft against the skin and suitable for the intended care routine.
How can I stop knitted slippers from slipping?
Use a suitable non-slip sole or fabric grip treatment. Avoid wearing slippery knitted slippers on polished floors until you have checked their traction.
Final Thoughts
These cozy knitted ankle slippers combine soft texture, a beautiful cable detail, a tall ribbed cuff, and a contrasting sole for a timeless handmade look. They make a thoughtful gift for family and friends, or a comfortable addition to your own home.
Take your time with the shaping and finishing, and remember that a good fit is the key to a pair of slippers you will love wearing.
If you enjoyed this knitting tutorial, save it for your next cozy craft project and explore more free knitting and crochet patterns for handmade gifts and everyday accessories.