
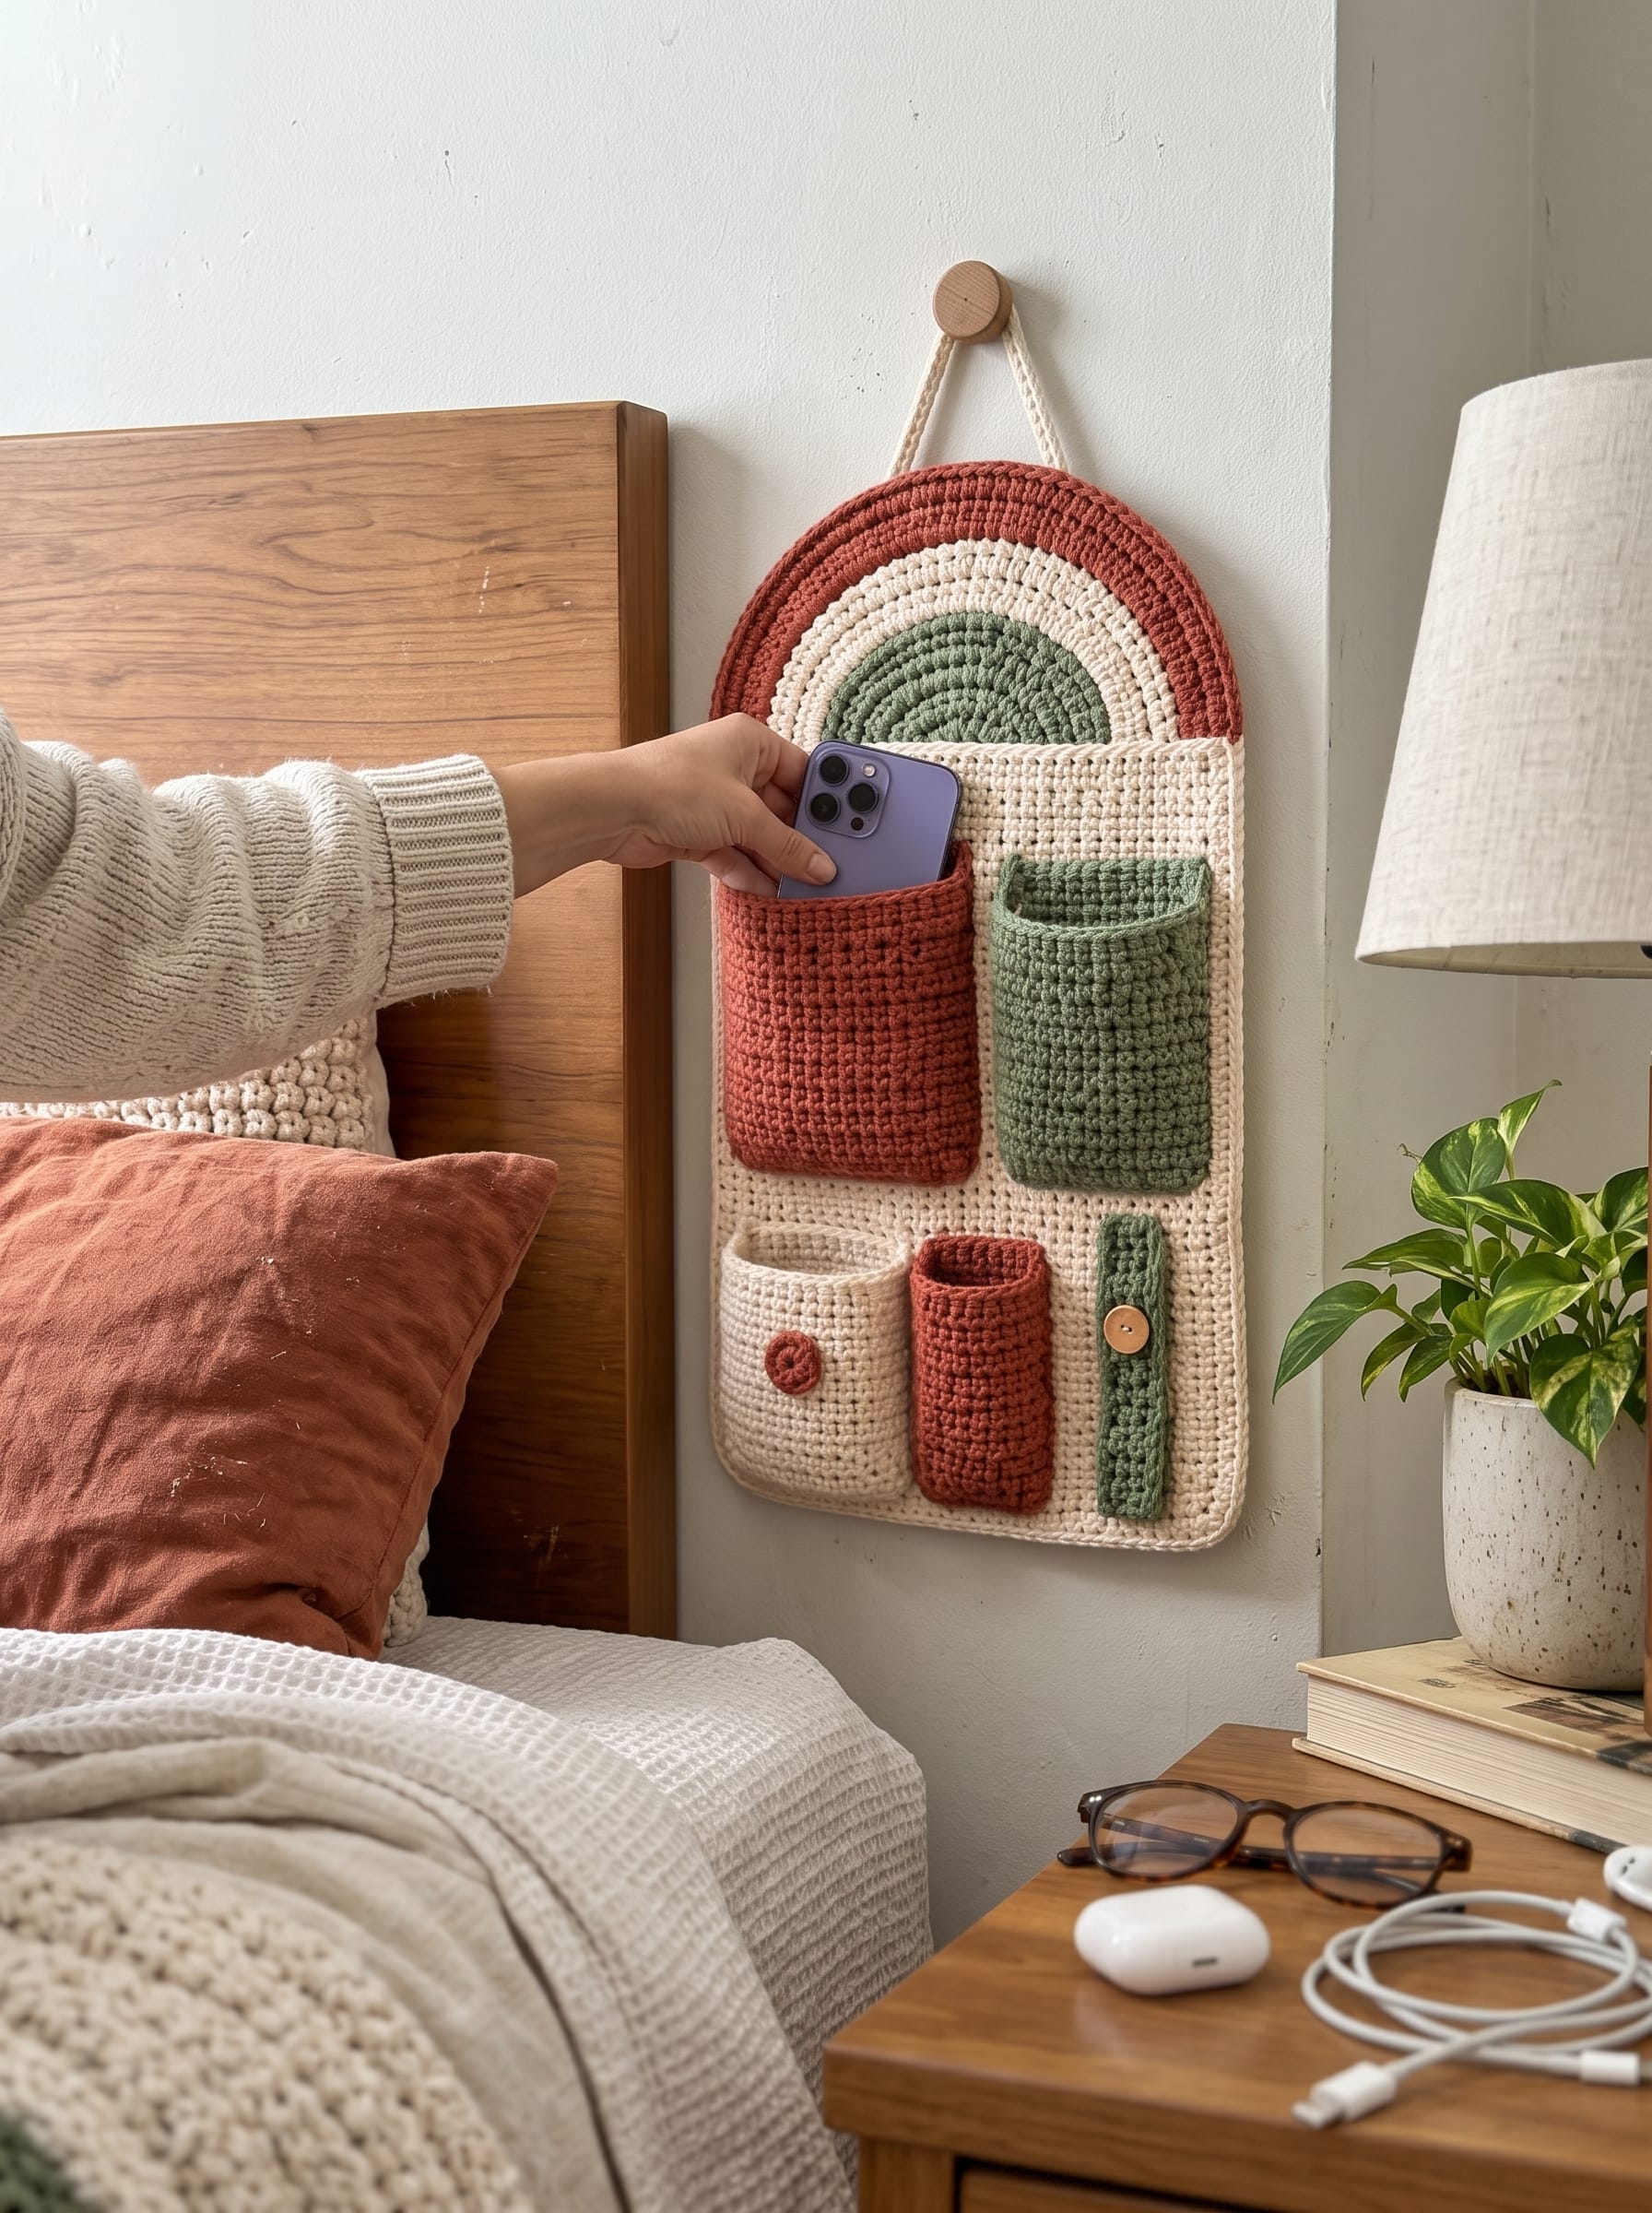
Is your nightstand buried under a phone, glasses, earbuds and tangled charging cables? This crochet wall organizer gives all of it a home. It hangs beside your bed and has a boho rainbow top, four pockets of different sizes, and a little button tab for your cable.
It’s made with simple single crochet and basic shaping, so it’s a great beginner crochet pattern. It also works well as a handmade gift or a craft fair project.
In this post:
- Materials and gauge
- Pattern notes and abbreviations
- Step-by-step instructions
- Finishing and hanging
- Styling and customizing tips
- FAQ
Project Details
- Skill level: Easy / confident beginner
- Finished size: about 10″ wide × 18″ tall (25 × 46 cm), not including the hanging loops
- Time to make: 6–8 hours
- Stitches used: magic ring, chain, single crochet, increase, slip stitch
Materials
- Yarn: worsted weight (#4) cotton or cotton blend. Cotton keeps the fabric sturdy so the pockets hold their shape.
- Cream: about 150 g / 300 yds
- Terracotta: about 80 g / 160 yds
- Sage green: about 60 g / 120 yds
- Hook: 4.0 mm (G-6). Go down a size if your fabric feels loose. Tight stitches make better pockets.
- 2 wooden buttons (about 25 mm and 15 mm)
- Yarn needle
- Stitch markers
- Scissors
- Wooden wall peg or hook for hanging
Gauge
16 sc × 17 rows = 4″ (10 cm). Gauge isn’t critical, but a dense fabric works best for an organizer.
Abbreviations (US terms)
- ch: chain
- sc: single crochet
- 2sc: 2 single crochet in the same stitch (increase)
- sl st: slip stitch
- st(s): stitch(es)
- MR: magic ring
- ( ) × #: repeat the instructions in parentheses that many times
Pattern Notes
- Ch 1 at the start of each row does not count as a stitch.
- Turn at the end of every row unless told otherwise.
- Carry yarn up the side for stripes, or cut and weave in ends as you go.
- Block all pieces lightly before sewing so they sit flat.
Part 1: Main Panel (Cream)
- Ch 41.
- Row 1: sc in the 2nd ch from hook and in each ch across. (40 sc)
- Rows 2–56: Ch 1, turn, sc in each st across. (40 sc)
Fasten off and leave the yarn tail on the last row for later.
Part 2: Rainbow Arch
The arch is worked as a flat half circle with 3 evenly spaced increases per row. Start with sage green.
Green section
- Row 1: 6 sc in MR. (6)
- Row 2: Ch 1, turn, (sc, 2sc) × 3. (9)
- Row 3: Ch 1, turn, (2sc, sc 2) × 3. (12)
- Row 4: Ch 1, turn, (sc 3, 2sc) × 3. (15)
- Row 5: Ch 1, turn, (2sc, sc 4) × 3. (18)
- Row 6: Ch 1, turn, (sc 5, 2sc) × 3. (21)
- Row 7: Ch 1, turn, (2sc, sc 6) × 3. (24)
Cream section. Change to cream. Keep placing 3 evenly spaced increases in each row, adding one more plain sc between increases every row.
- Rows 8–13: stitch counts are 27, 30, 33, 36, 39, 42.
Terracotta section. Change to terracotta and continue the same way.
- Rows 14–20: stitch counts are 45, 48, 51, 54, 57, 60, 63.
Fasten off and leave a long tail. If your arch cups, you have too many increases. If it ruffles, you have too few. Adjust by one stitch per row.
Part 3: Pockets
Large Pockets (make 1 terracotta, 1 sage green)
- Ch 17.
- Row 1: sc in the 2nd ch from hook and in each across. (16 sc)
- Rows 2–22: Ch 1, turn, sc in each st across. (16 sc)
Do not fasten off. Ch 1 and work 1 row of sc around all four sides of the pocket, putting 3 sc in each corner. This gives a neat edge. Fasten off.
Small Pocket (cream)
- Ch 15.
- Row 1: sc in the 2nd ch from hook and in each across. (14 sc)
- Rows 2–15: Ch 1, turn, sc in each st across. (14 sc)
Border it the same way as the large pockets. Fasten off.
Narrow Pocket (terracotta)
- Ch 13.
- Row 1: sc in the 2nd ch from hook and in each across. (12 sc)
- Rows 2–17: Ch 1, turn, sc in each st across. (12 sc)
Border it the same way as the large pockets. Fasten off.
Mini Appliqué Circle (terracotta)
- Make an MR and work 6 sc into it. Slip stitch to join.
- Round 2: 2sc in each st around. (12)
- Fasten off and leave a tail for sewing it to the small cream pocket.
Cable Tab (sage green)
- Ch 6.
- Row 1: sc in the 2nd ch from hook and in each across. (5 sc)
- Rows 2–24: Ch 1, turn, sc in each st across. (5 sc)
Fasten off. Sew the larger button near the center.
Part 4: Assembly
- Join the arch to the panel. Lay the arch’s flat edge across the top of the main panel, with the green center in the middle. Whipstitch or mattress stitch the two pieces together. Weave in ends.
- Border the whole piece (optional but recommended). With cream, join at any corner and work sc evenly around the entire outer edge, putting 3 sc in each corner. This hides the seam and gives a clean frame.
- Place the pockets. Pin them to the panel, leaving a small gap between each:
- Terracotta and sage large pockets side by side across the upper half
- Cream small pocket and terracotta narrow pocket on the lower left
- Sage tab to the right of the narrow pocket
- Sew the pockets. Use a yarn needle and matching yarn. Sew the bottom and both sides of each pocket, leaving the top open. Reinforce the top corners with a few extra stitches, because that’s where the weight pulls.
- Attach the circle and button. Sew the terracotta circle to the small cream pocket. Sew the tab’s top edge down and fasten the large button through it so the tab forms a loop for a charging cable.
Part 5: Hanging Loops
- With cream, ch 50 loosely. Fasten off.
- Make a second chain the same length.
- Sew each chain to a top corner of the arch to form a triangle. Pull both loops over a wooden peg or wall hook.
For a sturdier hanger, work a row of sc into each chain, or braid three strands of yarn into a cord.
Tips for the Best Results
- Use cotton yarn. Acrylic can stretch under the weight of a phone.
- Keep your tension snug. Tight stitches make a firm fabric that won’t sag.
- Block the pieces. Lightly steam or wet-block to even out the stitches before sewing.
- Reinforce the stress points. Add extra stitches at the top corners of each pocket and at the hanging loops.
- Make it your own. Try mustard, dusty rose or navy for a different mood.
Customization Ideas
- Bigger phones or tablets: add 4 stitches and 6 rows to the large pockets.
- Nursery version: use soft pastels and skip the button tab.
- Entryway organizer: hang it by the door for keys, mail and sunglasses.
- Craft room storage: make the pockets taller for hooks, scissors and notions.
Frequently Asked Questions
Can I use acrylic yarn instead of cotton?
Yes, but cotton or a cotton blend holds its shape better under the weight of a phone.
Is this pattern beginner friendly?
Yes. It uses only single crochet and increases, plus basic sewing.
How do I wash it?
Hand wash in cool water and lay flat to dry. Remove the buttons first if they aren’t machine safe.
Can I sell items made from this pattern?
Please check the pattern terms on your blog. Many designers allow selling finished items if you credit the designer.
How do I stop it from hanging crooked?
Use two loops attached evenly to the top corners and hang it on a wide peg or hook.
Save It for Later
If you enjoyed this crochet bedside organizer pattern, pin it to your boho crochet board and share your finished version. Tag me so I can see your color choices.