
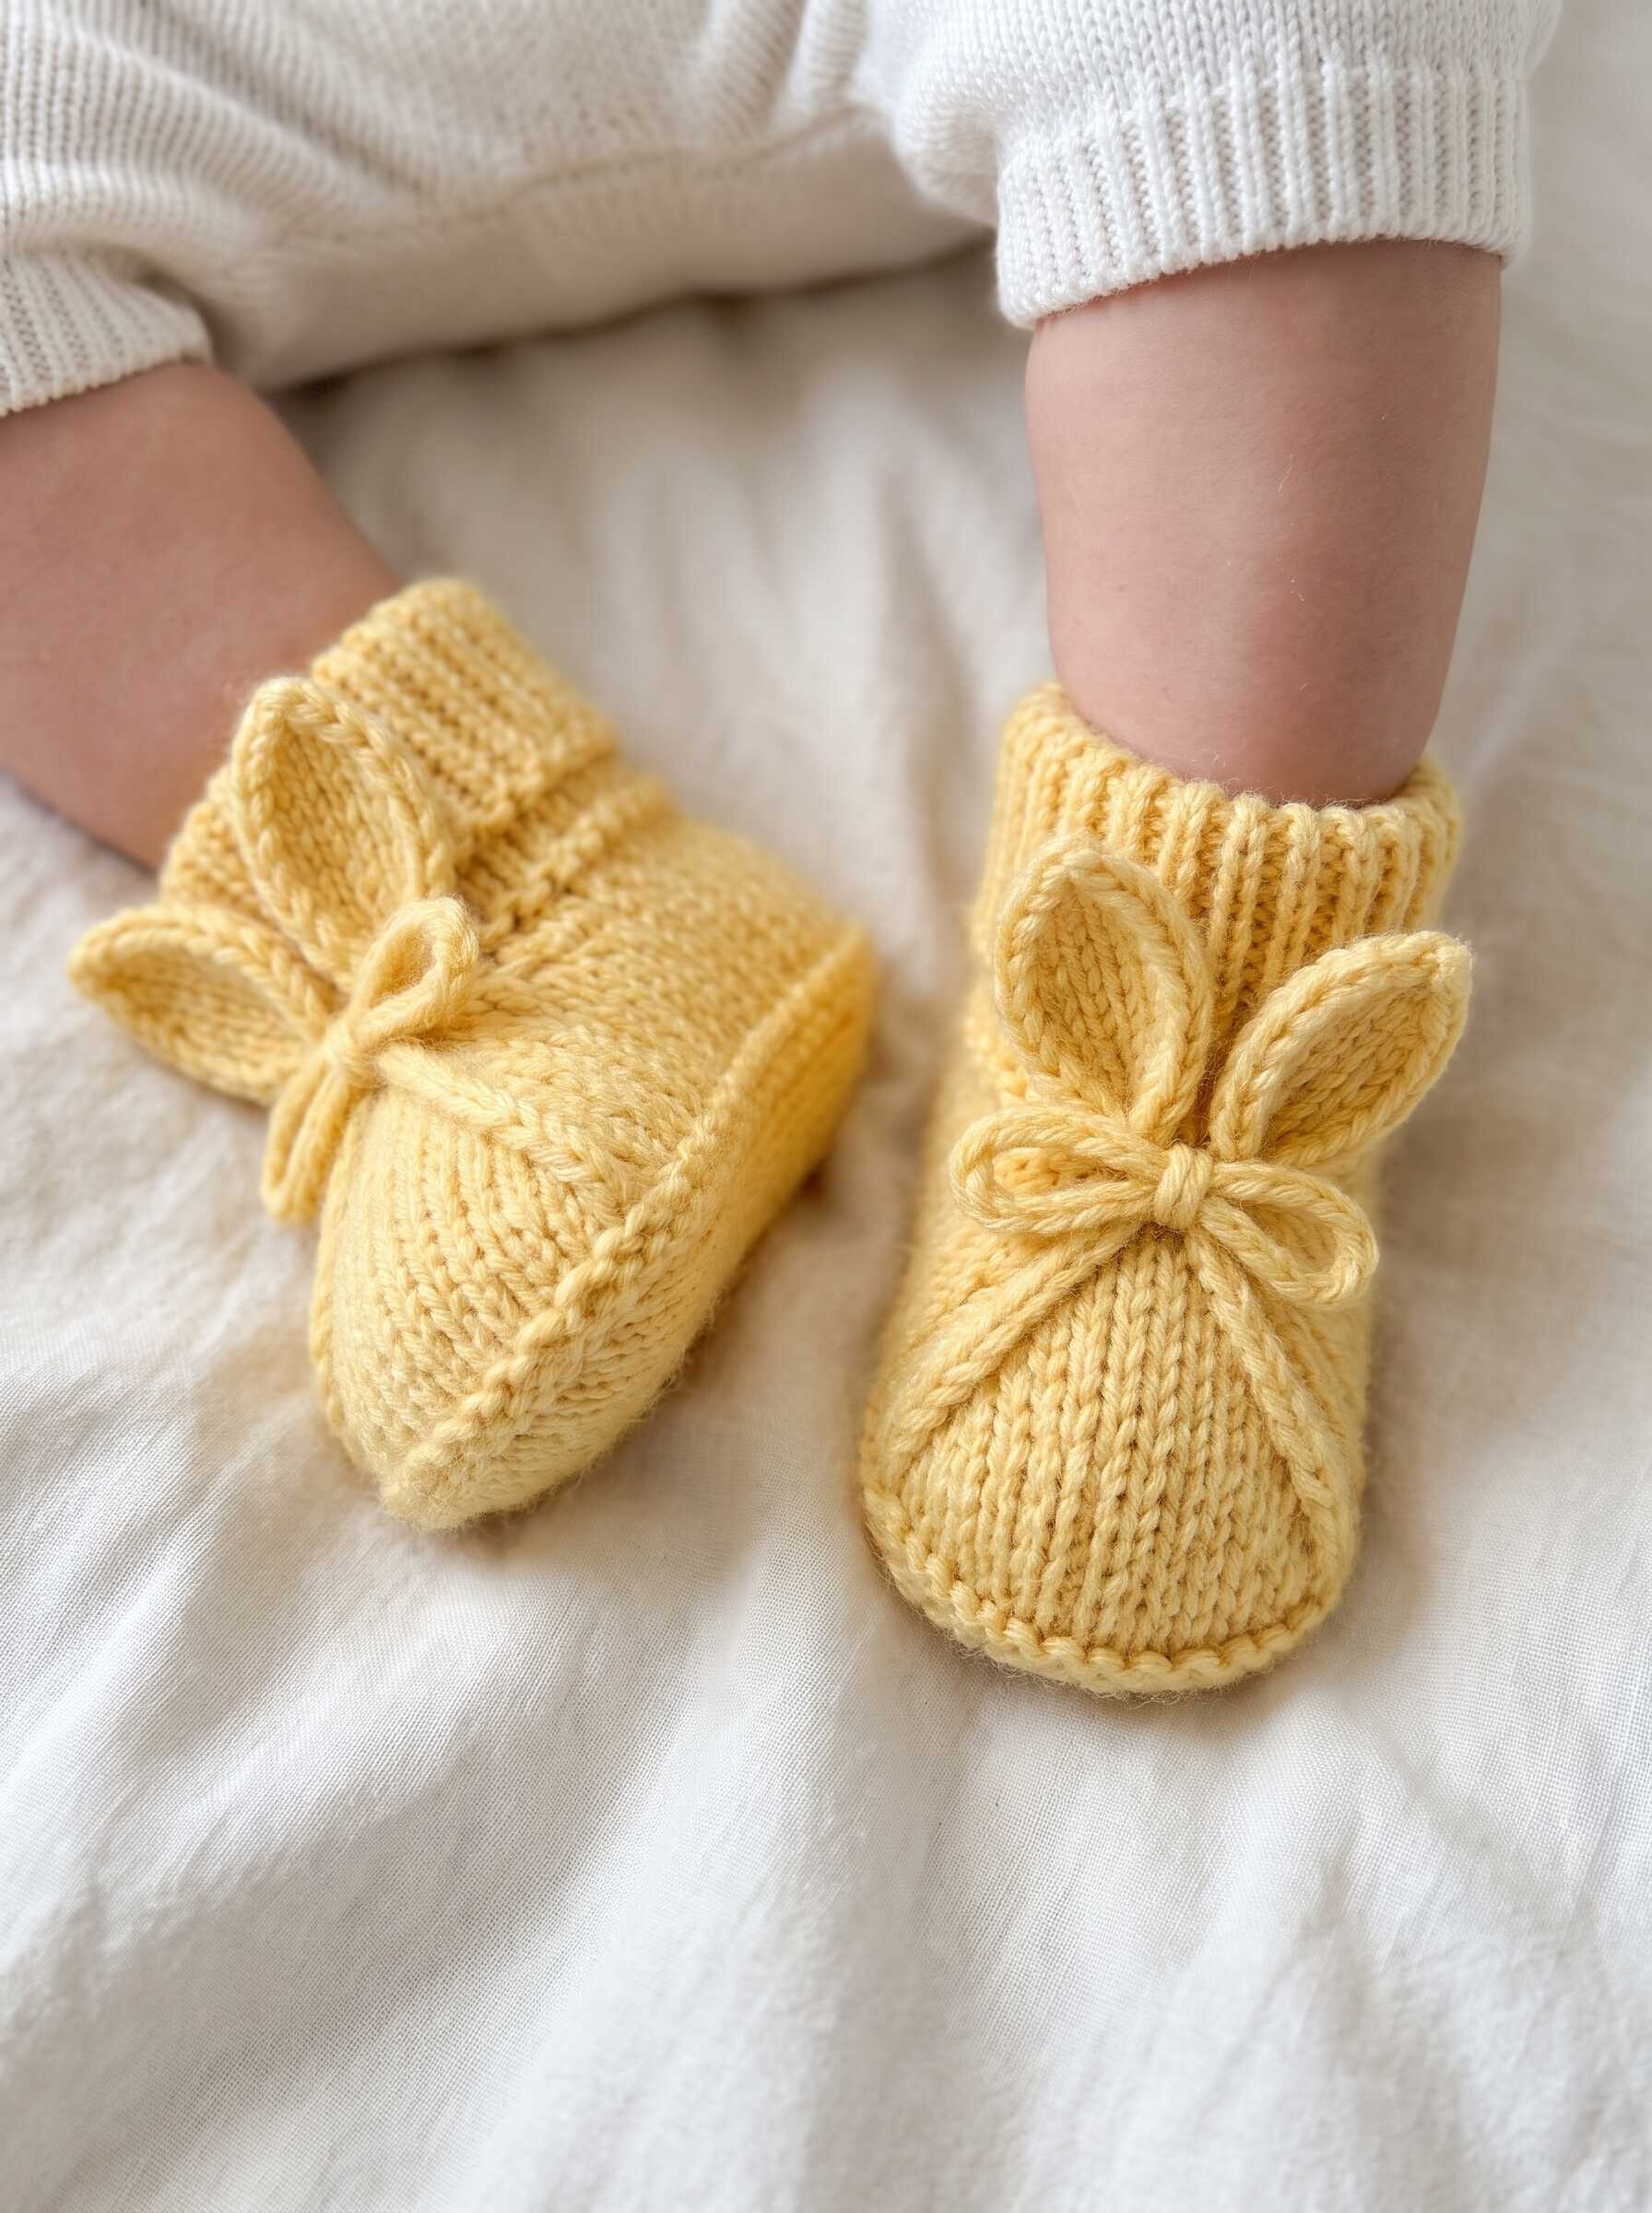
These Sweet Little Buttercup Baby Booties are a charming handmade project for little ones. With their soft yellow color, cozy ankle cuffs, delicate leaf-shaped decorations, and pretty bows, they make the sweetest addition to any baby’s wardrobe.
Designed with comfort and cuteness in mind, these crochet baby booties are perfect for everyday wear, baby shower gifts, newborn photography, or a thoughtful handmade present.
The pattern features a simple oval sole, a gently shaped toe, a stretchy ribbed cuff, and adorable decorative leaves that give the booties their signature look.
Whether you’re making them for your own little one or creating a special handmade gift, this beginner-friendly crochet pattern is a lovely project to enjoy.
Pattern Details
- Project: Sweet Little Buttercup Baby Booties
- Skill Level: Advanced Beginner
- Terminology: US Crochet Terms
- Construction: Worked from the sole upward
- Sizes: Approximately 0–3 months
- Finished Sole Length: Approximately 9–9.5 cm (3.5–3.75 inches)
- Yarn Weight: DK / Light Worsted
- Hook Size: 3.5 mm (E/4)
- Main Color: Butter Yellow
- Additional Materials: Yarn needle, stitch markers, and scissors
Materials Needed
- DK weight baby yarn in soft butter yellow (approximately 35–45 grams)
- 3.5 mm crochet hook
- Yarn needle for sewing and weaving in ends
- Scissors
- Stitch markers
- Measuring tape
Yarn Tip: Choose a soft, baby-friendly yarn that is gentle against delicate skin. Cotton blends or washable baby acrylic yarn work beautifully.
Abbreviations
This pattern uses US crochet terminology.
- ch – Chain
- sl st – Slip stitch
- sc – Single crochet
- hdc – Half double crochet
- dc – Double crochet
- inc – Increase (2 stitches in the same stitch)
- dec – Decrease (single crochet 2 stitches together)
- BLO – Back loop only
- FLO – Front loop only
- st – Stitch
- sts – Stitches
- rnd – Round
- rep – Repeat
Special Stitches
Single Crochet Decrease (sc2tog):
Insert hook into the next stitch and pull up a loop. Insert hook into the following stitch and pull up another loop. Yarn over and pull through all three loops.
Leaf Stitch:
A decorative leaf is created using chains and double crochet stitches worked around a foundation chain to form a pointed oval shape.
Finished Measurements
The finished booties are designed for approximately 0–3-month-old babies.
- Sole length: 9–9.5 cm
- Sole width: Approximately 4.5 cm
- Ankle cuff height: Approximately 3 cm
Always measure the baby’s foot when possible, as baby sizes can vary.
FULL CROCHET PATTERN
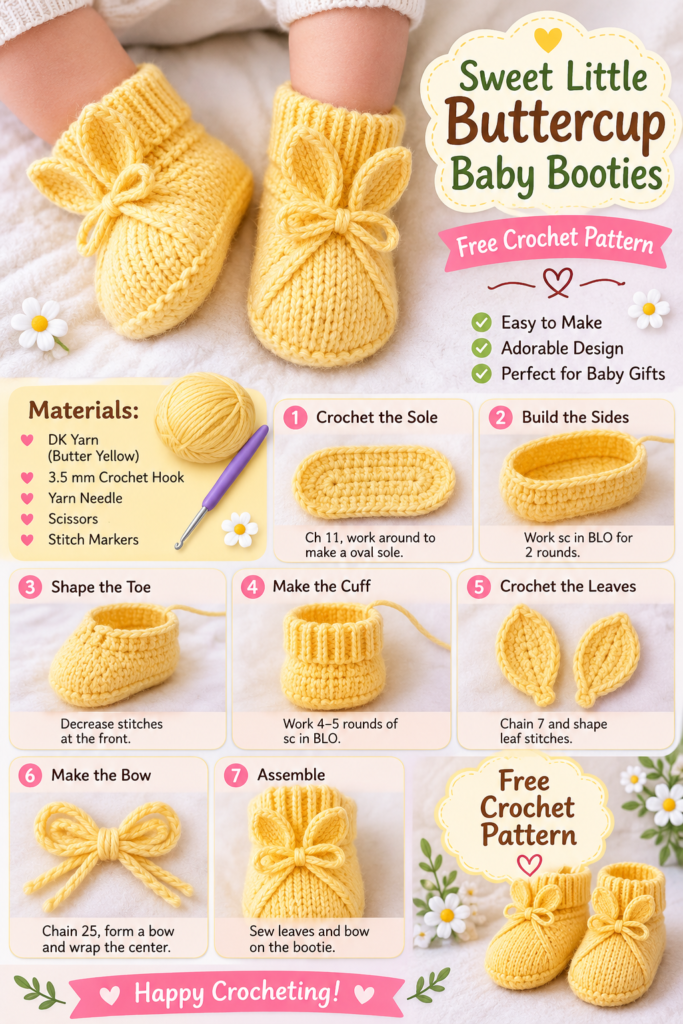
Make two identical booties.
PART 1: Crochet the Sole
Using butter-yellow yarn and a 3.5 mm crochet hook.
Round 1:
Ch 11.
Starting in the second chain from the hook, work 1 sc in each of the next 9 chains.
Work 3 sc in the last chain.
Continue along the opposite side of the foundation chain. Work 1 sc in each of the next 8 chains, then 2 sc in the final chain.
Join with a sl st to the first sc.
Total: 22 stitches.
Round 2:
Ch 1.
Work 2 sc in the first stitch, 1 sc in each of the next 8 stitches, 2 sc in each of the next 3 stitches, 1 sc in each of the next 8 stitches, and 2 sc in each of the last 2 stitches.
Join with a sl st.
Total: 28 stitches.
Round 3:
Ch 1.
Work 1 sc in the first stitch, 2 sc in the next stitch, 1 sc in each of the next 8 stitches.
Repeat (1 sc, 2 sc in next stitch) three times.
Work 1 sc in each of the next 8 stitches.
Repeat (1 sc, 2 sc in next stitch) twice.
Join with a sl st.
Total: 34 stitches.
Round 4:
Ch 1. Work 1 sc in every stitch around.
Join with a sl st.
Total: 34 stitches.
Fasten off if desired, or continue with the same yarn.
PART 2: Build the Sides
This section creates the raised sides of the baby bootie.
Round 5:
Join yarn if necessary.
Ch 1 and work 1 sc in the BLO of every stitch around.
Join with a sl st.
Total: 34 stitches.
Rounds 6–7:
Ch 1.
Work 1 sc in every stitch around.
Join with a sl st after each round.
Keep your stitches even so the bootie maintains a neat shape.
PART 3: Shape the Toe
The toe section is worked across the front 14 stitches of the bootie.
Place two stitch markers to identify the 14 front stitches, leaving 20 stitches for the heel and sides.
Toe Row 1:
Ch 1. Work 7 sc, then 7 sc2tog across the marked front section.
You will have 7 stitches remaining in the toe section.
Toe Row 2:
Ch 1. Work 3 sc2tog and 1 sc in the final stitch.
You will have 4 stitches remaining.
Fasten off, leaving a long yarn tail.
Using your yarn needle, gently gather the remaining toe stitches and secure them neatly.
Sew the small opening closed if necessary.
The result should be a softly rounded toe.
PART 4: Crochet the Ankle Cuff
Join yarn at the back of the bootie opening.
Round 1:
Ch 1. Work 1 sc evenly around the ankle opening.
Join with a sl st.
Rounds 2–5:
Ch 1.
Work 1 sc in the BLO of every stitch around.
Join with a sl st after each round.
Repeat the rounds until the cuff reaches approximately 3 cm in height.
Fasten off and weave in the ends.
For a more pronounced ribbed appearance, you can work additional rounds.
PART 5: Crochet the Decorative Leaves
The beautiful leaf details give these baby booties their sweet, delicate appearance.
Make four leaves for each pair of booties, two for each bootie.
Using the same yellow yarn, follow these instructions.
Leaf Pattern:
Ch 7.
Starting in the second chain from the hook:
- 1 sc in the first chain
- 1 hdc in the next chain
- 2 dc in the next chain
- 1 hdc in the next chain
- 1 sc in the next chain
- 3 sc in the final chain
Now work along the opposite side of the foundation chain:
- 1 sc
- 1 hdc
- 2 dc
- 1 hdc
- 1 sc
Join with a sl st.
Fasten off, leaving a long tail for sewing.
Gently shape the leaf with your fingers to create a pointed oval appearance.
Make four leaves in total.
PART 6: Make the Decorative Bow
The little bow at the front of each bootie completes the design.
Make two bows.
Bow Pattern:
Ch 25.
Join the ends with a sl st to create a loop.
Flatten the loop and pinch the center together.
Using a separate piece of yarn, wrap the center several times to create the bow shape.
Tie securely at the back and weave in the ends.
Adjust the loops until the bow looks even and fluffy.
For each bootie, you can also make two smaller loops by folding the bow gently before wrapping its center.
PART 7: Assemble the Decorations
Now comes the fun part!
Arrange two decorative leaves at the front of each bootie, just below the ankle cuff.
Position the leaves so that they point slightly upward and outward.
Place the bow in the center where the leaves meet.
Using your yarn needle, carefully sew the leaves and bow onto the bootie.
Secure all ends firmly and check that there are no loose yarn tails.
Repeat the same arrangement on the second bootie.
FINISHING TOUCHES
Once both booties are complete:
- Weave in all remaining yarn ends.
- Gently shape the soles and toe areas.
- Check that both booties are approximately the same size.
- Smooth the decorative leaves and adjust the bows.
- Lightly steam-block only if your yarn care instructions allow it.
Your Sweet Little Buttercup Baby Booties are ready!
SIZE ADJUSTMENTS
You can adapt this pattern for different baby sizes.
- Newborn: Aim for a sole length of approximately 8–8.5 cm.
- 0–3 Months: Aim for approximately 9–9.5 cm.
- 3–6 Months: Aim for approximately 10–10.5 cm.
To adjust the size, change the foundation chain and add or remove stitches from the sole rounds. Check the sole measurement as you work.
The cuff height can also be adjusted by adding or removing ribbed rounds.
COLOR IDEAS
Although butter yellow gives these booties their lovely sunny appearance, you can experiment with other beautiful baby colors.
- Soft ivory for a classic neutral look.
- Blush pink for a sweet feminine touch.
- Sage green for a natural, modern style.
- Powder blue for a traditional baby look.
- Cream and beige for a minimalist handmade design.
HELPFUL CROCHET TIPS
Keep your tension consistent: Even stitches help both booties maintain the same shape and size.
Use stitch markers: Marking the front toe stitches makes shaping much easier.
Choose soft yarn: Baby booties should feel gentle and comfortable.
Make matching pairs: Count your rounds carefully to ensure both booties are identical.
Secure decorations: Sew the bows and leaves firmly. These are decorative details, not detachable accessories.
CARE INSTRUCTIONS
To keep your handmade baby booties looking beautiful:
- Follow the washing instructions on your yarn label.
- Use a gentle detergent.
- Avoid harsh chemicals and bleach.
- Reshape while damp if necessary.
- Allow to air dry completely.
Baby Safety Note: These booties are decorative, non-slip footwear and are not intended for walking. Always supervise babies while wearing them. Ensure all decorations are securely attached and remove the booties if any part becomes loose.
FREQUENTLY ASKED QUESTIONS
Are these crochet baby booties suitable for beginners?
Yes! The sole and sides use basic crochet stitches. Beginners who know single crochet, increases, and decreases can follow the instructions with a little patience.
How much yarn do I need?
Approximately 35–45 grams of DK-weight yarn should be sufficient for one pair, depending on your tension and decorative details.
Can I use a different crochet hook?
Yes, but changing your hook size will affect the finished measurements. Always make a small test swatch and measure the sole as you work.
Can I make these booties in different colors?
Absolutely! Pastel pink, ivory, cream, sage green, and baby blue all look beautiful with this design.
Can I sell finished booties made from this pattern?
You may sell your finished handmade items. Please credit the pattern source when sharing the design and do not redistribute this written pattern as your own.
FINAL THOUGHTS
These Sweet Little Buttercup Baby Booties are a lovely example of how small handmade details can make a project truly special.
From the soft crochet sole to the cozy ribbed cuff and adorable leaf-and-bow decoration, every detail adds charm and sweetness.
Make a pair for a baby shower, a newborn gift, or simply as a beautiful handmade keepsake.
Happy crocheting!