
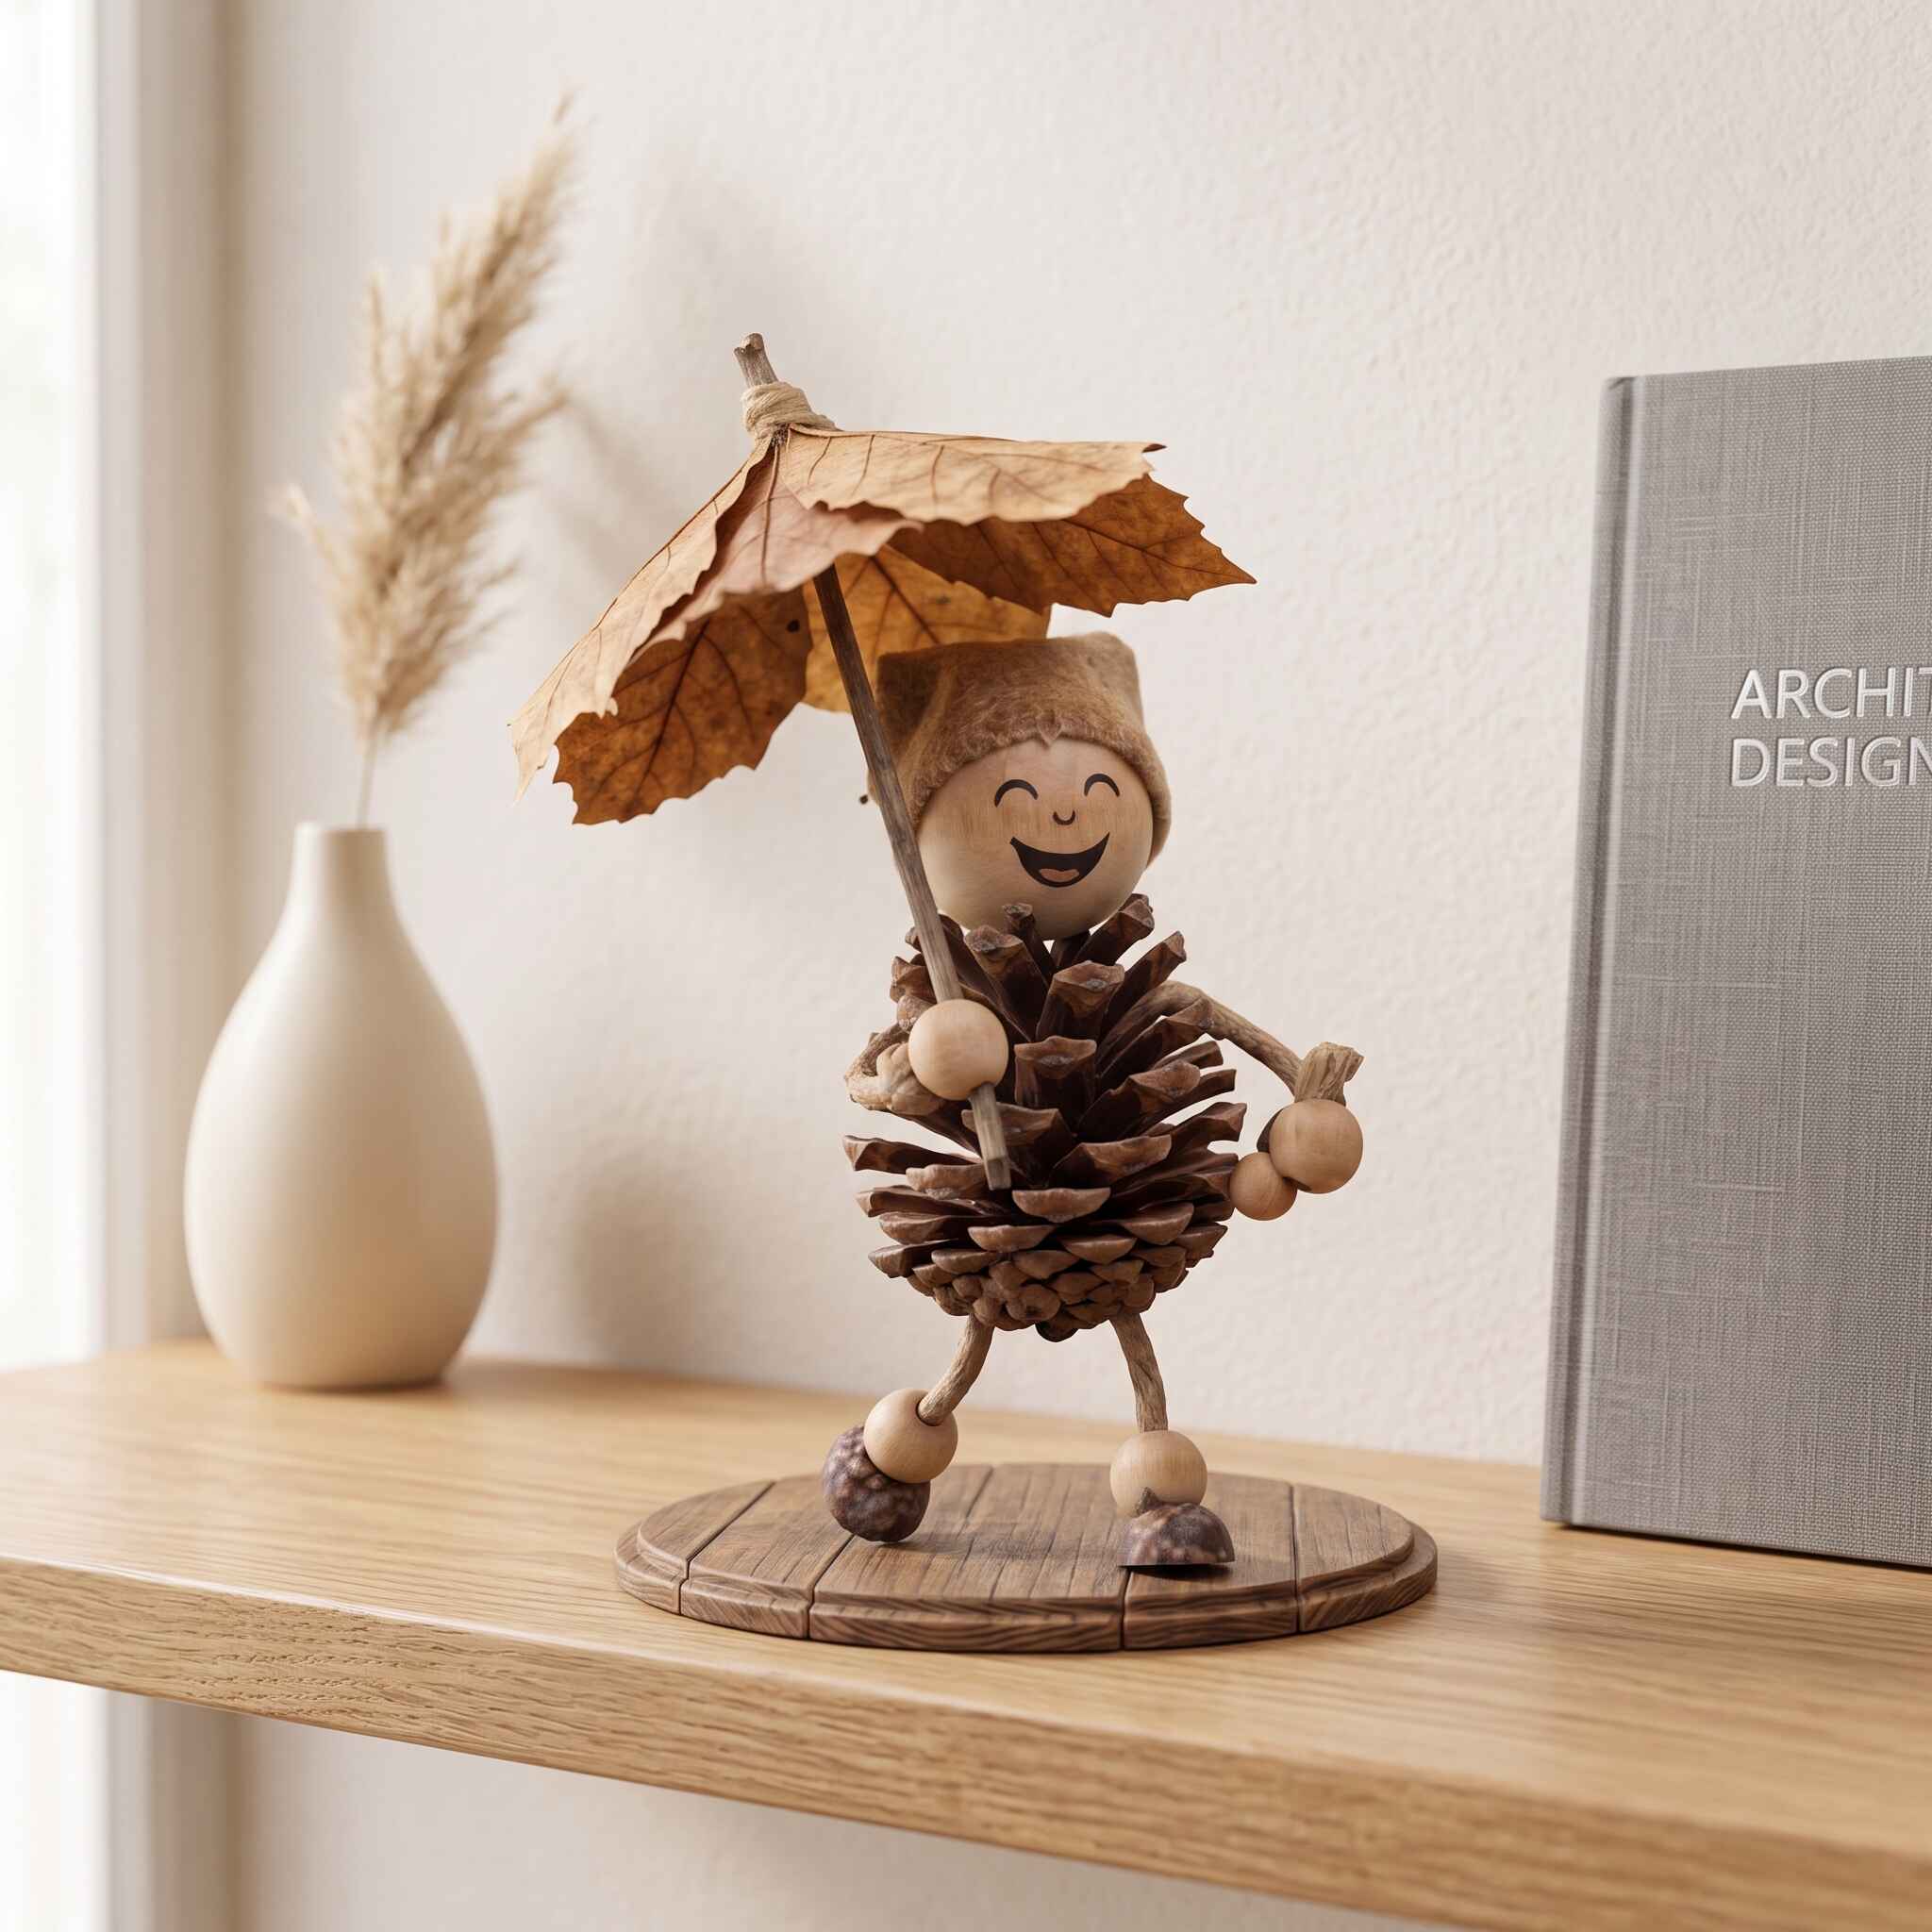
Bring a little woodland charm into your home with this adorable pine cone scarecrow craft! Made with a pine cone, wooden beads, natural leaves, and a few simple craft supplies, this cute fall decoration is perfect for a mantel, shelf, entryway, or Thanksgiving centerpiece.
The finished craft looks like a tiny woodland character holding a leaf umbrella, making it a fun DIY fall decoration for both adults and kids to create.
Pine Cone Scarecrow Craft
This rustic pine cone craft is inexpensive, easy to customize, and has a beautiful natural look. You can use real autumn leaves for an authentic seasonal feel or substitute artificial leaves so your decoration lasts longer.
What You’ll Need
- 1 large, dry pine cone
- 1 wooden ball or large wooden bead for the head
- Small wooden beads for the hands and feet
- Small brown wooden beads or acorns for the shoes
- A small piece of felt or soft fabric for the hair
- 1–2 dried autumn leaves
- A small straight twig for the umbrella handle
- Natural twine or thin jute cord
- Craft glue or hot glue
- Black marker or paint for the face
- Small piece of wood for the base
- Scissors
- Optional: clear craft sealer
How to Make a Pine Cone Scarecrow
Step 1: Prepare the Pine Cone
Choose a large pine cone with firm, open scales.
Brush away any dirt, leaves, or loose pieces. If you’ve collected the pine cone outdoors, make sure it is completely dry before starting.
For a cleaner-looking decoration, you can lightly wipe it with a dry brush.
Step 2: Make the Head
Take a wooden ball or large wooden bead and create a simple happy face.
Use a black marker or acrylic paint to draw:
- Closed smiling eyes
- A small nose
- A wide smiling mouth
You can make the expression as simple or playful as you like.
For the hair, glue a small piece of brown felt or soft fabric around the top of the wooden head. Trim the edges to create a slightly messy woodland hairstyle.
Step 3: Attach the Head to the Pine Cone
Place the wooden head on the narrow top portion of the pine cone.
Add a small amount of strong craft glue between the head and pine cone, then hold it in position until secure.
Allow the glue to dry completely before moving on.
Step 4: Make the Arms
Cut two small pieces of twine or thin flexible wire for the arms.
Attach one end of each arm to the sides of the pine cone.
Glue a small wooden bead onto the end of each arm to create the hands.
Position the arms naturally. In the finished design, one hand can hold the umbrella stick while the other rests beside the body.
Step 5: Add the Legs
Cut two slightly longer pieces of twine or thin craft wire for the legs.
Attach them underneath the pine cone.
Glue a wooden bead near the bottom of each leg to create the ankles or feet.
For the shoes, use small dark wooden beads, acorn pieces, or other natural-looking pieces.
Step 6: Make the Leaf Umbrella
This is the detail that makes this little fall character especially cute!
Choose one or two large, dry autumn leaves. Maple, oak, or similar leaves work beautifully.
Place the leaves together so they form a small umbrella shape.
Carefully tie the stems together with a little twine.
Then take a thin straight twig and position it underneath the leaves as the umbrella handle. Secure the leaf stems to the twig with twine or a small amount of glue.
Tip: If you want the umbrella to last longer, use artificial autumn leaves instead of real dried leaves.
Step 7: Give Your Scarecrow the Umbrella
Place the twig between the character’s hands and secure it with a small amount of glue.
Adjust the angle so the leaf umbrella sits above the character’s head.
Don’t worry about making it perfectly straight—the slightly handmade appearance is part of the charm!
Step 8: Create the Wooden Base
For a freestanding decoration, use a small round slice of wood as the base.
Position the pine cone character in the center and attach the feet to the wood with strong craft glue.
Let everything dry completely.
Step 9: Add the Finishing Touches
Look over your pine cone character and secure any loose pieces.
You can also add:
- Tiny twine bows
- Mini acorns
- Small dried flowers
- Additional autumn leaves
- A miniature scarf
- Small pieces of raffia
For a more rustic farmhouse look, keep the colors natural and earthy.
Easy Ways to Customize Your Pine Cone Craft
The best thing about this DIY pine cone decoration is how easy it is to personalize.
For Thanksgiving, add a tiny felt scarf or a miniature pumpkin.
For a woodland theme, use acorns, twigs, moss, and dried flowers.
For a children’s craft, let them create different facial expressions and choose their own colors for the accessories.
You can even make several little pine cone characters and create an entire fall woodland display.
Where to Display Your Pine Cone Scarecrow
This little fall craft looks adorable on:
- A fireplace mantel
- Bookshelves
- Entryway tables
- Kitchen shelves
- Coffee tables
- Dining tables
- Fall centerpiece displays
- Thanksgiving decorations
- Rustic farmhouse displays
Place it beside pumpkins, candles, dried flowers, or other natural decorations for a cozy autumn arrangement.
Tips for Working With Natural Materials
When making crafts with pine cones and dried leaves, make sure all natural materials are completely dry before using them.
Store the finished decoration somewhere dry and away from excessive moisture. If you’re using real leaves, expect them to become more fragile over time.
For a long-lasting decoration, artificial leaves can give you the same autumn appearance while making the craft reusable year after year.
Final Thoughts
This pine cone scarecrow craft is a simple way to turn inexpensive natural materials into a charming piece of fall home decor. The combination of the pine cone body, wooden beads, natural twigs, and autumn leaves gives this little character a warm handmade look.
Whether you’re looking for an easy fall craft, DIY Thanksgiving decoration, pine cone craft, rustic home decor idea, or woodland-inspired centerpiece, this project is a fun one to add to your seasonal crafting list.