
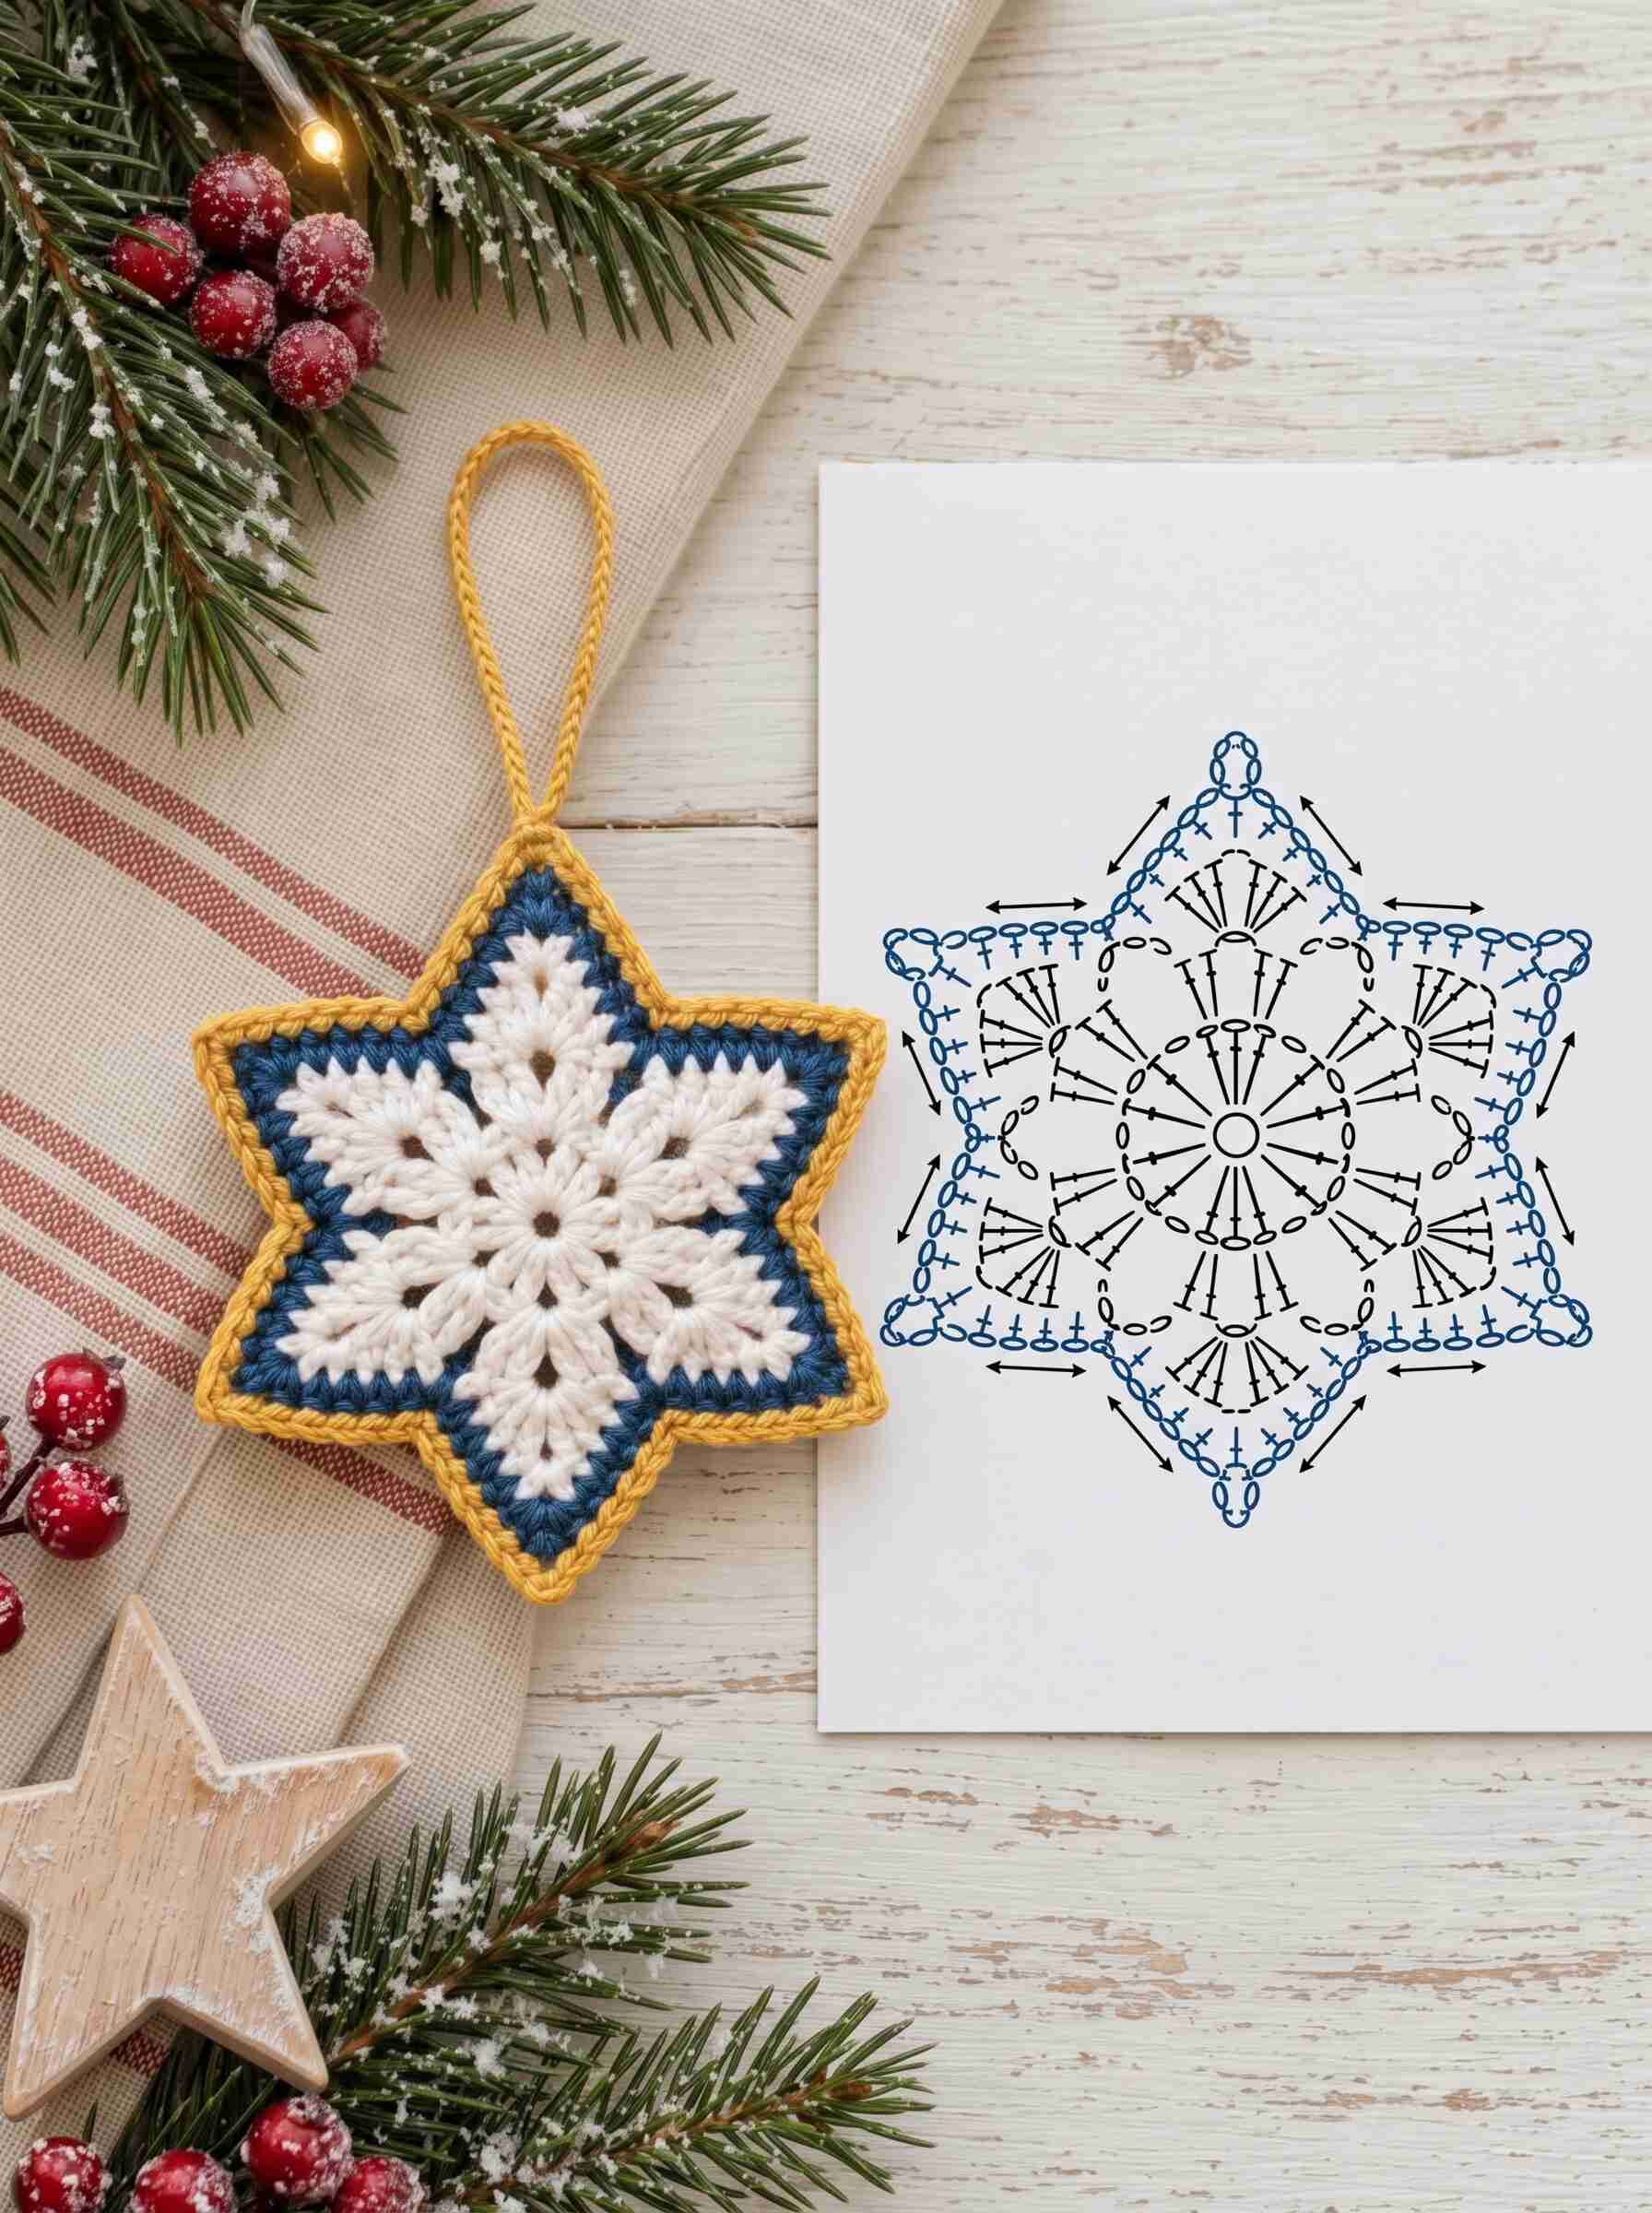
There’s something special about a handmade ornament. This crochet star starts with a white snowflake center, wraps it in deep blue, and finishes with a golden edge and a braided hanging loop. It works up in an evening, uses just a little yarn, and makes a sweet gift tag topper, tree decoration, or stocking stuffer.
The pattern is worked in rounds from the center out, so there’s no seaming and very little finishing. If you can chain, single crochet, and double crochet, you can make this star.
Finished Size
About 4 inches (10 cm) point to point, using the materials below.
Materials
- Yarn: DK or light worsted cotton in three colors
- White (or cream): about 15 yd / 14 m
- Blue: about 20 yd / 18 m
- Gold / mustard: about 30 yd / 27 m
- Hook: 3.0 mm (US D/3). Go down a size if you want a firmer, stiffer star.
- Yarn needle
- Scissors
- Optional: fabric stiffener or a diluted white glue solution, to help the star hold its shape
Abbreviations (US Terms)
- ch: chain
- sl st: slip stitch
- sc: single crochet
- dc: double crochet
- dc2tog: double crochet 2 together (a decrease)
- dc3tog: double crochet 3 together (a decrease)
- sp: space
- st(s): stitch(es)
Pattern Notes
- The star is worked in joined rounds. Do not turn.
- The beginning ch 3 counts as a dc.
- The corners (the star points) are worked as (2 dc, ch 2, 2 dc). The decreases between the corners make the valleys between the points.
- Change colors at the end of a round by pulling the new color through the last slip stitch.
Instructions
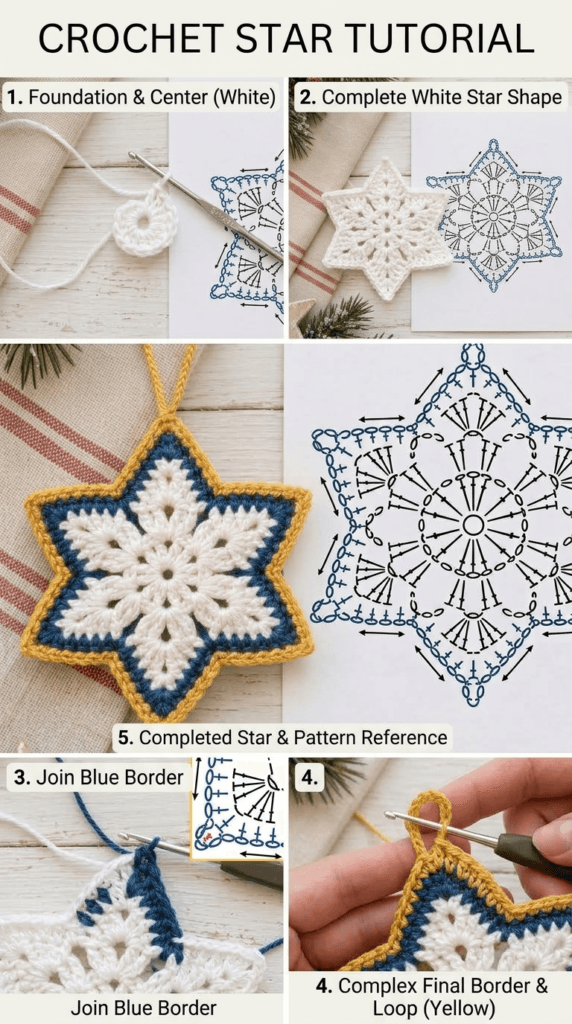
Round 1 (White): Center
Make a magic ring. Ch 3, work 11 dc into the ring. Join with a sl st to the top of the ch 3. Pull the ring tight. (12 dc)
Round 2 (White)
Ch 3, dc in the same st. Work 2 dc in each st around. Join with a sl st to the top of the ch 3. (24 dc)
Round 3 (White): Forming the Points
Ch 3, dc in the same st, ch 2, 2 dc in the same st (first corner made).
Dc in the next st, dc2tog over the next 2 sts, (2 dc, ch 2, 2 dc) in the next st.
Repeat from * 4 more times, then work dc in the next st and dc2tog over the last 2 sts. Join with a sl st to the top of the ch 3. Fasten off white. (36 sts + 6 ch-2 corners)
Round 4 (Blue)
Join blue in any ch-2 corner sp. Ch 3, dc in the same sp, ch 2, 2 dc in the same sp.
Dc in the next 2 sts, dc2tog over the next 2 sts, dc in the next 2 sts, (2 dc, ch 2, 2 dc) in the next ch-2 sp.
Repeat from * around, ending with dc in the last 2 sts, dc2tog, and dc in the last 2 sts. Join with a sl st to the top of the ch 3. (54 sts + 6 ch-2 corners)
Round 5 (Blue)
Ch 3, dc in the same sp, ch 2, 2 dc in the same sp.
Dc in the next 3 sts, dc3tog over the next 3 sts, dc in the next 3 sts, (2 dc, ch 2, 2 dc) in the next ch-2 sp.
Repeat from * around, finishing the last section the same way. Join with a sl st to the top of the ch 3. Fasten off blue. (66 sts + 6 ch-2 corners)
Round 6 (Gold): Edging
Join gold in any ch-2 corner sp. Ch 1, 3 sc in the same sp.
Sc in each of the next 11 sts, 3 sc in the next ch-2 sp.
Repeat from * around, ending with sc in the last 11 sts. Join with a sl st to the first sc. (84 sc)
Don’t fasten off yet.
Hanging Loop
With gold still on the hook, ch 30. Sl st into the same st as your last join (at the top point of the star) to make the loop. For a braided look like in the photo, work a sl st into each chain along the back of the loop, then fasten off. Leave a tail and weave in all ends.
Finishing
- Weave in all ends with a yarn needle.
- Wet-block the star by pinning it flat with the points pulled out, and let it dry completely.
- For a crisp ornament, brush on fabric stiffener or diluted white glue before pinning and let it dry fully.
Tips and Variations
- Make a set. Try red and green, silver and navy, or all white for a classic snowflake look.
- Add a button or bead. Sew one in the center for a little sparkle.
- Turn it into a gift topper. Tie it onto a wrapped present with ribbon instead of a tree.
- Use up scraps. This pattern only needs a few yards of each color, so it’s perfect for leftovers.
Share Your Stars!
If you make this pattern, I’d love to see it! Tag me on social media or leave a comment below with your color combinations. Happy crocheting, and happy holidays!
Please don’t resell or redistribute this pattern as your own. You’re welcome to sell finished items made from it. Please credit the designer and link back to this post.