
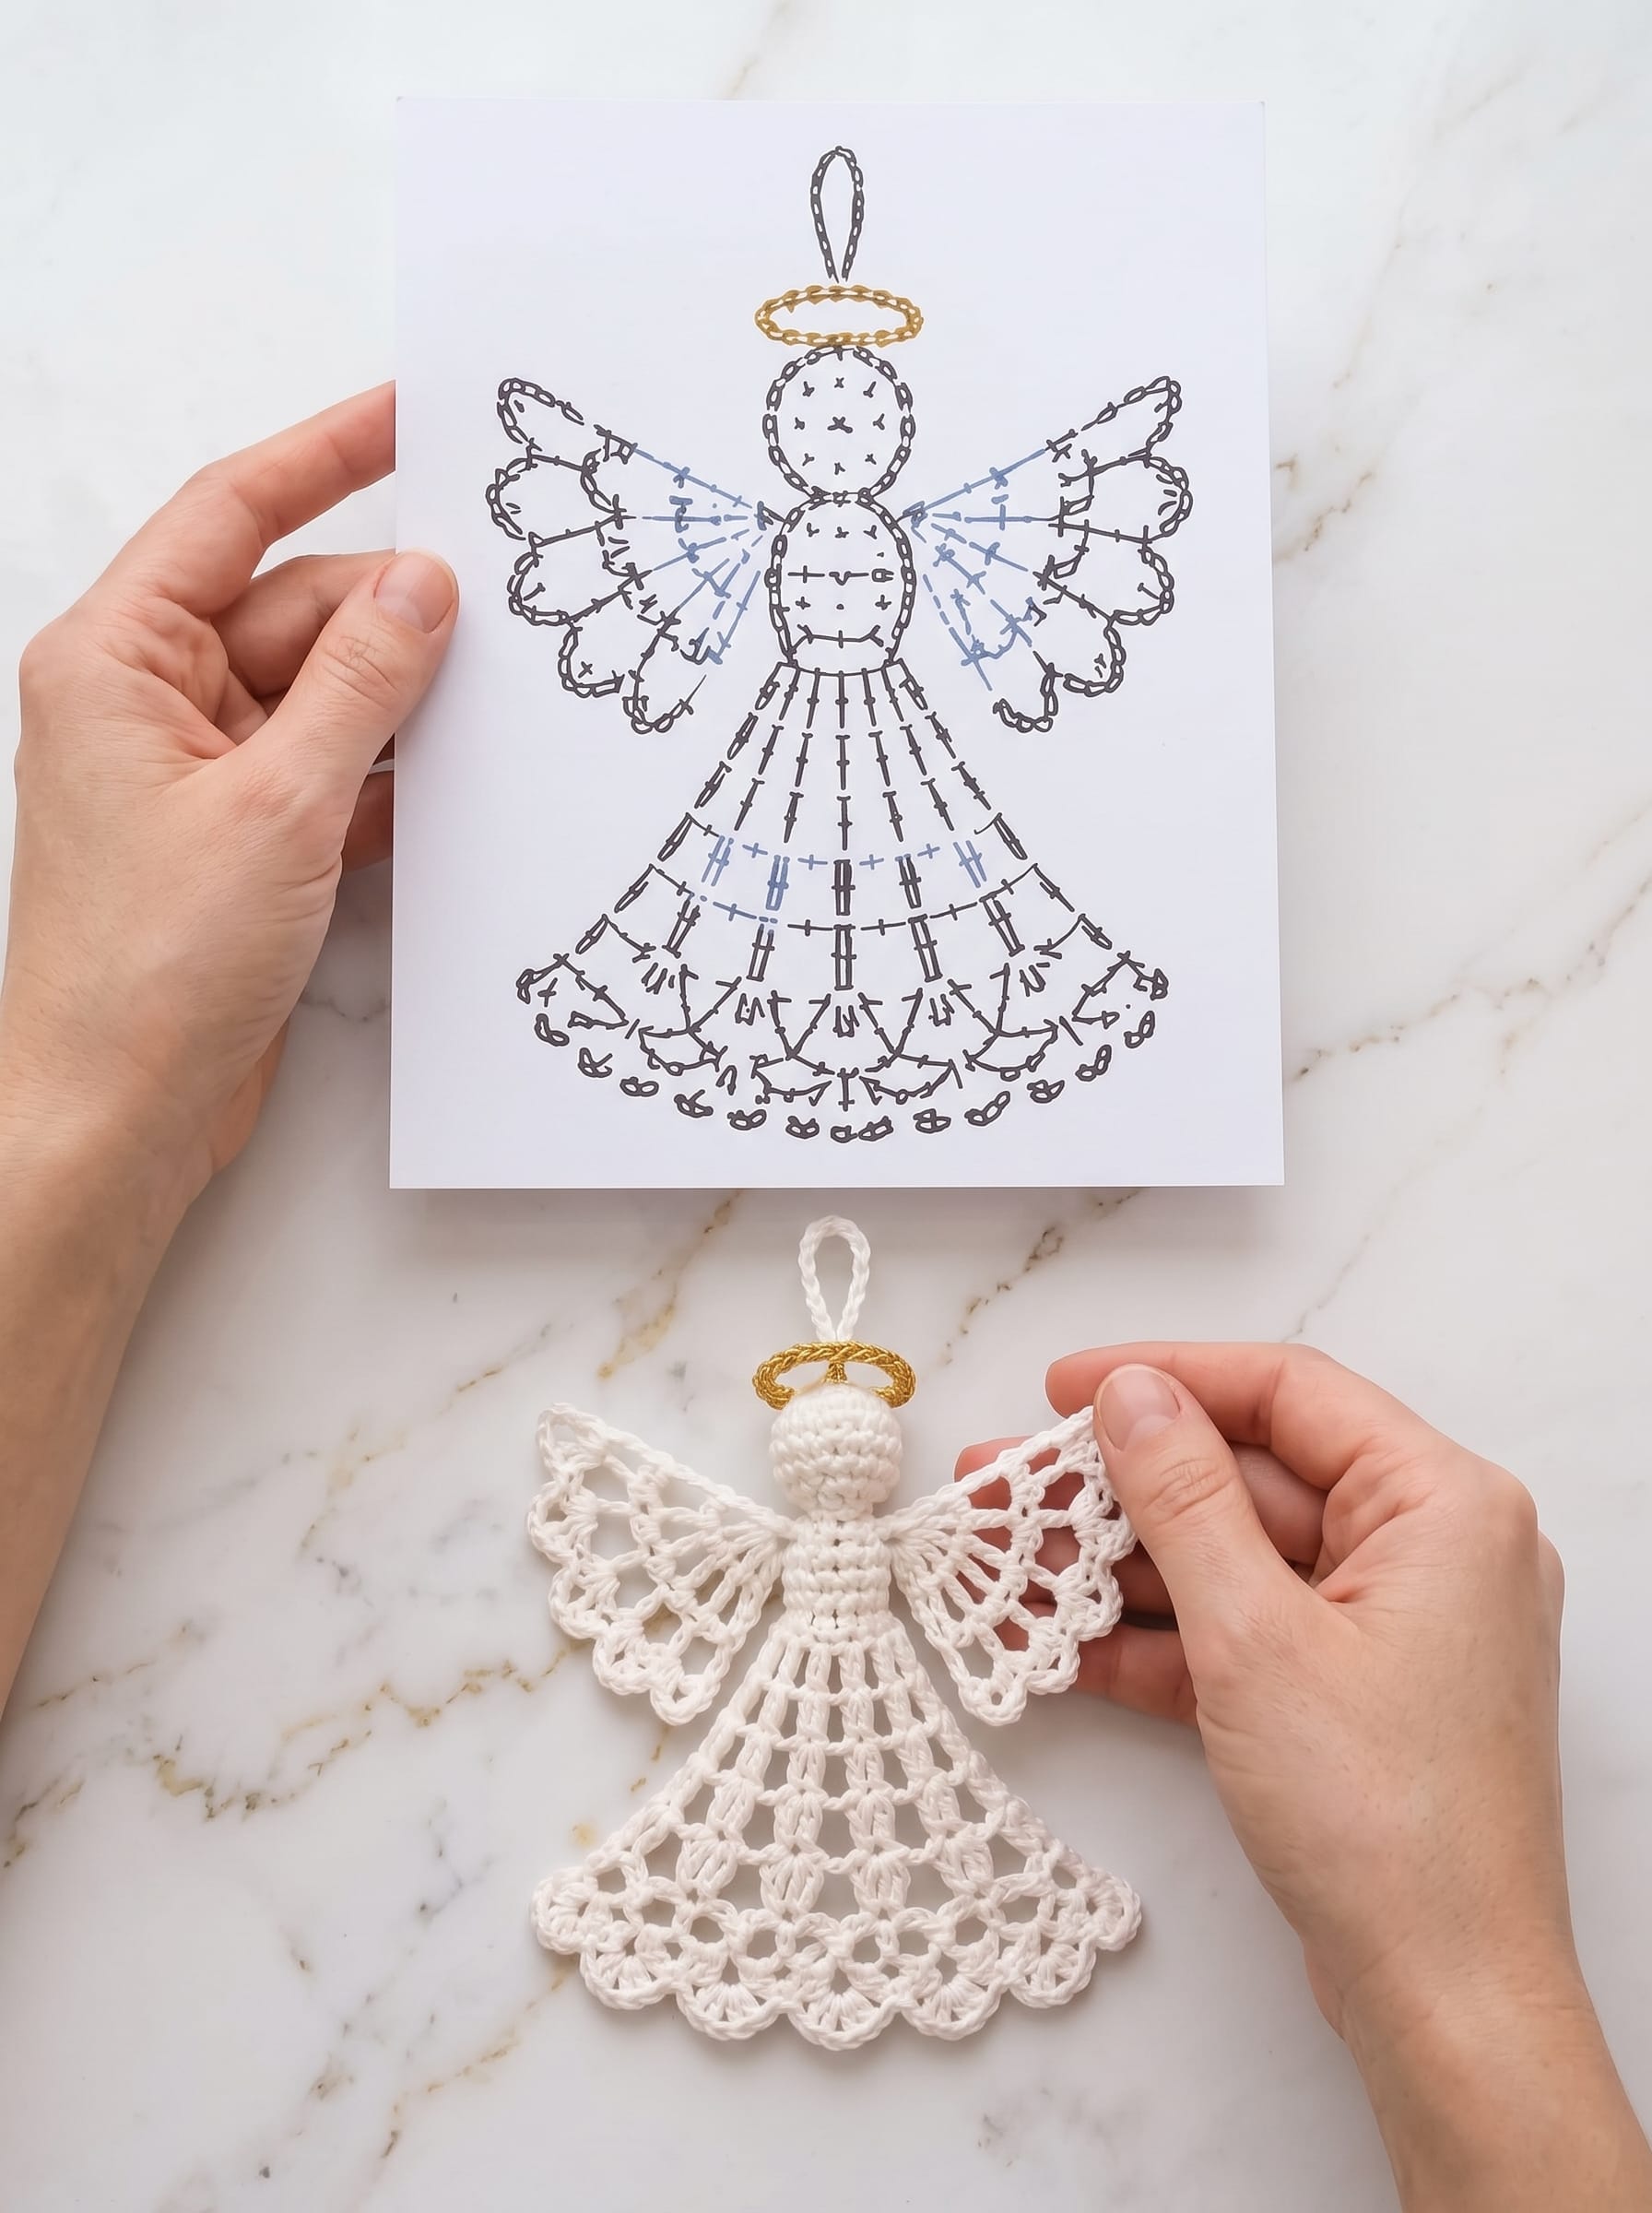
Add a handmade, heirloom touch to your holiday tree with this crochet lace angel ornament. Featuring a delicate flared skirt, scalloped lace wings, and a shimmering gold halo, this project works up quickly using basic stitches. Whether you hang them on your tree, use them as package toppers, or gift them to loved ones, these angels are an instant seasonal favorite.
Project Overview & Materials
- Skill Level: Advanced Beginner / Intermediate
- Yarn: Size 3 or Size 10 white crochet cotton thread (or fine Sport/DK weight cotton yarn)
- Accent Thread: Metallic gold embroidery floss or gold metallic crochet thread (for halo)
- Crochet Hook: 2.0 mm – 2.5 mm steel hook (or hook suited to your chosen yarn)
- Notions: Small pinch of fiberfill stuffing (for the head), yarn needle, scissors, and fabric stiffener/blocking board (optional, to keep lace crisp)
Stitch Abbreviations (US Terms):
- ch: chain
- sl st: slip stitch
- sc: single crochet
- dc: double crochet
- tr: treble/triple crochet
- picot: ch 3, sl st into first ch
- inc: work 2 sc in same stitch
- dec: sc 2 together
Step-by-Step Crochet Angel Pattern
1. Head (Worked in the Round)
- Round 1: Magic ring, 6 sc in ring. Pull tight and join with sl st (6 sts).
- Round 2: Ch 1, 2 sc in each st around (12 sts).
- Rounds 3–5: Ch 1, sc in each st around (12 sts).
- Round 6: (Dec, 1 sc) 4 times around (8 sts). Lightly stuff with fiberfill.
2. Body / Torso
- Rounds 7–9: Ch 1, sc in each st around (8 sts).
- Fasten off or leave live loop at the base of the neck/torso.
3. Lace Wings (Make 2)
Attach yarn at the shoulder level of the torso:
- Row 1: Ch 4 (counts as tr), 3 tr into the side of the upper torso, ch 2, turn.
- Row 2: Work an expanding fan of 6 dc across the previous row, ch 3, turn.
- Row 3: [1 dc, ch 1] across each stitch to create open lace spokes, ch 1, turn.
- Row 4 (Scalloped Edging): Work [3 dc, picot, 3 dc] shell stitches into the chain spaces across the outer wing edge to create the scalloped lace finish. Fasten off. Repeat on the opposite side for the second wing.
4. Flared Lace Skirt
Join white yarn along the bottom opening of the torso:
- Round 1: Ch 3 (counts as 1 dc), dc in each st around (8 dc).
- Round 2: Ch 3, [dc in same st, ch 1, dc in next st] around to establish an expanding V-stitch mesh (8 pairs/spokes).
- Rounds 3–5: Sl st into the first ch-1 space. Ch 3, [dc, ch 2, dc] in each ch-space around, flaring outward into an A-line mesh.
- Round 6: Ch 3, work 2 dc, ch 2, 2 dc into each space to widen the skirt hem.
- Round 7 (Hem Shells): Into each ch-2 space around, work [5 dc, picot, 5 dc] shells to match the wing scallops. Fasten off and weave in all yarn ends.
5. Halo & Hanging Loop
- Halo: With gold thread, ch 12–14. Sl st into the first ch to form a ring. Ch 1, work sc around the ring, sl st to join, and sew horizontally above the head.
- Hanging Loop: Join white thread at the top of the head, ch 25–30, and sl st back into the same stitch to form a sturdy hanging loop.
Finishing & Stiffening Tips
To keep the angel’s wings and skirt flat and flared on your tree, dissolve 1 part craft glue in 1 part water (or use commercial fabric stiffener). Pin the angel flat onto a blocking board or foam sheet, brush lightly with the mixture, and let dry overnight before hanging.