
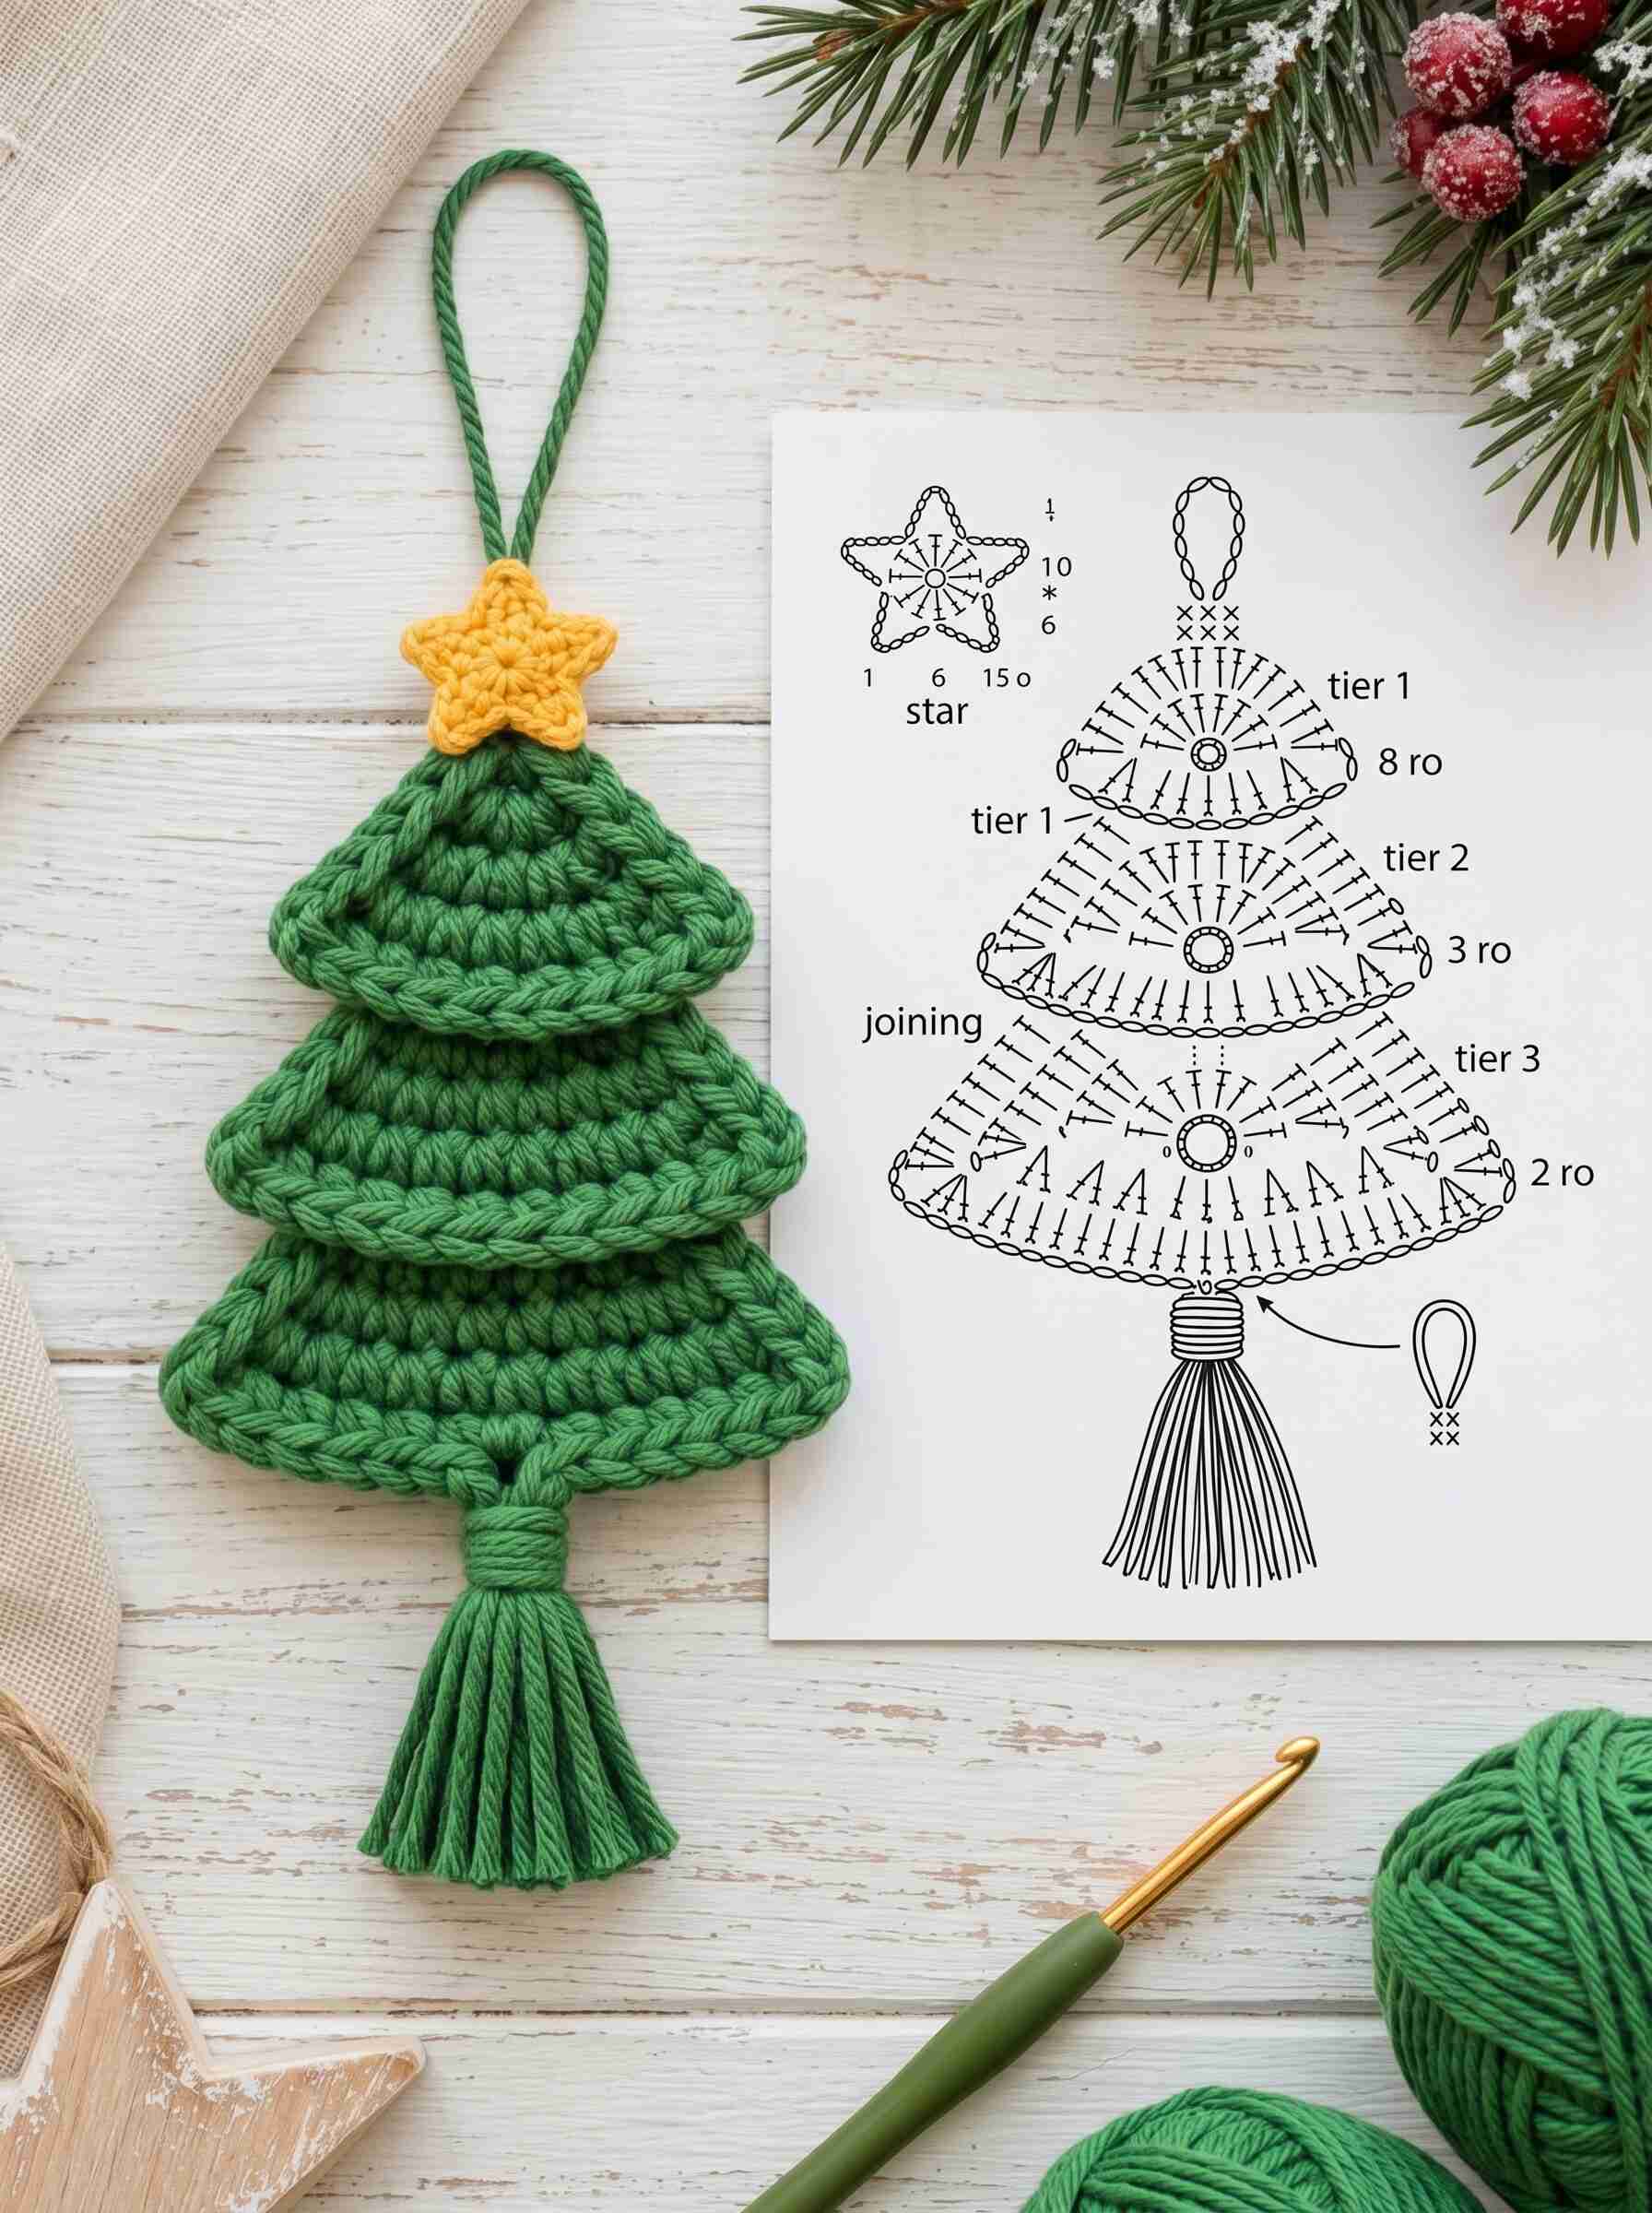
If you want a handmade ornament that looks impressive but works up quickly, this crochet Christmas tree is for you. It’s made of three stacked tiers in cheerful green, each with a braided-looking edge, topped with a tiny gold star and finished with a soft tassel at the bottom. It hangs from a simple chain loop and looks lovely on the tree, on a gift, or on a garland.
The pattern uses basic stitches (chain, single crochet, and slip stitch), so it’s a great beginner project and a good way to use up leftover cotton yarn. Make one, or make a whole forest.
Finished Size
About 3.5 inches (9 cm) wide and 6 inches (15 cm) tall including the tassel, using the materials below.
Materials
- Yarn: Worsted weight cotton
- Green: about 40 yd / 37 m
- Gold / mustard: about 5 yd / 5 m
- Hook: 3.5 mm (US E/4). Use a smaller hook if you want the fabric extra firm.
- Yarn needle
- Scissors
- A piece of cardboard about 3 inches (7.5 cm) wide for the tassel
- Optional: fabric stiffener for a sturdier tree
Abbreviations (US Terms)
- ch: chain
- sl st: slip stitch
- sc: single crochet
- rev sc: reverse single crochet (crab stitch)
- st(s): stitch(es)
Pattern Notes
- Each tier is worked flat in rows, from the top edge down to the wide bottom edge.
- Ch 1 at the start of a row does not count as a stitch.
- Each tier grows by 2 stitches per row, so the tier gets wider as you go down, which gives the tree its triangle shape.
- Make the tiers separately, then join them as shown in the Assembly section.
Instructions
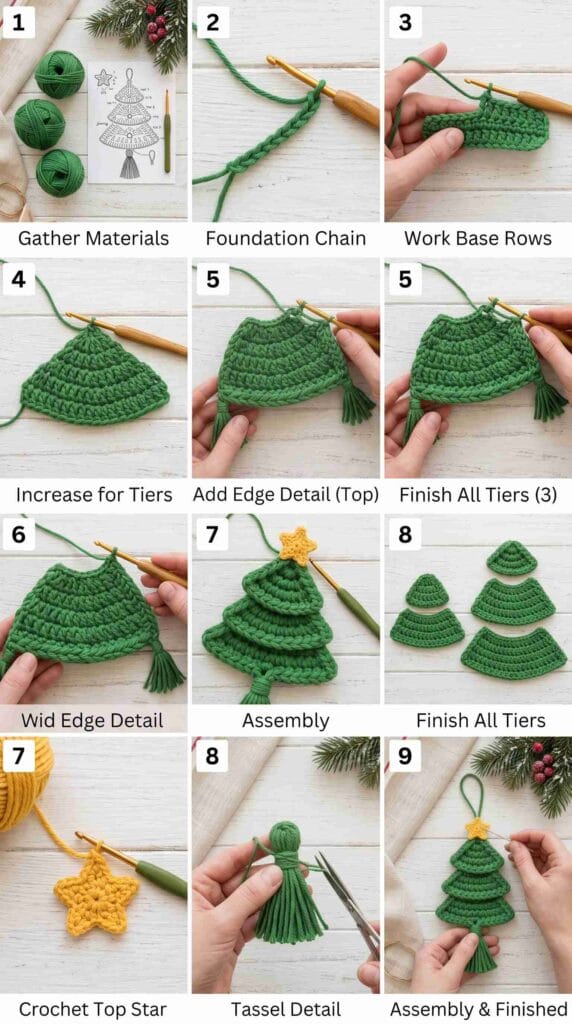
Tier 1 (Top, smallest)
Ch 4.
Row 1: Sc in the 2nd ch from the hook and in each ch across. Ch 1, turn. (3 sc)
Row 2: 2 sc in the first st, sc in the next st, 2 sc in the last st. Ch 1, turn. (5 sc)
Row 3: 2 sc in the first st, sc across to the last st, 2 sc in the last st. Ch 1, turn. (7 sc)
Row 4: Repeat Row 3. Ch 1, turn. (9 sc)
Row 5: Repeat Row 3. Do not turn. (11 sc)
Edging: Ch 1, then work rev sc evenly along the bottom edge of the tier from one corner to the other, in the free loops if you prefer a neater look. Fasten off, leaving a 10-inch (25 cm) tail for sewing.
Tier 2 (Middle)
Ch 6.
Row 1: Sc in the 2nd ch from the hook and in each ch across. Ch 1, turn. (5 sc)
Rows 2 to 6: 2 sc in the first st, sc across to the last st, 2 sc in the last st. Ch 1, turn after each row except the last. (7, 9, 11, 13, then 15 sc)
Edging: Ch 1, then work rev sc evenly along the bottom edge. Fasten off, leaving a 10-inch (25 cm) tail.
Tier 3 (Bottom, widest)
Ch 8.
Row 1: Sc in the 2nd ch from the hook and in each ch across. Ch 1, turn. (7 sc)
Rows 2 to 7: 2 sc in the first st, sc across to the last st, 2 sc in the last st. Ch 1, turn after each row except the last. (9, 11, 13, 15, 17, then 19 sc)
Edging: Ch 1, then work rev sc evenly along the bottom edge. Fasten off, leaving a 10-inch (25 cm) tail.
Star (Gold)
Make a magic ring.
Round 1: Ch 1, work 10 sc into the ring. Join with a sl st to the first sc. Pull the ring tight. (10 sc)
Round 2 (points): Ch 3, sc in the 2nd ch from the hook and in the next ch, sl st in each of the next 2 sts of the ring. Repeat from * 4 more times to make 5 points. Fasten off, leaving a tail for sewing.
Hanging Loop
With green, ch 25. Sl st through the top of Tier 1 and fasten off, or fasten the ends together with a knot and hide them in the tier when you assemble it. For the braided look in the photo, work a sl st into the back bump of each chain before joining.
Tassel
- Wrap green yarn around the cardboard about 25 times.
- Slide a strand of yarn under the wraps at the top and tie it tightly.
- Cut the wraps at the bottom, then wrap a separate strand around the tassel about half an inch below the top and tie it off to form the neck.
- Trim the ends evenly.
Assembly
- Stack the tiers. Lay Tier 1 on top of Tier 2 so the bottom edge of Tier 1 overlaps the top of Tier 2 by about half an inch (1 cm). Do the same with Tier 2 and Tier 3.
- Join them. Using the long tails, sew each tier to the one below it with small stitches along the back, so the stitches don’t show on the front.
- Add the star. Sew the gold star to the top of Tier 1, covering the hanging loop knot.
- Attach the tassel. Sew or tie the tassel to the bottom center of Tier 3.
- Weave in all ends and trim.
Finishing Tips
- Block lightly. Pin the tree flat, mist with water, and let it dry. This keeps the tiers from curling.
- Stiffen it. Brush on fabric stiffener before pinning if you want a sturdier ornament that holds its shape on the tree.
- Use cotton. Cotton yarn has less stretch than acrylic, so the tiers keep their sharp triangle shape.
Variations to Try
- Color swaps. Try white for a snowy tree, red for a candy-cane look, or navy with a silver star.
- Add tiny details. Sew on small beads or buttons as ornaments.
- Go bigger. Add another tier (ch 10, then increase to 23 sc) for a taller tree, or use chunky yarn for a bigger version.
- Make a garland. Crochet a dozen trees and string them on twine for a cozy mantel garland.
Share Your Trees!
I’d love to see your finished trees! Leave a comment below or tag me on social media with your color choices. Happy crocheting, and merry Christmas!
Please don’t resell or redistribute this pattern as your own. You’re welcome to sell finished items made from it. Please credit the designer and link back to this post.