
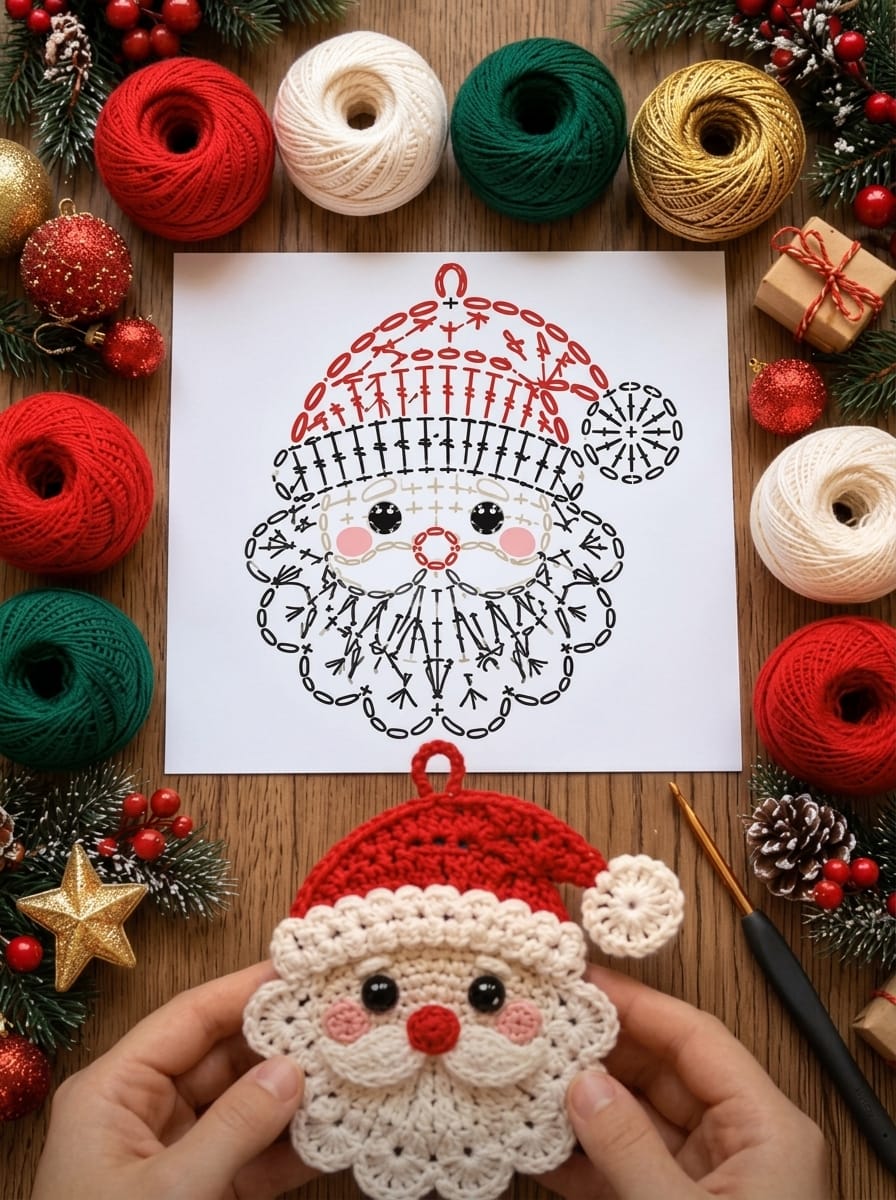
There’s something about a tiny crocheted Santa with rosy cheeks and a fluffy scalloped beard that makes the season feel real. This little ornament is a quick weekend make. It works as a tree decoration, a gift tag topper, a garland piece, or a small gift on its own. Use cotton thread and it will hold its shape beautifully.
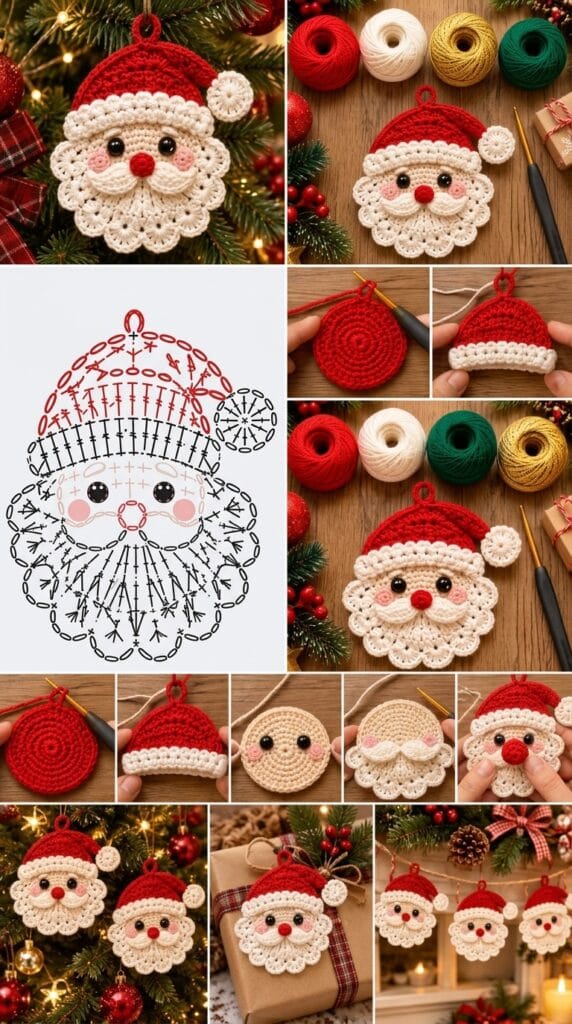
Finished size: about 4 in (10 cm) tall
Skill level: advanced beginner, since you only need basic stitches and a bit of counting
Time: 1.5 to 2 hours
Materials
- Mercerized cotton yarn or crochet thread (size 5 or DK cotton) in red, white, and cream or light peach
- Crochet hook, 2.5 mm to 3 mm (use a smaller hook than the yarn suggests for a tight, sturdy fabric)
- 2 black safety eyes (6 mm), or black embroidery thread for French knots
- Pink embroidery floss or blush for the cheeks
- A small amount of red yarn for the nose
- Tapestry needle and scissors
- A little polyester fiberfill (optional, for a puffier ornament)
- A ribbon or the red yarn tail for hanging
Abbreviations (US terms)
ch = chain | sl st = slip stitch | sc = single crochet | hdc = half double crochet | dc = double crochet | inc = 2 sc in the same stitch | MR = magic ring | st(s) = stitch(es)
Step 1: The Face (cream or light peach)
Work in a spiral and don’t join the rounds.
- Rnd 1: MR, 6 sc (6)
- Rnd 2: inc in each st (12)
- Rnd 3: (sc, inc) x 6 (18)
- Rnd 4: (2 sc, inc) x 6 (24)
- Rnd 5: (3 sc, inc) x 6 (30)
- Rnd 6: sc in each st, then sl st and fasten off (30)
Leave a tail for sewing. You now have a flat round face.
Tip: Add the eyes and nose before you sew anything together. Place the eyes about 5 stitches apart, in the middle of the face. Embroider the two pink cheeks below and just outside them, then sew on the small red nose between them.
Step 2: The Hat (red)
The hat is a half-circle worked in rows.
- Row 1: ch 2, 6 sc in the 2nd ch from hook, turn (6)
- Row 2: ch 1, inc in each st, turn (12)
- Row 3: ch 1, (sc, inc) x 6, turn (18)
- Row 4: ch 1, (2 sc, inc) x 6, turn (24)
- Row 5: ch 1, sc across, turn (24)
Fasten off. To make the hat a little curved and floppy like Santa’s, let the tip tilt toward the right when you sew it on.
The hanging loop: Join red at the top of the dome. Ch 12, sl st back into the same stitch, and fasten off.
Step 3: The White Brim
Join white along the straight bottom edge of the hat.
- Row 1: ch 1, sc evenly across the edge (about 14 to 16 sts), turn
- Row 2: ch 1, (sc, dc in the same st, skip 1) across for a fluffy shell-like edge
The brim should be slightly wider than the hat. Sew or slip stitch it to the top of the face.
Step 4: The Beard (white)
The beard is what makes this ornament work, so take your time on the scallops.
- Round 1: Attach white to the face edge at the left temple. Work along the lower half of the face: (skip 1, 5 dc in next st, skip 1, sl st) around to the right temple.
- Round 2: Work a second row of shells behind or below the first, tucking a 5-dc shell between each pair of shells above it. Add a few extra shells at the bottom center for a longer beard.
Fasten off and weave in the ends.
Step 5: The Mustache (white)
Make two small ovals:
- ch 6, 3 sc in the 2nd ch from hook, sc in the next 3 chains, 3 sc in the last chain, and work back along the other side of the chain. Sl st to join and fasten off.
Sew both ovals under the nose so the ends sweep outward.
Step 6: The Pom-Pom (white)
- Rnd 1: MR, 8 sc (8)
- Rnd 2: inc in each st (16)
- Rnd 3: (sc, inc) x 8 (24)
- Rnd 4: sl st in the back loop only in each st
Sew the pom-pom to the hat tip on the right. For the star-like texture in the photo, add a few embroidered spokes with white thread.
Assembly and Finishing
- Sew the brim to the top edge of the face.
- Sew the hat to the brim, keeping the loop at the top.
- Attach the mustache and beard.
- Sew on the pom-pom.
- Optional: sew or glue a matching backing piece to the back, with a little fiberfill inside, for a puffier ornament.
- Block lightly with steam and let it dry flat.
Tips for a Better Santa
- Keep your tension tight. Ornaments need a firm fabric to keep their shape.
- Use cotton, not acrylic. Cotton takes starch well and holds its shape.
- Stiffen it (optional). Brush on a mix of white glue and water and let it dry flat, so it stays crisp on the tree.
- Try color variations. Use green for an elf hat, or make a Mrs. Claus with white hair and a red bow.
Ways to Use It
- Hang it on the Christmas tree
- Attach it to a wrapped gift as a decoration
- Sew a few onto a garland
- Make a small set for craft fair sales
- Use it as a keychain or bag charm
Note on the pattern: Stitch counts and row lengths may need small changes depending on your yarn and hook. If the hat and brim don’t line up neatly, add or drop a stitch in the brim.