
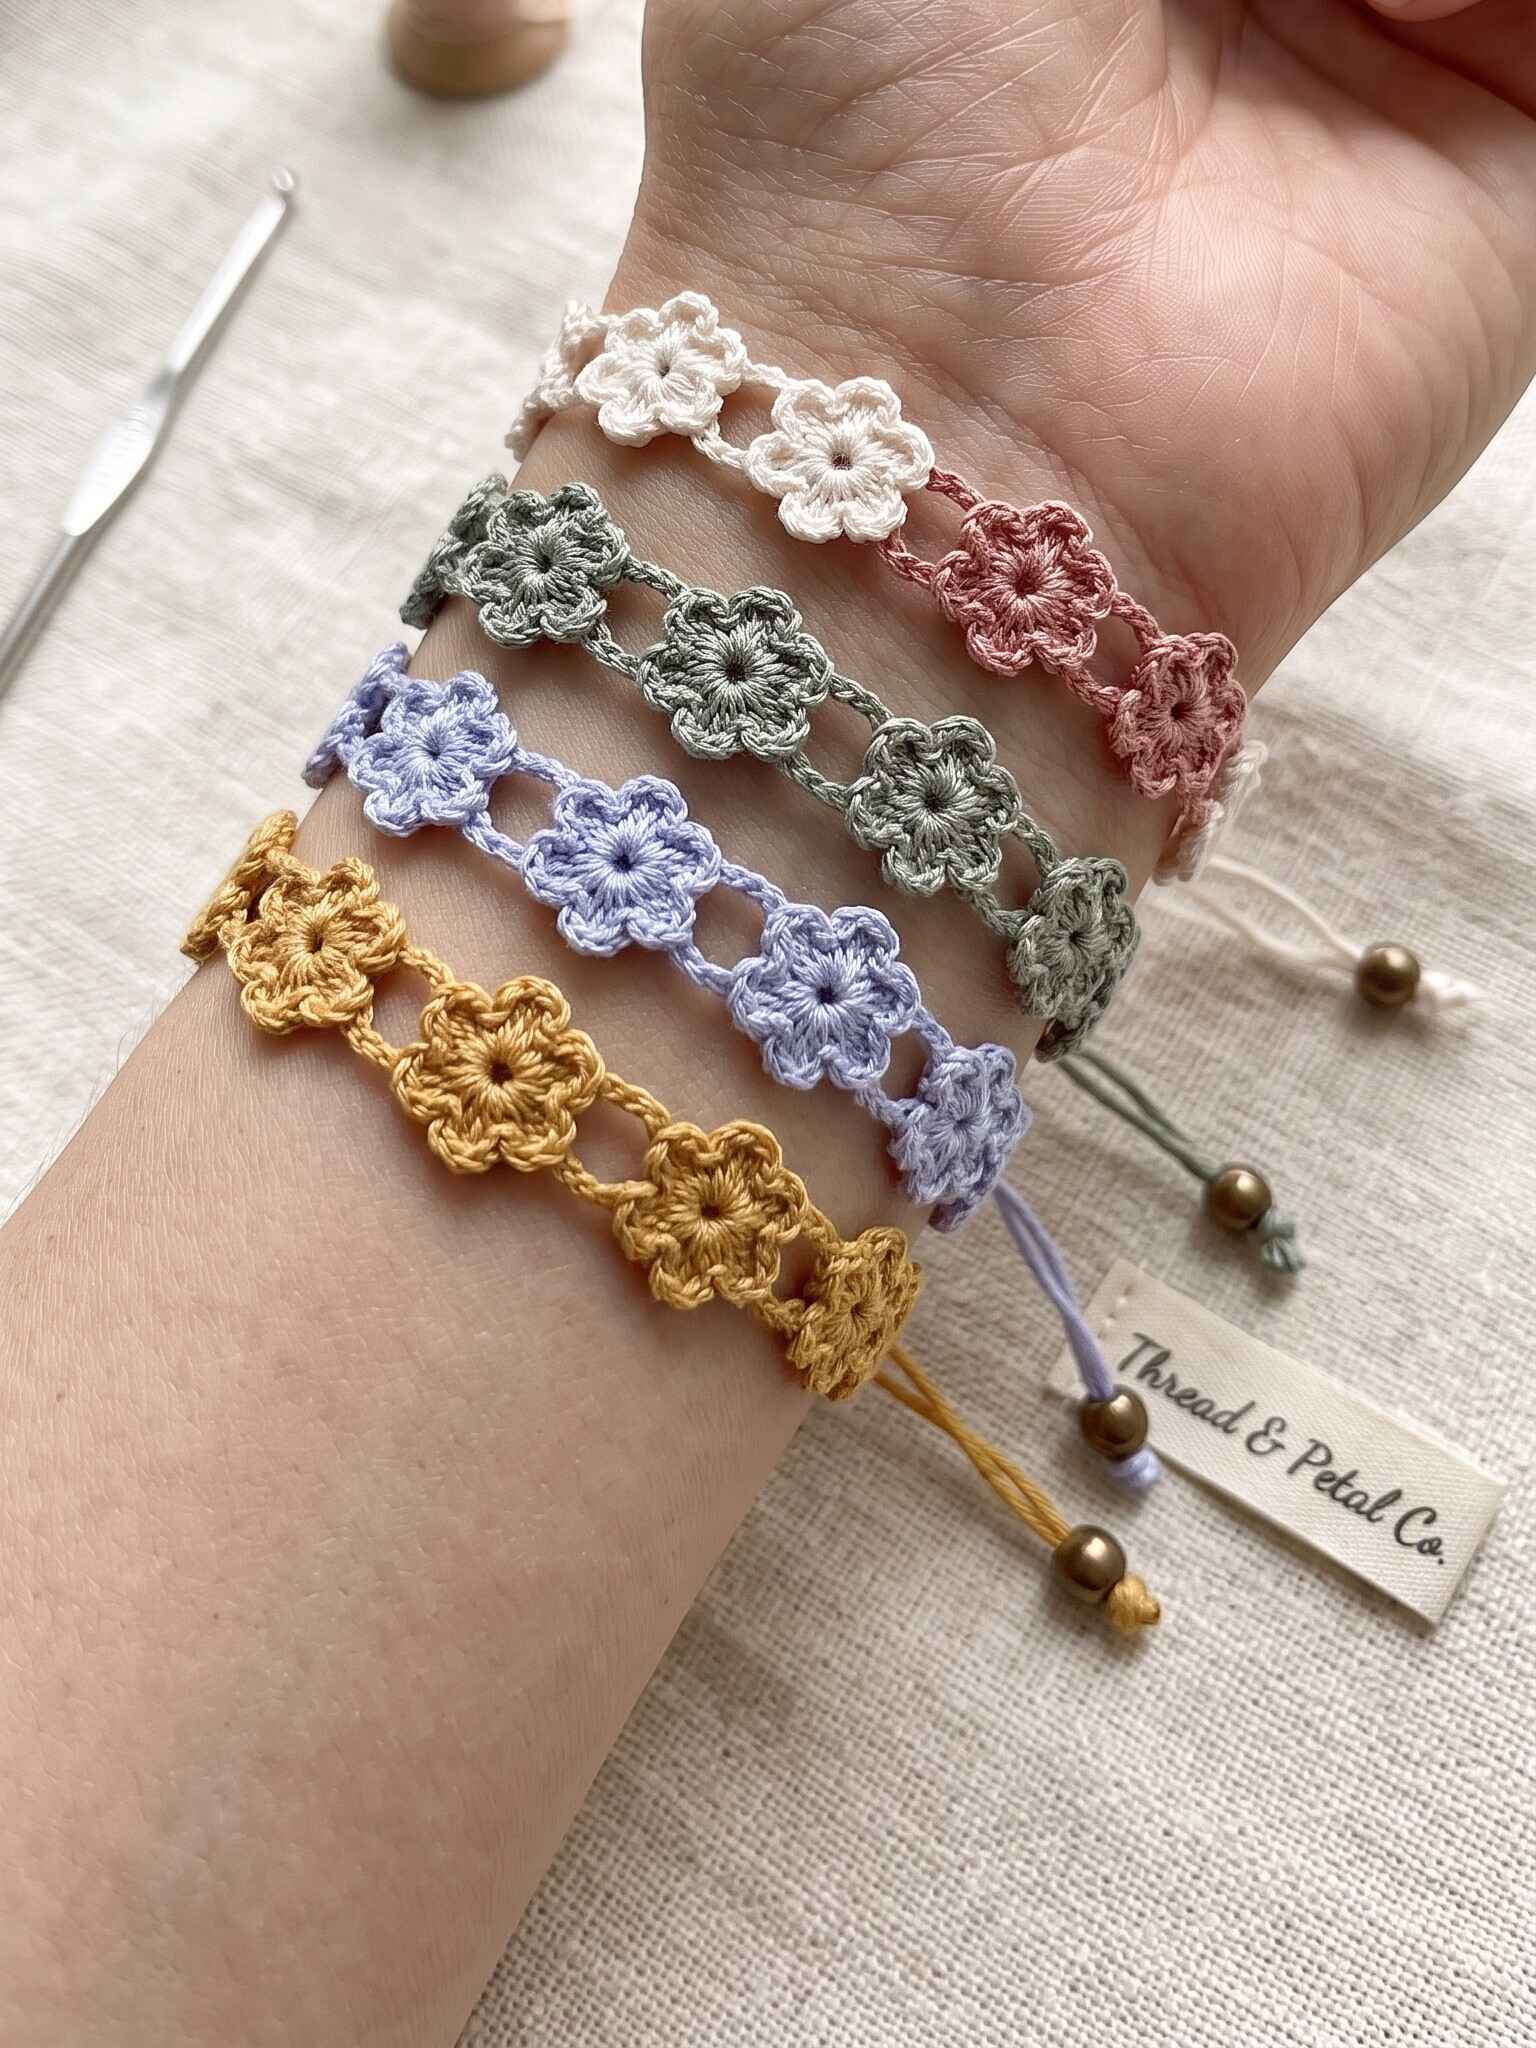
If you’re looking for a small, satisfying project that turns into a gift people want to wear, this free crochet flower bracelet pattern is for you. It’s a delicate chain of tiny five-petal blooms joined by airy chain links and finished with an adjustable sliding knot and a bronze bead. It uses very little thread and looks lovely stacked in different colors.
Why You’ll Love This Crochet Daisy Bracelet
It’s fast. Each flower is tiny, so you can finish a bracelet in an evening. It’s ideal for last-minute gifts, craft fairs, and using up leftover thread.
It fits every wrist. The sliding knot closure means one bracelet fits nearly any wrist. There are no clasps to buy and no sizing math.
It works in any color palette. Cream and dusty rose are soft and romantic. Sage green feels earthy and modern. Lavender and mustard are cheerful and bright. Make a set of four for a stackable collection.
It’s great for small businesses. These bracelets are lightweight to ship, cheap to make, and look polished with a branded label.
Skill Level
This pattern is for confident beginners. You should be comfortable with:
- A magic ring
- Chain (ch), single crochet (sc), slip stitch (sl st), and double crochet (dc)
- Working with fine thread
Materials
- Size 10 cotton crochet thread (about 10 to 15 yards per bracelet), in one color per bracelet
- Steel crochet hook, 1.5 mm (use 1.25 to 1.75 mm to match your tension)
- 2 small beads for the cord ends (the hole must fit two strands of thread)
- Scissors
- Tapestry needle
- Optional: clear-drying fabric glue or fray sealant
Time: 1 to 2 hours
Finished size: adjustable, fits most wrists. The flower section is about 6 in (15 cm) long, and the sliding cords add the adjustability.
Abbreviations (US Terms)
| Abbreviation | Meaning |
|---|---|
| ch | chain |
| sl st | slip stitch |
| sc | single crochet |
| dc | double crochet |
| MR | magic ring |
| st(s) | stitch(es) |
Pattern Notes
- The bracelet uses 6 flowers. Add or remove flowers to change the length.
- Each flower is made separately, and flowers 2 to 6 are joined to the previous flower as you work Round 2.
- The five petals are numbered 1 to 5 in the order you work them. Petal 1 points left and joins to the flower before it. Petals 3 and 4 face right and receive the link from the next flower.
- The “tip” of a petal is the top ch-2 loop at the end of the petal.
- Leave a 4 in (10 cm) tail on each flower for weaving in.
Flower Pattern
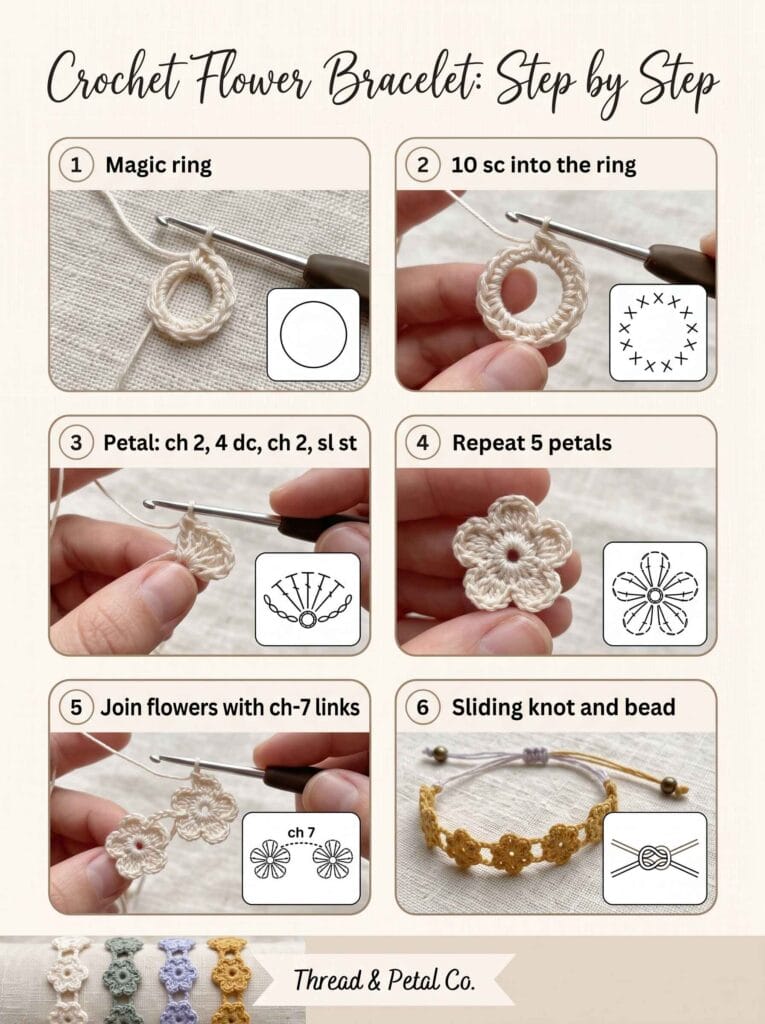
Use this for Flower 1. Flowers 2 to 6 use the same steps with the join in Petal 1.
Round 1: Make a MR. Ch 1 (does not count as a stitch). Work 10 sc into the ring. Join with a sl st to the first sc. Pull the ring tight. (10 sc)
Round 2 (petals): Work a petal in the next sc, then sl st in the next sc. Repeat 5 times.
Petal: In the same stitch, work ch 2, 4 dc, ch 2, sl st. The petals are in sc 1, 3, 5, 7, and 9. The sl sts are in sc 2, 4, 6, 8, and 10. (5 petals)
Fasten off Flower 1, leaving a 4 in tail. Hold it with Petal 1 pointing left.
Joining Flowers 2 to 6
Work Round 1 as above. In Round 2, work Petal 1 as follows.
- Work ch 2, 4 dc, ch 2 in the first sc, as for a normal petal.
- Link 1: Ch 7. Sl st into the tip of Petal 3 of the previous flower. Sl st in each of the 7 chains back toward the new flower, ending with a sl st in the tip of Petal 1.
- Link 2: Ch 7. Sl st into the tip of Petal 4 of the previous flower. Sl st in each chain back, ending with a sl st in the tip of Petal 1.
- Sl st in the same sc as the start of the petal to finish it.
Continue Round 2 as normal: sl st in the next sc, then Petals 2, 3, 4, and 5, each followed by a sl st. Fasten off.
The two links form a small “Y” between the flowers, which gives the bracelet its open, lacy look. If your links pull or buckle, chain 8 instead of 7. If they sag, chain 6.
Adjustable Cords
Left cord: Attach thread to the tip of Petal 1 of Flower 1 with a sl st. Ch until the cord measures 7 in (18 cm), which is about 60 to 70 chains. Fasten off, leaving a 4 in tail.
Right cord: Attach thread to the tip of Petal 3 of Flower 6 with a sl st. Ch until the cord measures 7 in (18 cm). Fasten off, leaving a 4 in tail.
Finishing
- Weave in all the flower ends with a tapestry needle, hiding them in the back of the petals.
- Lightly mist the bracelet with water and gently press each flower flat. Let it dry.
- Make the sliding knot: Wrap the bracelet around your wrist and overlap the two cords so the ends point in opposite directions. Take the end of the left cord and make a loop around the right cord. Pass the tail through that loop 3 times, like an overhand knot with extra wraps. Pull snug, but keep it loose enough to slide. Repeat with the right cord around the left cord.
- Thread a bead onto each cord end and tie a knot below it. Trim the tails and add a dab of fabric glue to each knot.
- Slide the two knots apart to open the bracelet, and together to tighten it.
Color Combinations to Try
- Soft neutrals: cream, blush pink, and dusty rose for a wedding or bridesmaid gift
- Earthy tones: sage green, mustard, and terracotta for a boho look
- Pastels: lavender, mint, and butter yellow for spring
- Monochrome: one color in three shades for a subtle, modern set
Tips for Crocheting with Thread
- Use good lighting. Fine thread is easier on your eyes near a window or under a daylight lamp.
- Keep your tension relaxed. Tight stitches make the petals curl instead of lying flat.
- Count your stitches. Five even petals are easy to keep track of, but it’s easy to lose your place in a 10-stitch round.
- Secure your knots. A dab of fabric glue keeps a bracelet that’s worn every day from coming undone.
Perfect for Gifts and Handmade Businesses
These bracelets make thoughtful presents for birthdays, bridesmaids, Mother’s Day, and teacher gifts. Tie one to a card or tuck it into a small kraft box. If you sell your finished pieces, adding a woven label with your shop name makes the packaging feel professional.
Frequently Asked Questions
Can I use yarn instead of thread?
Yes, but the bracelet will be chunkier. Use a larger hook, and expect bigger flowers.
What size hook should I use?
Start with a 1.5 mm hook and adjust up or down depending on your tension.
Is this pattern good for beginners?
Yes, if you already know basic stitches. Working with thread is the main challenge, but the small size makes practice quick.
How many flowers do I need?
Six flowers fit most wrists, and the sliding cords adjust the fit. For a child’s bracelet, use four or five.
Can I sell bracelets made from this pattern?
Yes, you may sell finished items. Please credit the designer and do not resell or share the pattern itself.
How do I care for my crochet bracelet?
Hand wash gently in cool water and lay flat to dry. Remove it before swimming or showering.
Final Thoughts
A crochet flower bracelet is a small project with a big payoff: quick to make, charming to wear, and easy to customize. Grab your thread, pick your favorite colors, and start your first bloom today. One bracelet often turns into a whole stack.
Share your makes! Post your finished bracelets on social media and tag me so we can see your colors.