
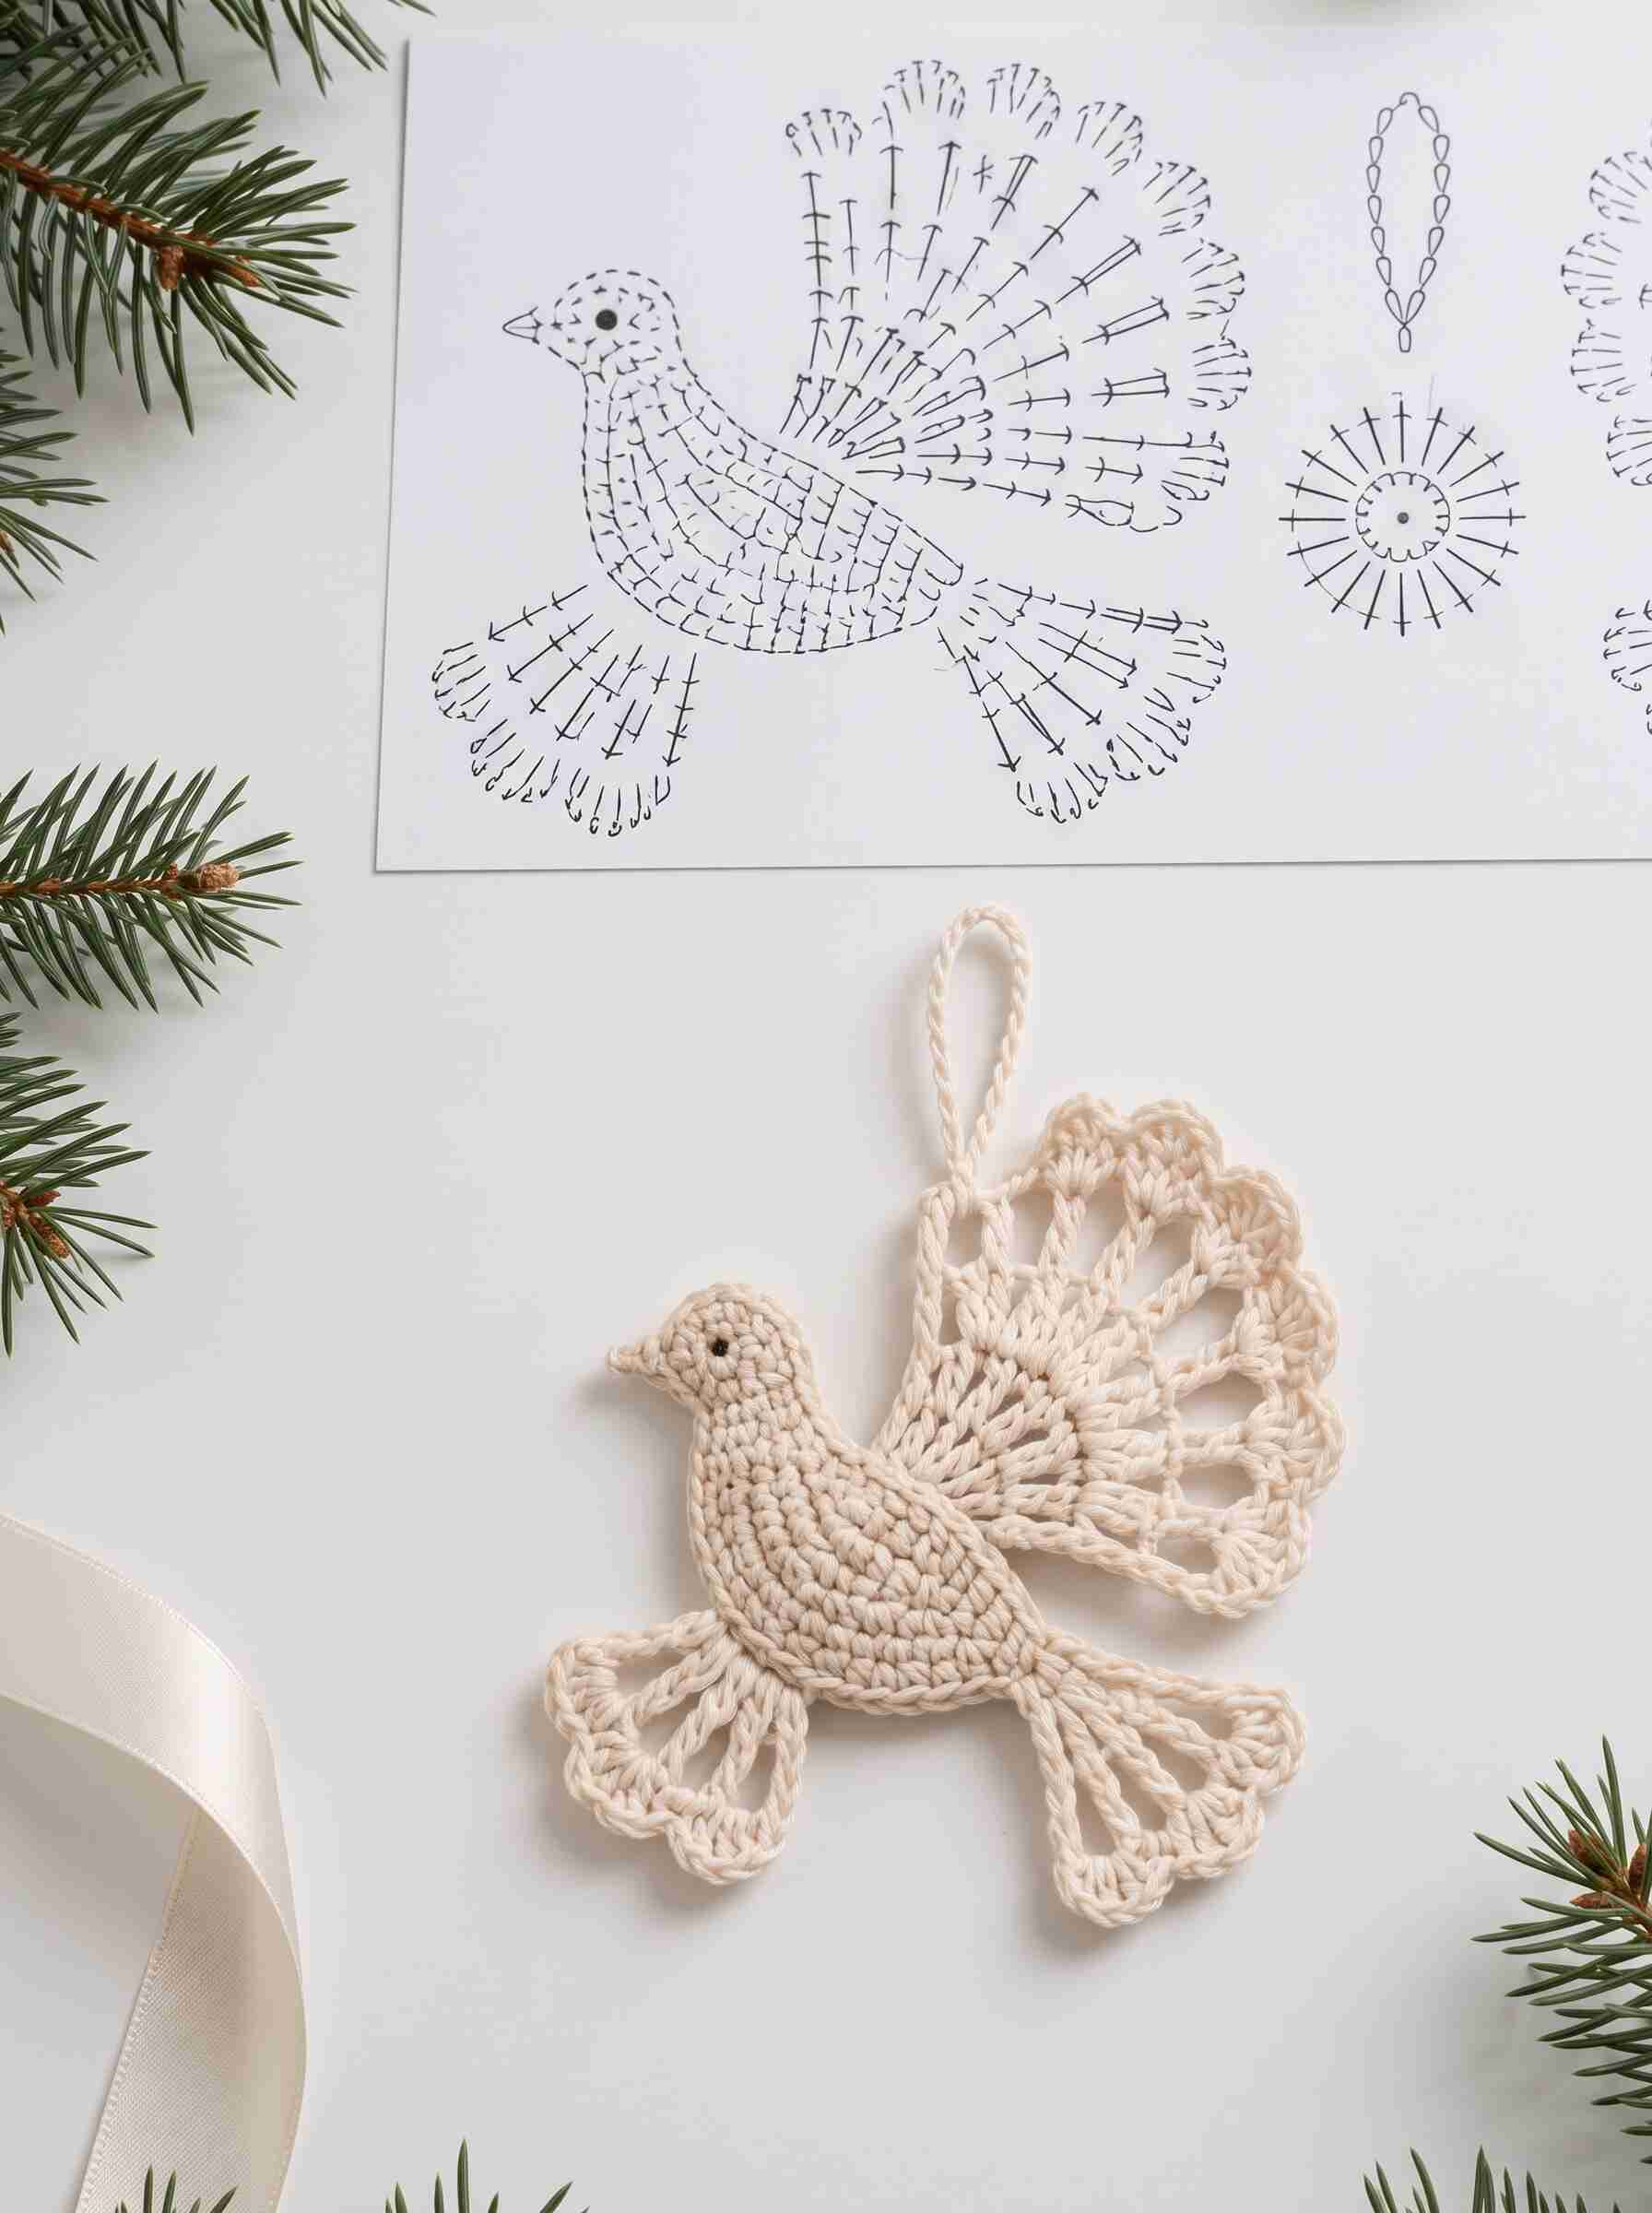
There’s something so peaceful about a handmade Christmas ornament, and this little crochet dove is one of my favorites. 🕊️ Made with simple crochet stitches and a soft cream yarn, it has delicate openwork wings and tail feathers that make it look beautiful hanging on a Christmas tree.
This crochet dove ornament pattern is a lovely handmade Christmas decoration and also makes a thoughtful gift for family and friends. The finished dove can be made in one color, or you can experiment with white, cream, gold, or soft pastel yarn.
Crochet Dove Christmas Ornament
This pattern creates a small decorative dove with a rounded body, delicate fan-shaped wings, decorative tail feathers, and a hanging loop.
The design is worked in separate sections and assembled at the end. The body is crocheted first, followed by the wings and tail. Finally, the pieces are attached and a hanging loop is added.
Why You’ll Love This Pattern
- Perfect for Christmas decorating
- Great handmade tree ornament
- Uses a small amount of yarn
- Beautiful in neutral or traditional Christmas colors
- Makes a lovely handmade gift
- Easy to customize with different yarn colors
- A great project for using leftover yarn
Materials
- Worsted-weight or DK-weight cotton yarn
- Crochet hook suitable for your yarn
- Small amount of black yarn or embroidery thread for the eye
- Yarn needle
- Scissors
- Stitch marker
- Optional: small amount of fiberfill
Suggested Colors
For a classic look, use:
- Cream or ivory yarn for the dove
- Black thread for the eye
You can also make a white dove, or use metallic yarn for a festive Christmas version.
Crochet Abbreviations
US crochet terminology:
- ch – chain
- sc – single crochet
- hdc – half double crochet
- dc – double crochet
- sl st – slip stitch
- st – stitch
- sk – skip
- rep – repeat
- sp – space
- FO – fasten off
How to Crochet the Dove
Step 1: Crochet the Body
Start with the main body of the dove.
Round 1
Make a magic ring.
Work 6 sc into the ring.
Pull the ring closed and place a stitch marker.
Round 2
Work 2 sc in each stitch around.
You should now have 12 stitches.
Round 3
Repeat:
1 sc in the next stitch, 2 sc in the next stitch.
Continue around.
Round 4
Repeat:
1 sc in each of the next 2 stitches, 2 sc in the next stitch.
Continue around.
Rounds 5–8
Continue working sc around, keeping the body gently rounded.
At this point, the piece should begin to look like a small oval body.
If you want a slightly fuller ornament, add a small amount of fiberfill before closing the body.
Shaping the Body
Begin decreasing gradually by working sc2tog in a few places around the next rounds.
Continue until the opening becomes small.
Fasten off, leaving a long yarn tail.
Use the yarn needle to close the remaining opening.
Step 2: Shape the Dove’s Head
The head can be shaped from the upper front portion of the body.
Attach your yarn near the front of the body and work several short rows of sc.
Work the first row evenly across the selected stitches.
For the following rows, decrease slightly toward the top to create the rounded head.
Once the head is formed, fasten off and weave in the ends.
Creating the Beak
For the small pointed beak, attach yarn near the front of the head.
Work a few short stitches while gradually decreasing.
The final stitch should create a small point.
Fasten off and hide the yarn ends inside the body.
Step 3: Add the Eye
Use black embroidery thread or a tiny amount of black yarn.
Make one small stitch on each side of the head where the eye should be positioned.
Keep the eyes small so the dove maintains its delicate appearance.
Step 4: Crochet the Large Decorative Wing
The large wing is the most eye-catching part of this ornament.
Start with a foundation chain.
Create a series of chain spaces and tall stitches to form the openwork structure.
First Row
Chain approximately 12–14 stitches.
Work back along the chain using a combination of sc and dc stitches.
Do not make the stitches too tight because the wing needs to remain flexible.
Building the Wing
Continue adding rows that gradually increase toward the outside edge.
For each section, use:
dc, ch 1, dc
to create open spaces.
These chain spaces will form the decorative holes visible between the feather sections.
Creating the Feathered Edge
For the outer edge, work groups of dc stitches into the chain spaces.
A simple repeat is:
sl st into space, 5 dc in the next space, sl st into the following space.
Repeat this around the curved edge.
This creates the scalloped feather appearance.
Fasten off and leave a long tail for sewing.
Step 5: Crochet the Second Wing
Make a second wing using the same technique.
The second wing can be slightly smaller or positioned behind the body depending on the look you want.
For a symmetrical ornament, make both wings the same size.
For a more dimensional dove, make one wing slightly larger and place it prominently behind the body.
Step 6: Crochet the Tail
The tail is made with long openwork sections that resemble feathers.
Start with a chain long enough to create the desired tail length.
Work back across the chain using dc stitches.
Then create several feather sections using chain spaces.
For example:
ch 3, dc into the next space, ch 3, dc into the next space.
Continue until you have several narrow sections.
Shape the Feather Tips
At the end of each section, work several stitches into the same space to create a rounded or scalloped feather tip.
A simple combination is:
3 dc, ch 2, 3 dc
worked into the same space.
Repeat for each feather section.
Fasten off and weave in the ends.
Step 7: Crochet the Hanging Loop
The hanging loop is very simple.
Attach yarn to the top of the dove.
Chain approximately 20–25 stitches, depending on how large you want the loop.
Slip stitch back into the starting point.
Fasten off securely.
This creates a loop that can be placed directly onto your Christmas tree.
Step 8: Assemble the Dove
Now it’s time to bring all the pieces together.
Place the large wing behind the body.
Use your yarn needle and matching yarn to sew the wing securely to the back of the dove.
Attach the second wing on the opposite side.
Position the tail at the back of the body.
Sew along the center of the tail while leaving the decorative feather sections free.
This allows the tail to spread out naturally.
Tip
Before sewing everything permanently, use a few pins or small pieces of yarn to hold the pieces in position.
Step back and check the shape from different angles.
Once you’re happy with the placement, sew everything securely.
Step 9: Shape the Feathers
After assembling the ornament, gently arrange the openwork sections with your fingers.
Spread the wing and tail feathers so the chain spaces are clearly visible.
If the yarn is curling slightly, lightly block the pieces before final assembly.
Avoid excessive heat or moisture unless the yarn you’re using is suitable for blocking.
Finishing Your Crochet Dove
Weave all remaining yarn ends into the back of the ornament.
Trim the excess yarn.
Give the dove a final gentle shaping.
Your handmade crochet dove is now ready to hang!
How to Use Your Crochet Dove Ornament
This little dove isn’t only for Christmas trees.
You can also use it as:
- A handmade Christmas gift
- A gift tag decoration
- A holiday wreath decoration
- A centerpiece decoration
- A Christmas garland
- A package topper
- A nursery decoration
- A handmade keepsake
You could even make several doves in different shades and create a beautiful handmade Christmas tree collection.
Crochet Dove Pattern Tips
Keep your tension consistent.
The openwork wings look best when the stitches are worked evenly.
Don’t pull the chain spaces too tightly.
Loose, even chains help the decorative feathers open up.
Use cotton yarn for a defined look.
Cotton usually gives the stitches enough structure to show the feather details clearly.
Block the wings if necessary.
Light blocking can help the wings and tail hold their shape.
Experiment with color.
White and ivory create a traditional dove, while gold, silver, blush, or red can give the ornament a completely different Christmas look.
Frequently Asked Questions
What yarn is best for a crochet dove ornament?
Cotton yarn is a great choice because it gives the ornament good stitch definition and helps the openwork details stay visible.
Can I make this crochet dove in white?
Absolutely. White or ivory yarn gives the dove a classic, elegant appearance.
Is this suitable for beginners?
The body is relatively simple, but the decorative wings and tail require some familiarity with chains, double crochet, increases, and working into chain spaces.
Can I make the dove larger?
Yes. Use thicker yarn and a larger crochet hook for a larger ornament. You can also add additional rows to the body and increase the wing and tail sections proportionally.
How do I hang the crochet dove?
The easiest method is to crochet a chain loop at the top of the ornament. You can then place the loop directly over a Christmas tree branch.
A Handmade Christmas Keepsake
I love how a simple piece of yarn can become something that feels so special. This little crochet dove has a delicate, peaceful look that works beautifully with a natural Christmas tree, neutral holiday decorations, or a handmade Christmas collection.
Make one for your own tree, or create several to give as handmade gifts. 🕊️🎄
Save this crochet dove Christmas ornament pattern for your next holiday crochet project and share it with someone who loves handmade Christmas decorations.