
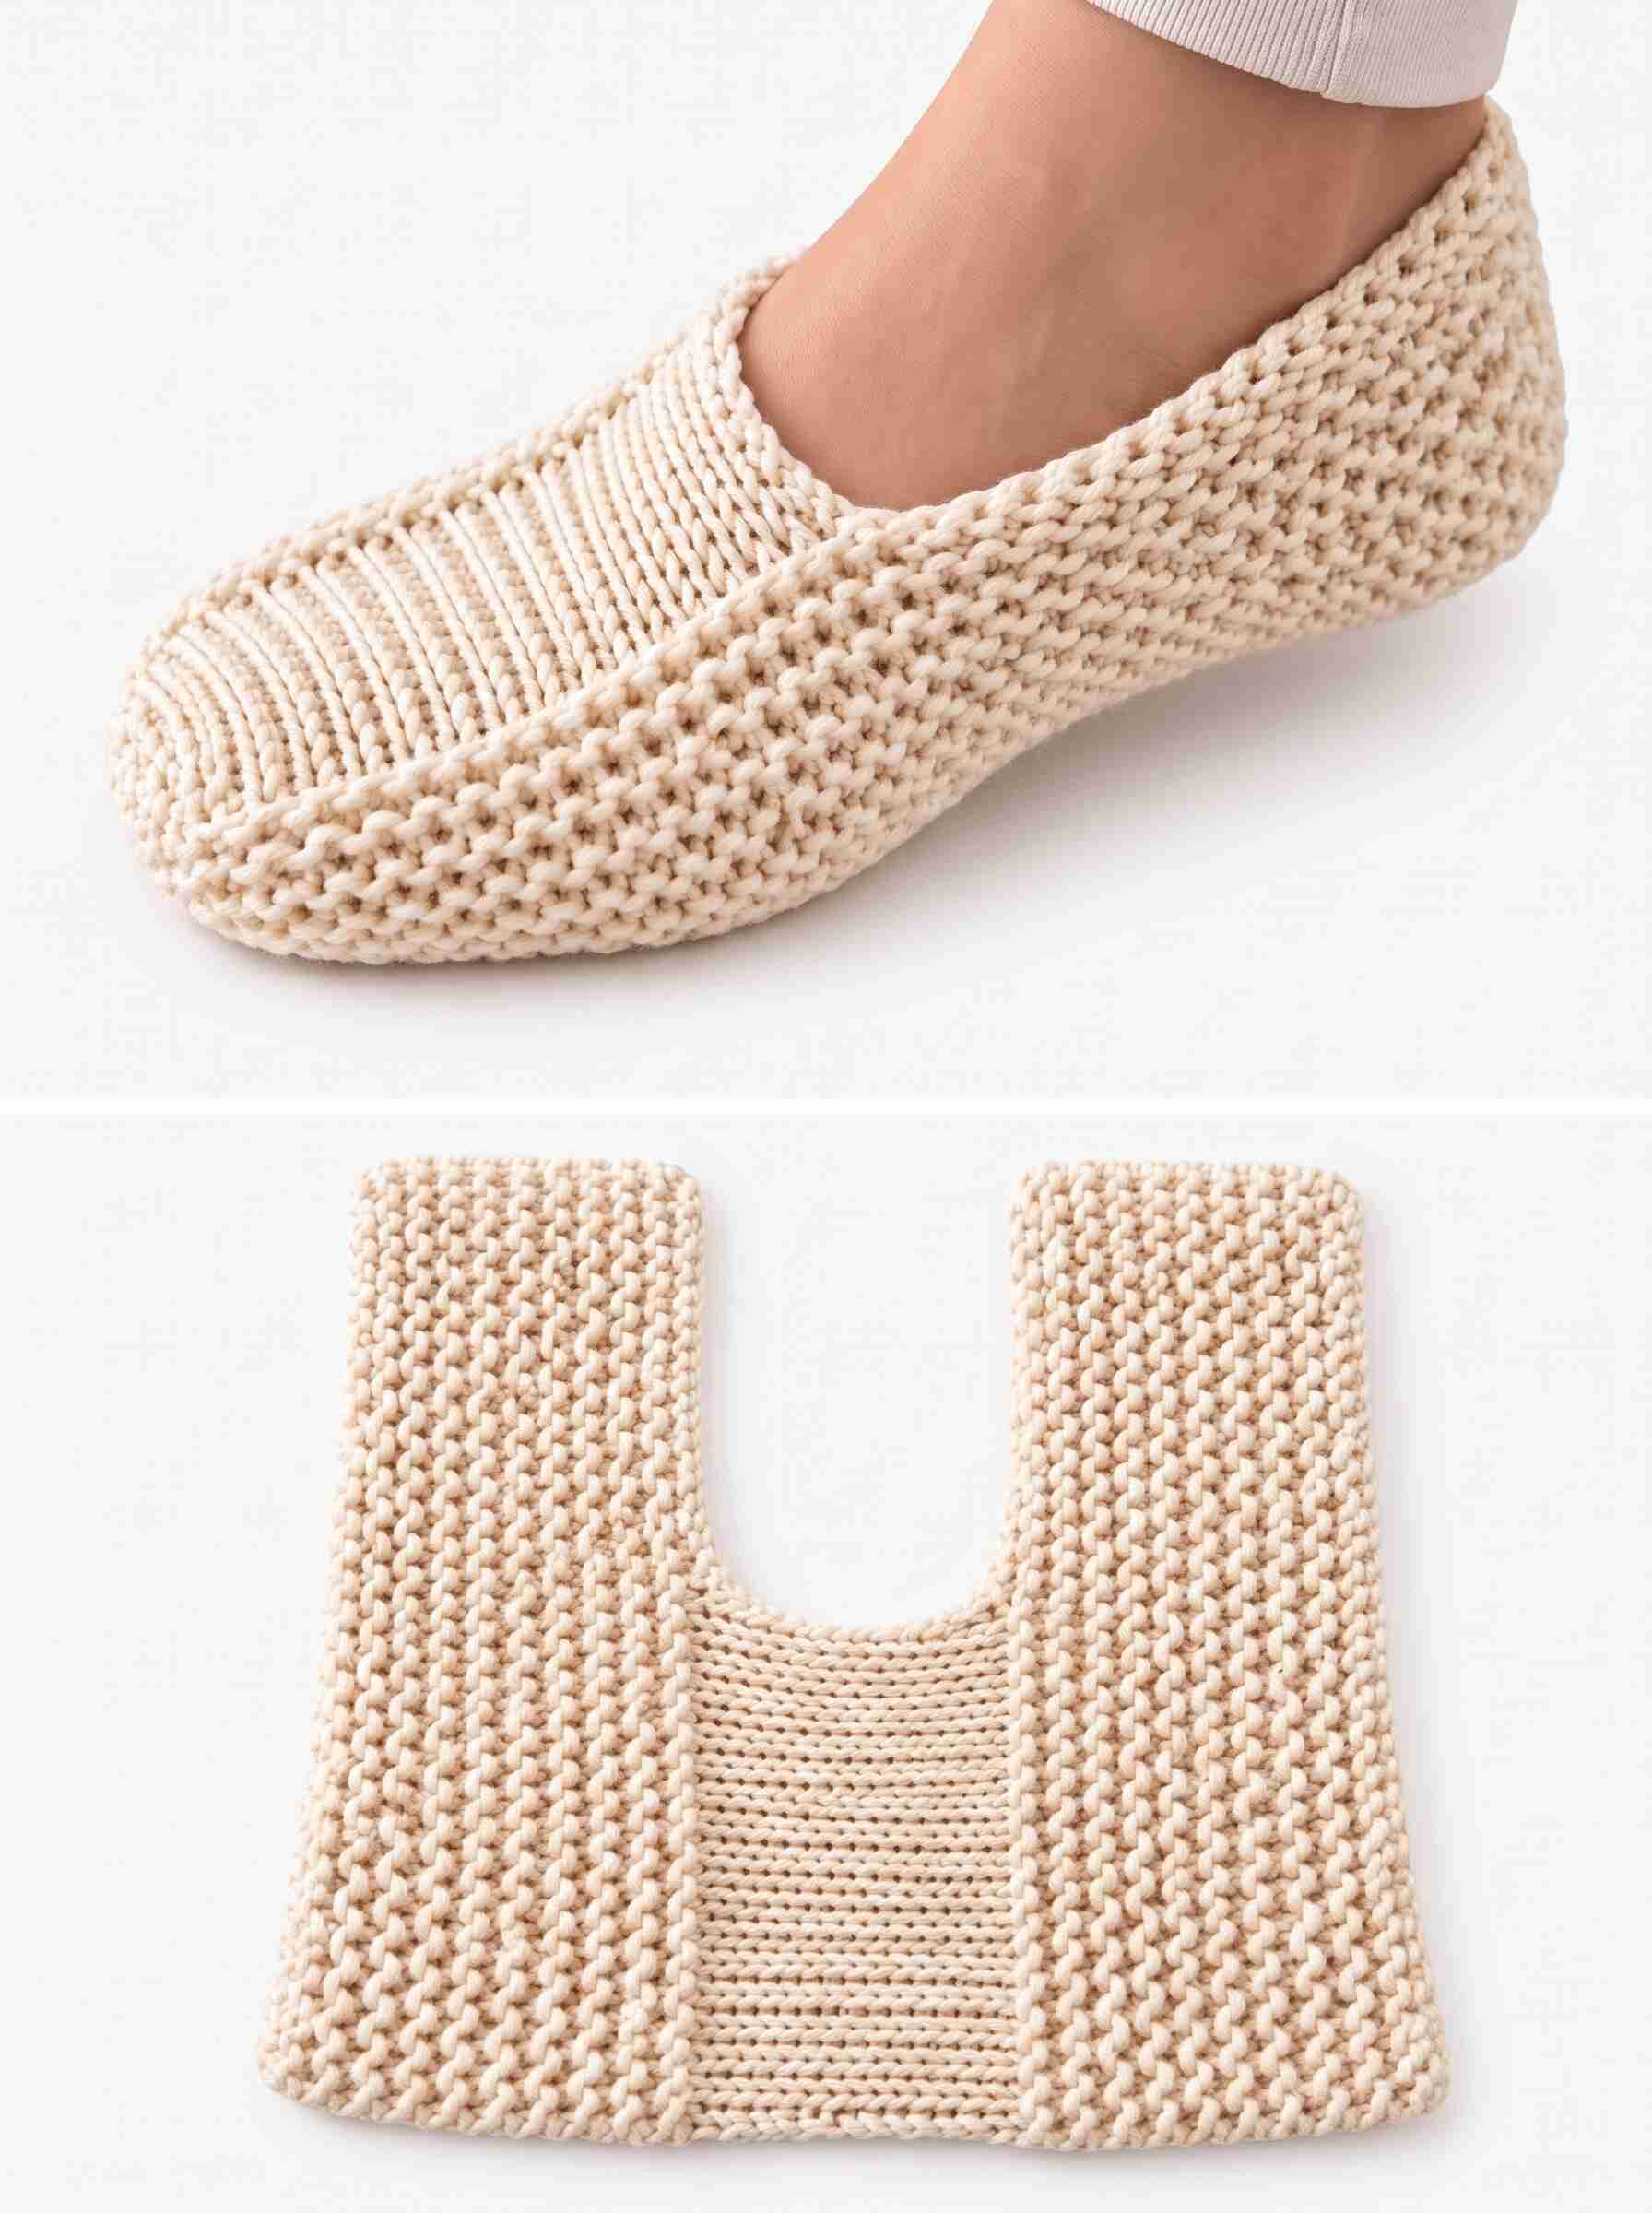
If you are looking for a fast, beginner-friendly knitting project that looks professionally tailored, these two-needle flat knit slippers are the perfect weekend make.
Knitted entirely flat using basic knit and purl stitches, this clever “U-shaped” design requires zero circular needles or double-pointed needles (DPNs). With just two simple seams along the heel and sole, the flat piece folds seamlessly into a snug, cushioned house shoe.
Materials & Quick Specs
- Yarn: 100 g (approx. 150–180 m) of Aran / Worsted weight yarn (wool-blend or acrylic for durability and stretch)
- Needles: US 6–7 (4.0 mm – 4.5 mm) straight knitting needles
- Notions: Tapestry / yarn needle, scissors, measuring tape, 2 stitch markers
- Gauge: Approx. 18–19 sts = 4 inches (10 cm) in garter stitch
- Skill Level: Advanced Beginner (requires Cast On, Knit, Purl, Bind Off, and Seaming)
- Sizing: Adult Medium (US Women’s 6–9 / EU 37–40); easily adjusted by lengthening or shortening the heel straps.
Pattern Notes & Stitch Guide
- Garter Stitch: Knit every stitch on every row.
- 1×1 Ribbing (Instep): Knit 1, Purl 1 across right side and wrong side rows.
- Construction: The slipper starts at the toe/instep worked across all stitches, divides at the foot opening by binding off the center, and finishes by working two side bands that wrap around the heel.
Slipper Knitting Pattern (Make 2)
Step 1: Cast On & Instep Base
- Cast on 38 stitches using the long-tail cast-on method:
- Side A (Sole/Side): 13 sts (Garter)
- Center (Instep): 12 sts (1×1 Rib)
- Side B (Sole/Side): 13 sts (Garter)
- Row 1 (RS): K13, place marker (PM), [K1, P1] 6 times, PM, K13.
- Row 2 (WS): K13, slip marker (SM), [K1, P1] 6 times, SM, K13.
- Repeat Rows 1 and 2 until the piece measures 4.5 to 5 inches (11.5–13 cm) from the cast-on edge, ending after a wrong-side row.
Step 2: Divide for Foot Opening (The “U” Cutout)
- Division Row (RS):
- K13 (first heel strap).
- Bind off the center 12 stitches in pattern for the foot opening.
- Knit to end (13 sts remaining for second heel strap).
Step 3: Work Heel Straps
You now have 13 stitches on each side, worked in garter stitch (knit every row):
- First Strap:
- Work in garter stitch across the first 13 stitches until the strap measures 4.5 to 5 inches (11.5–13 cm) from the bind-off edge.
- Bind off all 13 stitches loosely.
- Second Strap:
- Reattach yarn to the remaining 13 stitches on the opposite side.
- Work in garter stitch to match the length of the first strap.
- Bind off all 13 stitches loosely.
Assembly & Finishing
       [Back Heel Seam]
       +----+     +----+
       |    |     |    |  <-- Heel Straps (Garter)
       |    +-----+    |
       |    (Open)     |  <-- Foot Opening
       |               |
       |  G   Rib   G  |  <-- Instep & Sole Area
       +---------------+
          [Toe Gather]
- Back Heel Seam: Fold the ends of the two heel straps together at the back. Using a tapestry needle and a mattress stitch, seam the two short edges together vertically.
- Sole Seam: Fold the slipper in half lengthwise (right sides facing out). Seam the bottom edges together from the heel toward the toe along the center of the sole.
- Toe Closure: Weave your working yarn through the cast-on stitches at the toe end, pull snugly to cinch the toe closed, and secure with a tight knot on the inside.
- Weave Ends: Weave in all loose yarn tails neatly inside the garter ridges. Repeat the entire process for the second slipper.
Custom Sizing Tips
- Wider Feet: Add 2 to 4 stitches evenly to the outer garter sections (e.g., cast on 42 sts: 15 / 12 / 15).
- Longer / Shorter Feet: Increase or decrease the number of rows worked on the heel straps before binding off. Test the fit around the back of your heel before casting off.