
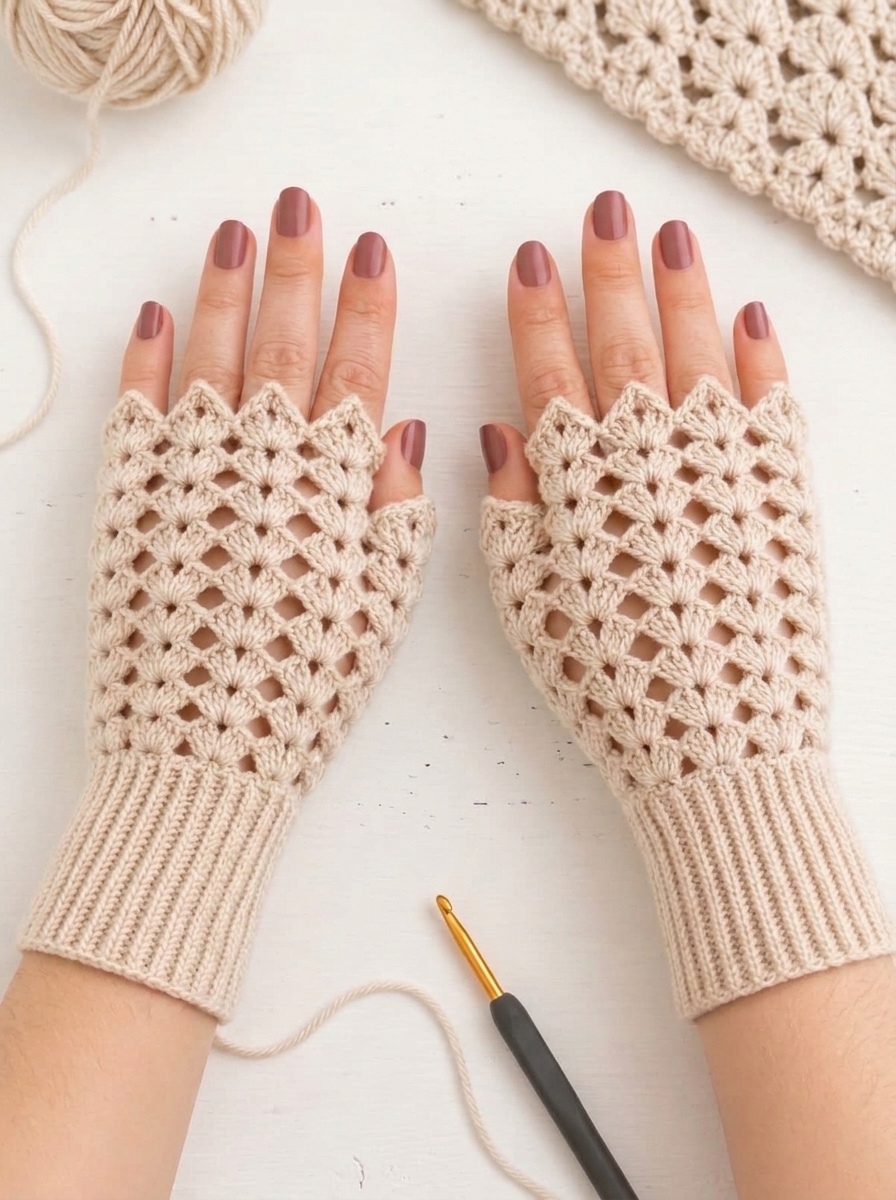
Looking for a stylish and cozy crochet project that is both practical and beautiful? These crochet fingerless gloves are a lovely handmade accessory for chilly days. Featuring an elegant openwork shell stitch, delicate scalloped edges, and comfortable ribbed cuffs, they are perfect for adding a touch of handmade charm to your winter wardrobe.
This easy-to-follow crochet fingerless gloves pattern is suitable for adventurous beginners and intermediate crocheters. The gloves are worked with a beautiful lace-inspired stitch that creates small diamond-shaped openings, while the ribbed cuffs provide a snug and comfortable fit.
Whether you make them for yourself, give them as a handmade gift, or add them to your crochet collection, these elegant gloves are a wonderful project to try!
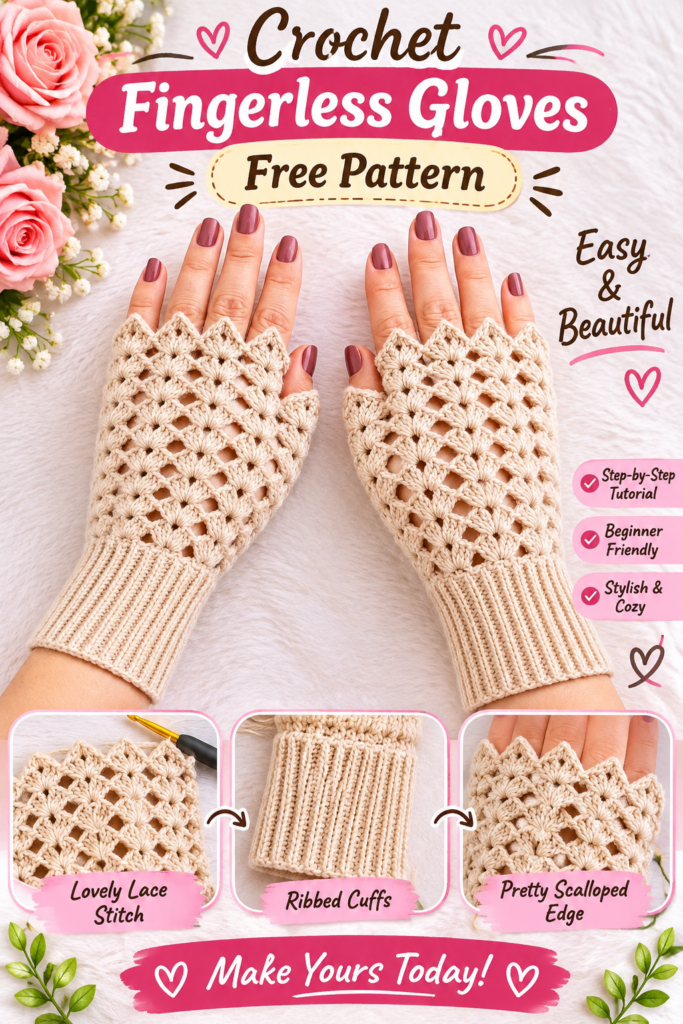
Why You’ll Love These Crochet Fingerless Gloves
- Beautiful lace texture: The shell stitch creates a delicate openwork pattern.
- Comfortable fit: The ribbed cuffs gently hug your wrists.
- Fingerless design: Keep your hands warm while leaving your fingers free.
- Beginner-friendly techniques: Uses basic crochet stitches and simple repeats.
- Customizable: Easily adjust the length, width, and yarn color.
- Perfect handmade gift: A lovely accessory for birthdays, holidays, and winter gifts.
Materials You’ll Need
To make these crochet fingerless gloves, gather the following supplies:
- Worsted-weight yarn or DK yarn in a soft beige or cream color (approximately 100–130 yards).
- 4 mm crochet hook (adjust to your yarn and tension).
- Scissors.
- Yarn needle for sewing and weaving in ends.
- Stitch markers.
- Measuring tape.
Yarn recommendation: A soft acrylic, wool blend, or cotton blend yarn will work beautifully. Choose a smooth yarn that shows the lace stitches clearly.
Crochet Abbreviations
This pattern uses US crochet terminology.
- ch – Chain
- sc – Single crochet
- dc – Double crochet
- sl st – Slip stitch
- BLO – Back loop only
- st – Stitch
- sts – Stitches
- sp – Space
- rep – Repeat
Skill Level
Adventurous beginner to intermediate.
You should be comfortable with chain stitches, single crochet, double crochet, and working into chain spaces.
Finished Size
The pattern is designed for an average adult woman’s hand.
- Wrist circumference: approximately 6.5–7.5 inches.
- Hand circumference: approximately 7–8 inches.
- Cuff length: approximately 3 inches.
- Hand section: approximately 4–5 inches.
These measurements are approximate and will vary depending on yarn, hook size, and tension.
Special Stitch: Crochet Shell Lace Stitch
The beautiful openwork texture is created using a simple combination of chain spaces and shell stitches.
Shell stitch: Work 5 double crochet stitches into the same chain-3 space.
Lace row: Work a single crochet into the center double crochet of each shell, separated by chain-3 spaces.
Alternating these two rows creates the decorative openwork pattern.
Full Crochet Fingerless Gloves Pattern
You will make two matching glove panels, sew the side seams while leaving a thumb opening, and attach separate ribbed cuffs.
Part 1: Crochet the Ribbed Cuffs
Make two identical cuffs.
Foundation:
Ch 13.
Row 1: Sc in the second chain from the hook and in each remaining chain across. (12 sc)
Row 2: Ch 1, turn. Sc in BLO of each stitch across. (12 sc)
Rows 3–28: Repeat Row 2.
Continue adding rows until the cuff comfortably wraps around your wrist. Adjust the number of rows for a tighter or looser fit.
Fold the cuff in half so the short edges meet.
Join the short edges with slip stitches or sew them together using a yarn needle.
You now have a stretchy ribbed cuff.
Repeat for the second glove.
Part 2: Crochet the Lace Hand Section
Make two identical rectangular panels.
The foundation chain should create a width that comfortably wraps around your hand above the thumb, without being too tight.
Foundation Chain:
Ch 34.
This creates approximately eight lace repeats. For a different hand size, use a foundation chain in multiples of 4 + 2.
Row 1:
Sc in the second chain from the hook.
Ch 3, skip the next 3 chains, sc in the next chain.
Repeat from * across the row.
Row 2:
Ch 3 (counts as dc), turn.
Work 4 dc into each ch-3 space across.
Work 1 sc into the final sc of the previous row.
Row 3:
Ch 1, turn.
Sc in the first stitch.
Ch 3, skip the next 5 dc, sc in the center (third) dc of the next shell.
Repeat across, finishing with a sc in the final stitch.
Row 4:
Ch 3, turn.
Work 5 dc into each ch-3 space across.
Finish with a sc in the final sc.
Rows 5–12:
Continue alternating Row 3 and Row 4 until the lace panel measures approximately 4–5 inches from the cuff attachment point, or reaches the desired length from wrist to knuckles.
Adjust the number of rows to suit your hand.
Part 3: Create the Scalloped Top Edge
To create the pretty decorative edge shown in the photo:
Join yarn at one corner of the top edge.
Edging Round:
Ch 1.
Work 1 sc along the edge, then work 5 dc into the next suitable space to create a shell.
Skip the next space and work 1 sc into the following space.
Repeat the shell and single crochet sequence around the top edge.
Sl st to join.
This creates a delicate scalloped finish.
Part 4: Attach the Ribbed Cuff
Place the lace panel around the top edge of the ribbed cuff.
Make sure the panel and cuff have matching circumferences.
With the right sides facing each other, sew or slip-stitch the bottom edge of the lace panel to the upper edge of the cuff.
Work evenly around to avoid puckering.
Repeat for the second glove.
Part 5: Sew the Side Seam and Create the Thumb Opening
Fold the glove panel around your hand with the wrong side facing out.
Align the two long edges.
Starting at the cuff, sew the side edges together using a yarn needle or slip stitches.
Important: Do not sew the entire side closed.
Leave an opening of approximately 1.5–2 inches near the thumb position. This opening allows your thumb to pass through comfortably.
Sew the remaining upper section closed, stopping at the top edge.
Try the glove on before securing the seam to make sure the thumb opening is in the correct position.
Repeat for the second glove, positioning the thumb opening on the opposite side so the gloves fit the left and right hands.
Weave in all loose yarn ends.
Part 6: Finishing Touches
Your crochet fingerless gloves are almost ready!
- Check that both gloves are approximately the same size.
- Gently stretch the ribbed cuffs to make sure they fit comfortably.
- Adjust any loose stitches around the thumb opening.
- Weave in all remaining yarn ends.
- Lightly steam or wet-block the gloves if your yarn allows it.
Avoid excessive heat when blocking acrylic yarn.
Tips for Making Beautiful Crochet Fingerless Gloves
1. Choose soft yarn
A soft yarn makes the gloves more comfortable and pleasant to wear.
2. Keep your tension consistent
Try to maintain even tension throughout the lace pattern so that both gloves have the same appearance.
3. Adjust the thumb opening
Everyone’s hands are different. Try on the glove before finishing the side seam to find the most comfortable thumb position.
4. Customize the colors
Cream, beige, dusty pink, gray, and oatmeal are beautiful choices for this design.
5. Make the cuffs longer
If you prefer extra warmth, simply add more ribbing rows before joining the cuff.
Frequently Asked Questions
Are these crochet fingerless gloves suitable for beginners?
Yes! The pattern uses basic stitches such as single crochet, double crochet, and chain stitches. Beginners who have practiced these stitches can give this project a try.
How much yarn do I need?
Approximately 100–130 yards of yarn should be enough for an average adult pair, depending on your yarn weight, hand size, and tension.
Can I make these gloves in different sizes?
Absolutely! Adjust the foundation chain to change the width and add or remove lace rows to change the length. You can also adjust the cuff length by adding more or fewer rows.
Can I use cotton yarn?
Yes. Cotton yarn works well for a lightweight pair of fingerless gloves, especially for spring and autumn. For colder weather, a soft wool or acrylic blend may provide more warmth.
How do I make the gloves fit snugly?
Use a slightly smaller hook if your stitches are too loose, and make sure the ribbed cuffs fit comfortably around your wrists.
Can I sell the finished gloves?
Yes! You can sell finished handmade gloves made from your own work. Please credit the pattern source if you share the written instructions.
Final Thoughts
These beautiful crochet fingerless gloves combine a delicate lace design with cozy ribbed cuffs to create an accessory that is both stylish and practical. The openwork shell stitch gives them a romantic handmade look, while the fingerless design makes them comfortable for everyday use.
Choose your favorite yarn color, grab your crochet hook, and enjoy making a lovely handmade pair!
Happy crocheting!