If you have ever wondered why your baked chicken thighs come out soggy instead of crispy, or bland instead of deeply flavorful, this recipe is about to solve both of those problems permanently. These Baked Boneless Chicken Thighs are coated in a perfectly balanced dry rub of brown sugar, paprika, Italian seasoning, garlic, and onion powder, then roasted on a baking sheet at high heat for just 30 minutes. The result is chicken with genuinely crispy edges, a beautifully seasoned exterior, and meat that is so juicy and tender it will make you question why you ever bothered with chicken breasts.
This is the weeknight dinner that requires almost no effort but tastes like you put in real work. Ten minutes of prep, one baking sheet, and thirty minutes in the oven — and you have a dinner that impresses every single time. Once you understand the few simple techniques that make this recipe so successful, you will use this method for every batch of baked chicken you make from here on out.
Why You’ll Love These Baked Boneless Chicken Thighs
They are genuinely crispy. The combination of high heat, a baking sheet (not a baking dish), and properly dried chicken creates edges that are crispy and slightly caramelized — not soggy, not pale, not rubbery.
They are incredibly juicy. Chicken thighs are naturally more forgiving than breasts thanks to their higher fat content. They stay tender and moist even if your oven runs a little hot or you leave them in a minute or two longer than planned.
The dry rub does all the heavy lifting on flavor. Brown sugar, paprika, Italian seasoning, garlic powder, onion powder, and black pepper layer together into a rub that is savory, slightly smoky, and lightly sweet. It seasons the chicken deeply and creates a beautiful crust as it roasts.
They are completely weeknight friendly. Ten minutes of prep, one pan to wash, and forty minutes total from start to plate. This is the definition of an easy, reliable dinner.
They work with everything. Pasta, rice, roasted vegetables, salads — these chicken thighs complement virtually any side dish and can be dressed up or down depending on the occasion.
Ingredients
Here is everything you need to make these Baked Boneless Chicken Thighs:
- 2 lb boneless, skinless chicken thighs (about 6 thighs)
- 1 tablespoon olive oil
- 1 tablespoon brown sugar
- 2 teaspoons Italian seasoning
- 1.5 teaspoons paprika
- 1.5 teaspoons kosher salt
- 1 teaspoon onion powder
- 1 teaspoon garlic powder
- 1/2 teaspoon ground black pepper
The brown sugar is not just for sweetness — it is what helps the exterior of the chicken caramelize and develop that gorgeous golden, slightly sticky crust as it roasts at high heat. It balances the savory and smoky notes of the rest of the rub and contributes to the crispy edges that make these thighs so satisfying.
Patting the chicken completely dry before seasoning is one of the most important steps in this recipe. Moisture on the surface of the chicken creates steam in the oven rather than the dry, radiant heat needed for crispy results. Take an extra thirty seconds to thoroughly pat every surface with paper towels — it makes a significant difference in the final texture.
Using a baking sheet rather than a deep baking dish or a casserole pan is equally important. A baking sheet allows hot air to circulate around the chicken from all sides, which promotes even browning and crispy edges. A deep-sided baking dish traps steam and produces a braising effect rather than a roasting one.
Step-by-Step Instructions
Step 1 – Preheat and Prep the Pan
Set your oven to 425 degrees Fahrenheit and allow it to fully preheat before the chicken goes in. Line a rimmed baking sheet with parchment paper and set aside.
Step 2 – Mix the Dry Rub
In a small bowl, combine the brown sugar, Italian seasoning, paprika, kosher salt, onion powder, garlic powder, and black pepper. Stir well until the spices are completely and evenly blended together.
Step 3 – Prep the Chicken
Unfold each chicken thigh and lay them flat on a cutting board — boneless thighs often come folded or bunched and flattening them ensures even cooking. Trim away any large pockets of excess fat with kitchen scissors or a sharp knife. Then pat every surface of each thigh thoroughly dry with paper towels, pressing firmly to absorb as much surface moisture as possible.
Step 4 – Oil and Season the Chicken
Drizzle the olive oil over the chicken thighs and use clean, dry hands to rub the oil into every surface of each piece. Sprinkle the dry rub generously over the thighs, then use your hands again to press and rub the seasoning into the chicken on all sides until each thigh is evenly and thoroughly coated.
Step 5 – Arrange on the Baking Sheet
Place the seasoned chicken thighs on the prepared baking sheet in a single even layer, leaving a small amount of space between each piece. Crowding the pan will cause the chicken to steam rather than roast, so give each thigh enough room to breathe.
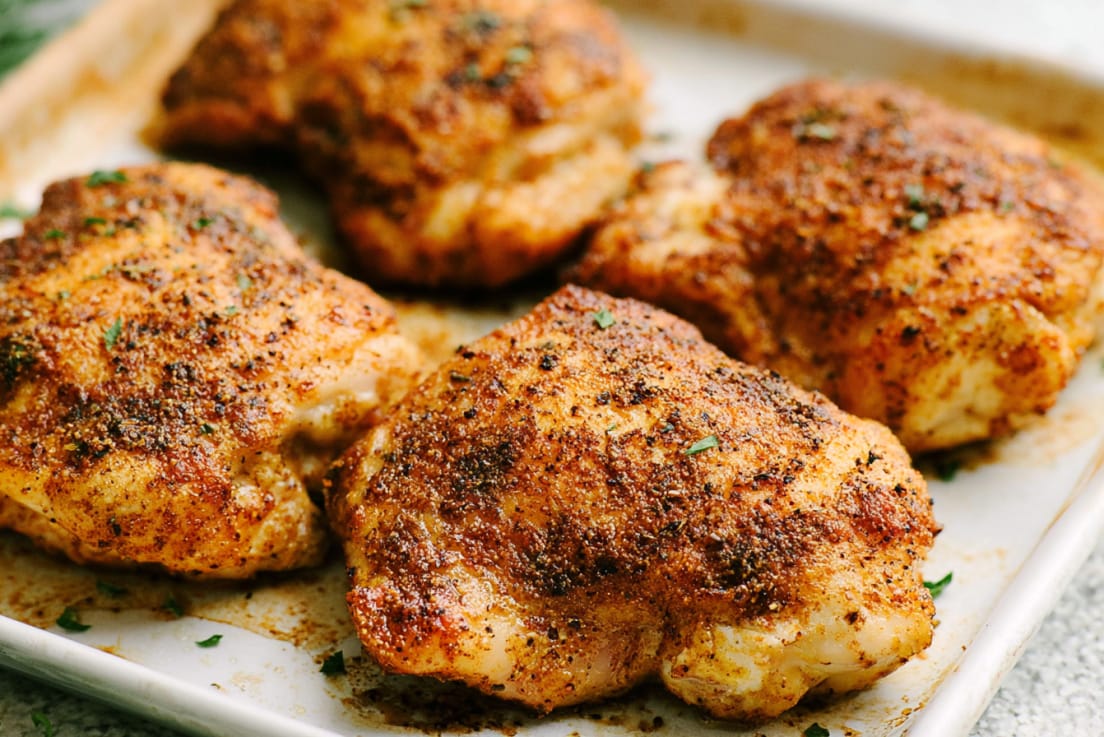
Step 6 – Roast
Transfer the baking sheet to the fully preheated oven and roast for 25 to 30 minutes, until the edges of the chicken are crispy and the internal temperature reads 165 degrees Fahrenheit when checked at the thickest point with an instant-read thermometer.
Step 7 – Rest and Serve
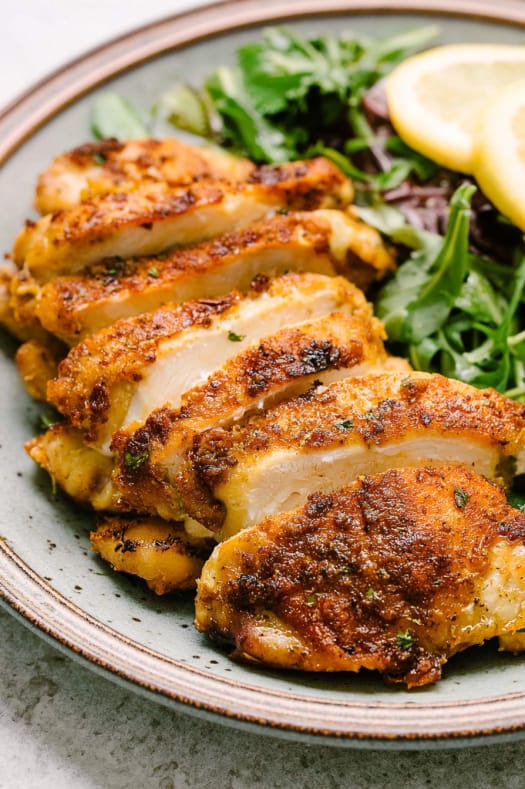
Transfer the chicken to a cutting board and let it rest for five minutes before slicing. Resting allows the juices to redistribute through the meat rather than running out onto the cutting board when you cut. Slice against the grain for the most tender bites and serve immediately.
Expert Tips for the Best Baked Boneless Chicken Thighs
Pat the chicken completely dry. This cannot be overstated. Wet chicken steams in the oven — dry chicken roasts and crisps. Use multiple sheets of paper towel and press firmly on every surface. The drier the chicken going into the oven, the crispier it will come out.
Use a baking sheet, not a baking dish. A rimmed baking sheet with sides low enough to allow air circulation is the right pan for this recipe. A deep casserole dish traps too much steam and prevents the edges from crisping properly.
Do not skip the resting time. Five minutes of resting after the chicken comes out of the oven lets the internal juices redistribute and makes every slice noticeably more moist and tender. Cutting into the chicken immediately after roasting causes those juices to run out.
Use a thermometer for confidence. 165 degrees Fahrenheit is the safe internal temperature for chicken, and an instant-read thermometer is the most reliable way to confirm it without guesswork. Insert it into the thickest part of the thigh for an accurate reading.
Flatten the thighs before seasoning. Unfolding each thigh and pressing it flat before oiling and seasoning ensures the dry rub coats the maximum possible surface area and the chicken cooks evenly all the way through without thicker folded sections remaining undercooked.
Space the chicken on the pan. Each piece needs a little room around it for hot air to circulate. Crowded chicken equals steamed chicken — and steamed chicken is the enemy of crispy edges.
Variations
Change the dry rub profile. The base technique in this recipe is completely flexible. Swap the Italian seasoning and paprika for a Cajun seasoning blend, a smoked chipotle rub, a lemon pepper combination, or a simple herb and garlic blend — the chicken preparation method stays exactly the same.
Add a honey glaze. In the last five minutes of roasting, brush a thin layer of honey over each thigh and return to the oven. The honey caramelizes quickly at 425 degrees and creates a gorgeous, lacquered finish.
Make it spicy. Add a quarter to a half teaspoon of cayenne pepper to the dry rub for a version with genuine heat. The sweetness of the brown sugar balances the cayenne beautifully.
Use bone-in thighs. If you prefer bone-in chicken thighs, this same recipe works with an adjusted baking time — plan on 35 to 45 minutes depending on size, still at 425 degrees, still using a baking sheet.
Finish under the broiler. For extra-crispy skin and deeply caramelized edges, switch the oven to broil for the last two to three minutes of cooking. Watch closely — the broiler works fast and the brown sugar in the rub can burn quickly.
Storage and Reheating
Refrigerator: Store cooked chicken thighs in an airtight container in the refrigerator for up to four days. They are excellent cold sliced over salads or reheated for a quick lunch or dinner throughout the week.
Reheating: For the best results, reheat in a 375-degree oven for 10 to 12 minutes until warmed through. This method re-crisps the exterior nicely. The microwave works in a pinch but will soften the edges. A quick two to three minutes in a hot skillet per side also re-crisps beautifully.
Freezer: Cooked chicken thighs freeze well. Cool completely, then store in a freezer-safe airtight container for up to three months. Thaw overnight in the refrigerator and reheat in the oven.
Meal prep: These baked boneless chicken thighs are an outstanding meal prep protein. Make a double batch on Sunday, slice and refrigerate, and use throughout the week in salads, grain bowls, wraps, and pasta dishes.
Serving Suggestions
These Baked Boneless Chicken Thighs are one of the most versatile dinner proteins you can make. Here are some great ways to serve them:
Serve them alongside garlic parmesan chicken pasta for a fully loaded weeknight dinner that feels restaurant-worthy without much extra effort.
Slice the chicken thighs and pile them over a bowl of Spanish rice with roasted corn, black beans, and a spoonful of sour cream for a satisfying, flavor-packed dinner bowl.
Serve them with a simple cucumber salad and roasted vegetables for a complete, balanced dinner that comes together without much extra cooking.
Use leftover sliced chicken thighs in a fresh BLT chicken salad for a quick and satisfying next-day lunch.
Serve them alongside baked beans and coleslaw for a casual, hearty dinner spread that feels like a proper backyard meal any night of the week.
Frequently Asked Questions
Why should I use a baking sheet instead of a baking dish?
A baking dish has high sides that trap moisture and create a steaming environment — great for braises, not for crisping. A low-sided baking sheet allows hot, dry oven air to circulate around the chicken from all sides, which is what produces crispy edges and deep roasted flavor.
How do I know when the chicken is done?
The most reliable method is an instant-read meat thermometer inserted into the thickest part of the thigh — it should read 165 degrees Fahrenheit. Visually, the edges should look golden and slightly caramelized and the juices should run clear when the meat is pierced.
Can I use bone-in thighs?
Yes. Use the same dry rub and the same high-heat method, but plan for a longer cook time — typically 35 to 45 minutes at 425 degrees depending on the size of the thighs. Always confirm doneness with a thermometer.
Can I marinate the chicken overnight instead of using a dry rub?
You can marinate boneless thighs overnight, but the dry rub technique is specifically designed to maximize crispiness. Marinated chicken tends to have a wetter surface going into the oven, which can work against the crispy edge result. If you marinate, pat the chicken very dry before roasting for the best outcome.
Is this recipe gluten-free?
Yes. All of the ingredients in this recipe — chicken, olive oil, brown sugar, and the listed spices — are naturally gluten-free. Always double-check individual spice labels if you are cooking for someone with celiac disease.
Final Thoughts
These Crispy and Juicy Baked Boneless Chicken Thighs are a recipe worth knowing by heart. The dry rub is deeply flavorful, the high-heat technique delivers on its promise of crispy edges and juicy meat, and the whole thing takes less than forty-five minutes from start to finish. This is the kind of reliable, endlessly satisfying dinner that works every night of the week — make it once and it will become a permanent fixture in your dinner rotation.
Crispy and Juicy Baked Boneless Chicken Thighs
Ingredients
- 2 lb boneless skinless chicken thighs (about 6 thighs)
- 1 tablespoon olive oil
- 1 tablespoon brown sugar
- 2 teaspoons Italian seasoning
- 1.5 teaspoons paprika
- 1.5 teaspoons kosher salt
- 1 teaspoon onion powder
- 1 teaspoon garlic powder
- 1/2 teaspoon ground black pepper
Instructions
- Preheat the oven to 425 degrees Fahrenheit. Line a rimmed baking sheet with parchment paper.
- In a small bowl, combine the brown sugar, Italian seasoning, paprika, kosher salt, onion powder, garlic powder, and black pepper. Stir until evenly blended.
- Unfold the chicken thighs and lay flat on a cutting board. Trim any large fat deposits. Pat every surface thoroughly dry with paper towels.
- Drizzle the olive oil over the chicken and rub it evenly into all surfaces using clean, dry hands.
- Sprinkle the dry rub over the chicken and use your hands to press and rub the seasoning evenly into all sides of each thigh.
- Arrange the seasoned thighs on the prepared baking sheet in a single even layer with a little space between each piece.
- Roast for 25 to 30 minutes until the edges are crispy and an instant-read thermometer inserted into the thickest part reads 165 degrees Fahrenheit.
- Transfer to a cutting board and rest for 5 minutes. Slice against the grain and serve immediately
Notes
Use a baking sheet, not a deep baking dish, for proper air circulation and crispiness.
Do not crowd the pan — leave space between each piece for even roasting.
Always confirm doneness with a meat thermometer inserted into the thickest part.
Rest the chicken for 5 minutes before slicing to retain juices.
Store leftovers in an airtight container in the refrigerator for up to 4 days.
Reheat in a 375-degree oven for 10 to 12 minutes to restore crispiness.
For extra crispy edges, broil for the last 2 to 3 minutes of cooking.