Easter is a time to celebrate with family, friends, and, of course, delicious food! If you’re looking to add a sweet touch to your holiday festivities, we’ve compiled a list of 10 top Easter dessert recipes that are perfect for the season. From classic carrot cake cupcakes to fun bunny-shaped treats, these desserts are not only delicious but also festive and easy to make. Whether you’re hosting a big family dinner or simply enjoying a quiet afternoon, these desserts will add the perfect finishing touch to your Easter celebration.
1. Carrot Cake Cupcakes
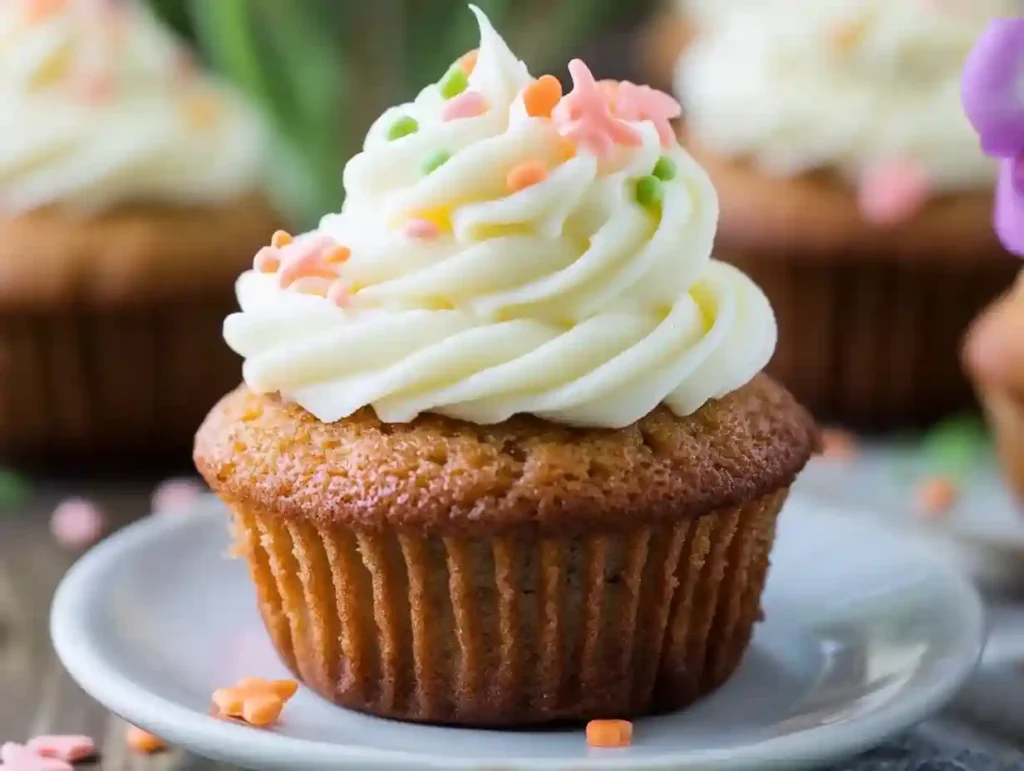
These moist and flavorful carrot cake cupcakes are topped with a smooth, tangy cream cheese frosting. They’re the perfect treat for any occasion, especially Easter. Light, airy, and full of cinnamon-spiced goodness, these cupcakes are sure to impress.
Ingredients:
- For the Cupcakes:
- 1 ½ cups all-purpose flour
- 1 ½ teaspoons baking powder
- 1 teaspoon baking soda
- 1 ½ teaspoons ground cinnamon
- ½ teaspoon ground nutmeg
- ½ teaspoon salt
- 3 large eggs
- 1 cup granulated sugar
- ½ cup brown sugar, packed
- 1 cup vegetable oil
- 2 teaspoons vanilla extract
- 2 cups grated carrots (about 4 medium carrots)
- ½ cup chopped walnuts or pecans (optional)
- For the Cream Cheese Frosting:
- 8 oz cream cheese, softened
- ½ cup unsalted butter, softened
- 4 cups powdered sugar
- 1 teaspoon vanilla extract
Instructions:
For the Cupcakes:
- Preheat the oven to 350°F (175°C). Line a muffin tin with cupcake liners.
- In a medium-sized bowl, whisk together the flour, baking powder, baking soda, cinnamon, nutmeg, and salt. Set aside.
- In a large bowl, beat the eggs, granulated sugar, brown sugar, and vegetable oil until combined and smooth. Add the vanilla extract and mix again.
- Gradually add the dry ingredients to the wet ingredients, mixing just until combined. Be careful not to overmix.
- Fold in the grated carrots and nuts (if using) until evenly distributed throughout the batter.
- Spoon the batter into the cupcake liners, filling them about 2/3 full.
- Bake for 18-22 minutes, or until a toothpick inserted into the center comes out clean. Let the cupcakes cool in the tin for 5 minutes before transferring them to a wire rack to cool completely.
For the Cream Cheese Frosting:
- In a large bowl, beat the cream cheese and butter together until smooth and creamy.
- Gradually add the powdered sugar, one cup at a time, beating well after each addition until the frosting is light and fluffy.
- Mix in the vanilla extract.
- Frost the cooled cupcakes with a generous amount of the cream cheese frosting using a knife or piping bag.
- Optionally, garnish with a few extra chopped walnuts or shredded coconut for extra texture and flavor.
Tips:
- Be sure to grate the carrots finely to ensure they integrate well into the batter.
- If you prefer a lighter texture, you can substitute half of the oil with unsweetened applesauce.
- The cupcakes can be stored in an airtight container in the refrigerator for up to 4 days.
Enjoy your delightful carrot cake cupcakes, with just the right balance of sweetness and spice! They’re sure to be a crowd-pleaser at your next gathering.
2. Lemon Meringue Pie
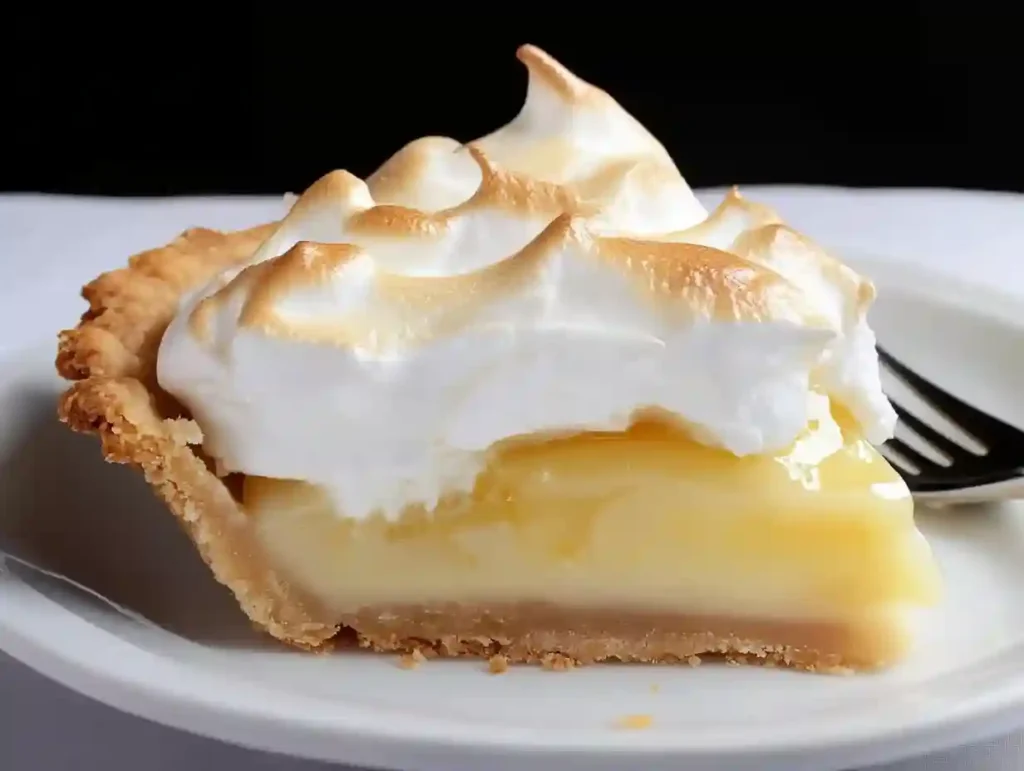
This tangy and sweet Lemon Meringue Pie is a classic dessert that’s perfect for any occasion, especially Easter. With a crisp pie crust, a smooth and zesty lemon filling, and a fluffy meringue topping, it’s a delightful combination of textures and flavors.
Ingredients:
- For the Pie Crust:
- 1 ¼ cups all-purpose flour
- 1/3 cup cold unsalted butter, cubed
- ¼ cup ice-cold water
- 1 tablespoon granulated sugar
- ¼ teaspoon salt
- For the Lemon Filling:
- 1 ½ cups granulated sugar
- ¼ cup all-purpose flour
- ¼ cup cornstarch
- 1 ½ cups water
- 6 large egg yolks (reserve the whites for the meringue)
- 1/2 cup fresh lemon juice (about 3-4 lemons)
- 2 tablespoons unsalted butter
- 1 teaspoon lemon zest
- For the Meringue:
- 6 large egg whites
- ¼ teaspoon cream of tartar
- ¾ cup granulated sugar
- 1 teaspoon vanilla extract
Instructions:
For the Pie Crust:
- Preheat the oven to 350°F (175°C).
- In a food processor, combine the flour, sugar, and salt. Add the cold butter and pulse until the mixture resembles coarse crumbs.
- Gradually add the ice-cold water, 1 tablespoon at a time, pulsing until the dough comes together.
- Turn the dough out onto a lightly floured surface and knead it a few times. Roll it out to fit a 9-inch pie dish, then trim and crimp the edges.
- Blind bake the crust by lining it with parchment paper and filling with pie weights or dried beans. Bake for 10-12 minutes, then remove the weights and parchment and bake for another 5-7 minutes until lightly golden. Set aside to cool.
For the Lemon Filling:
- In a medium saucepan, whisk together the sugar, flour, and cornstarch. Gradually whisk in the water.
- Place the saucepan over medium heat and cook, whisking constantly, until the mixture thickens and comes to a gentle boil.
- In a small bowl, whisk the egg yolks. Gradually add a small amount of the hot mixture to temper the yolks, then slowly pour the yolks back into the saucepan, whisking constantly.
- Bring the mixture to a boil again and cook for 2-3 minutes until it thickens to a custard-like consistency.
- Remove from heat and stir in the lemon juice, butter, and lemon zest until smooth.
- Pour the filling into the baked pie crust.
For the Meringue:
- In a clean bowl, beat the egg whites with a hand mixer on medium speed until soft peaks form. Add the cream of tartar and continue beating until stiff peaks form.
- Gradually add the sugar, 1 tablespoon at a time, and beat until the meringue is glossy and holds stiff peaks.
- Spoon the meringue over the lemon filling, spreading it to the edges of the crust to seal in the filling.
- Bake the pie at 350°F (175°C) for 10-12 minutes, or until the meringue is golden brown.
- Allow the pie to cool completely before serving to set the filling and meringue.
This Lemon Meringue Pie is a refreshing and sweet treat that’s perfect for springtime gatherings. Enjoy the combination of tangy lemon, creamy filling, and the crispy, airy meringue!
3. Easter Egg Cookies

These Easter Egg Sugar Cookies are soft, buttery, and perfect for decorating with your favorite icing and sprinkles. Shaped like colorful Easter eggs, they’re a fun and festive treat to celebrate the season.
Ingredients:
- For the Cookies:
- 2 ¾ cups all-purpose flour
- 1 teaspoon baking powder
- ¼ teaspoon salt
- 1 cup unsalted butter, softened
- 1 ½ cups granulated sugar
- 1 large egg
- 1 teaspoon vanilla extract
- ½ teaspoon almond extract (optional)
- 2-4 tablespoons milk (as needed)
- For the Icing:
- 2 cups powdered sugar
- 2 tablespoons milk
- ½ teaspoon vanilla extract
- Food coloring (optional)
Instructions:
For the Cookies:
- Preheat the oven to 350°F (175°C). Line baking sheets with parchment paper or silicone mats.
- In a medium-sized bowl, whisk together the flour, baking powder, and salt. Set aside.
- In a large bowl, beat the butter and sugar together with an electric mixer until light and fluffy, about 2-3 minutes.
- Add the egg, vanilla extract, and almond extract (if using), and beat until well combined.
- Gradually add the dry ingredients to the wet ingredients, mixing until the dough comes together. If the dough is too crumbly, add milk, 1 tablespoon at a time, until it forms a soft dough.
- Divide the dough into two portions, wrap each in plastic wrap, and chill in the refrigerator for at least 1 hour.
- After chilling, roll out the dough on a lightly floured surface to about ¼-inch thickness. Using an Easter egg-shaped cookie cutter, cut out the cookies and transfer them to the prepared baking sheets.
- Bake for 8-10 minutes, or until the edges are lightly golden. Let the cookies cool on the baking sheet for 5 minutes before transferring them to a wire rack to cool completely.
For the Icing:
- In a medium bowl, whisk together the powdered sugar, milk, and vanilla extract until smooth.
- Divide the icing into separate bowls and add food coloring to each to create a variety of colors.
- Once the cookies are completely cooled, use a spoon or piping bag to decorate the cookies with the icing. You can also add sprinkles or other decorations as desired.
- Allow the icing to set for about 30 minutes before serving or storing.
These Easter Egg Sugar Cookies are a fun and festive way to celebrate Easter! They are perfect for decorating with family or for sharing with friends and loved ones. Enjoy the soft, buttery texture paired with colorful, sweet icing!
4. Bunny Butt Cupcakes
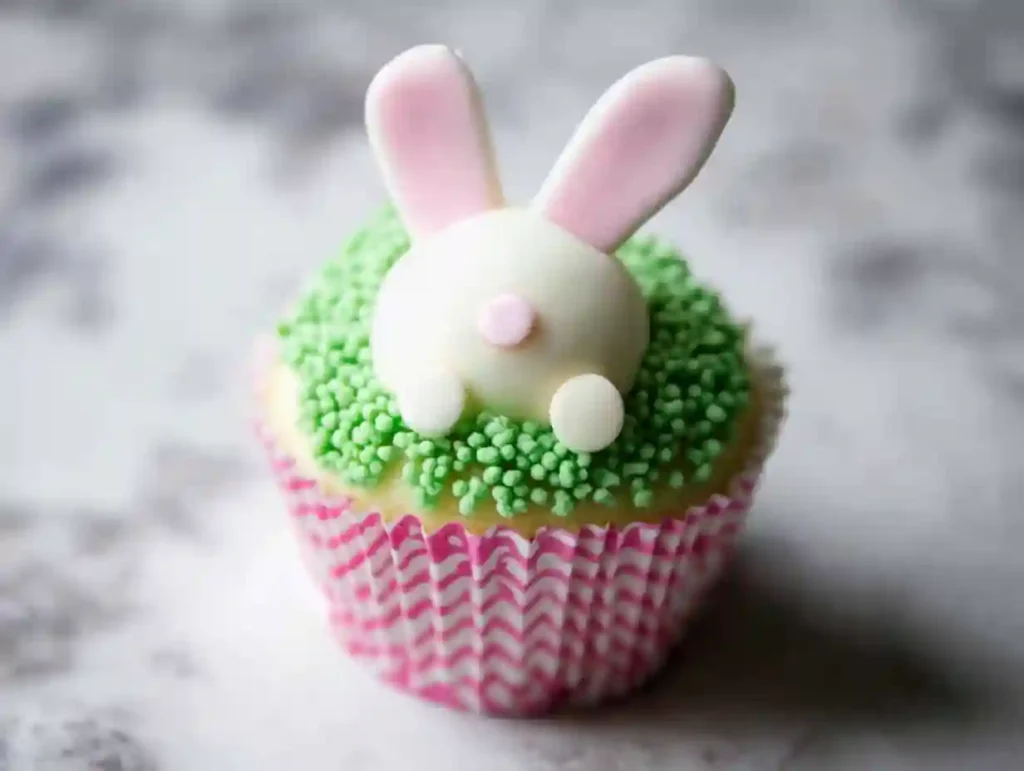
These adorable Bunny Butt Cupcakes are the perfect treat for Easter! Soft cupcakes topped with fluffy white frosting, shaped to resemble a cute bunny’s backside. They’re fun to make and even more fun to eat!
Ingredients:
- For the Cupcakes:
- 1 ½ cups all-purpose flour
- 1 ½ teaspoons baking powder
- ½ teaspoon baking soda
- ¼ teaspoon salt
- ½ cup unsalted butter, softened
- 1 cup granulated sugar
- 2 large eggs
- 1 teaspoon vanilla extract
- ½ cup buttermilk (or whole milk)
- ½ cup sour cream
- For the Frosting:
- 2 cups powdered sugar
- 1 cup unsalted butter, softened
- 2 teaspoons vanilla extract
- 1-2 tablespoons heavy cream (to reach desired consistency)
- For the Bunny Butt Decoration:
- 12 large marshmallows
- 12 mini marshmallows
- Pink candy (for the tail)
- Chocolate chips or black sprinkles (for the feet)
Instructions:
For the Cupcakes:
- Preheat your oven to 350°F (175°C) and line a cupcake tin with cupcake liners.
- In a medium-sized bowl, whisk together the flour, baking powder, baking soda, and salt. Set aside.
- In a large bowl, cream the butter and sugar together using an electric mixer until light and fluffy (about 3 minutes).
- Add the eggs, one at a time, beating well after each addition. Then add the vanilla extract.
- In alternating additions, add the dry ingredients and buttermilk to the butter mixture, beginning and ending with the dry ingredients. Be careful not to overmix.
- Fold in the sour cream until the batter is smooth and well combined.
- Spoon the batter evenly into the cupcake liners, filling each about 2/3 full.
- Bake for 18-22 minutes, or until a toothpick inserted into the center comes out clean. Allow the cupcakes to cool completely on a wire rack.
For the Frosting:
- In a large bowl, beat the butter until creamy using an electric mixer.
- Gradually add the powdered sugar, beating well after each addition. Add the vanilla extract and 1 tablespoon of heavy cream. Beat until smooth and fluffy, adding more cream as needed to achieve the desired consistency.
For the Bunny Butt Decoration:
- Once the cupcakes are completely cooled, frost them generously with the white buttercream frosting.
- To create the bunny butt, place a large marshmallow in the center of each cupcake to act as the bunny’s body.
- Attach mini marshmallows around the large marshmallow to represent the bunny’s feet. Use a dab of frosting to help secure them in place.
- Place a pink candy in the center of the large marshmallow to create the bunny’s tail.
- Use chocolate chips or black sprinkles to create the toes on the mini marshmallows, forming little bunny feet.
- Allow the cupcakes to sit for a few minutes for the frosting to set before serving.
These Bunny Butt Cupcakes are a playful and delightful Easter treat that will surely bring a smile to everyone’s face. They’re soft, fluffy, and perfect for any Easter celebration!
5. Peep Rice Krispies Treats
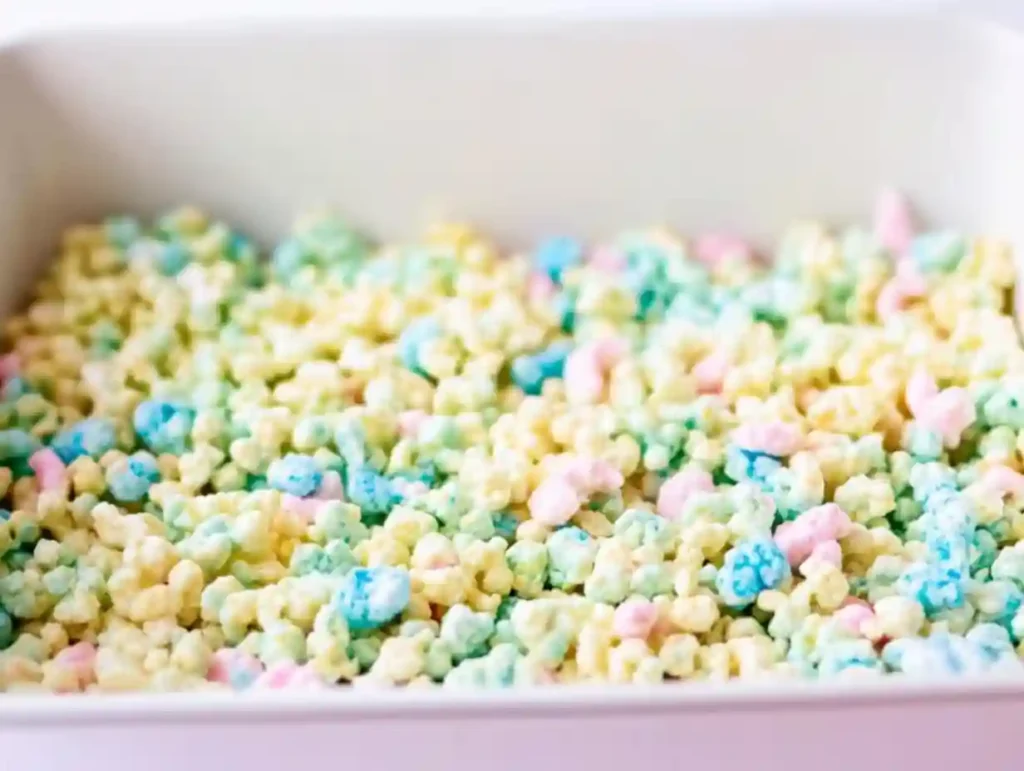
These Peeps Rice Krispies Treats are a fun twist on the classic, with colorful marshmallow Peeps adding a festive touch to your favorite crispy treat. They’re perfect for Easter or any spring celebration!
Ingredients:
- 3 tablespoons unsalted butter
- 10 oz marshmallows (about 4 cups mini marshmallows)
- 6 cups Rice Krispies cereal
- 8-10 Peeps marshmallow chicks (colors of your choice)
- 1 teaspoon vanilla extract (optional)
- Sprinkles or additional Peeps for decoration (optional)
Instructions:
- Prepare the pan: Lightly grease a 9×13-inch baking dish or line it with parchment paper for easy removal of the treats.
- Melt the butter: In a large saucepan, melt the butter over medium heat.
- Add marshmallows: Once the butter has melted, add the marshmallows to the saucepan, stirring constantly until fully melted and smooth. If you want a bit of extra flavor, add the vanilla extract and stir it in.
- Mix in the Rice Krispies: Add the Rice Krispies cereal to the melted marshmallow mixture. Stir gently until the cereal is evenly coated with the marshmallow mixture.
- Add Peeps: Cut the Peeps into small pieces (each Peep should be cut into about 3-4 pieces) and gently fold them into the Rice Krispies mixture. Be careful not to break up the Peeps too much, as they add a fun marshmallow flavor and texture to the treats.
- Press into the pan: Transfer the mixture to the prepared baking dish and use a spatula or your hands (lightly greased) to press it down into an even layer.
- Let them set: Allow the treats to cool at room temperature for about 1 hour or until firm.
- Decorate and serve: If desired, add more Peeps or sprinkles on top for extra decoration. Once set, cut the treats into squares or rectangles and enjoy!
These Peeps Rice Krispies Treats are a colorful, fun, and easy-to-make dessert for any Easter gathering. They’re sure to be a hit with both kids and adults alike!
6. Strawberry Shortcake
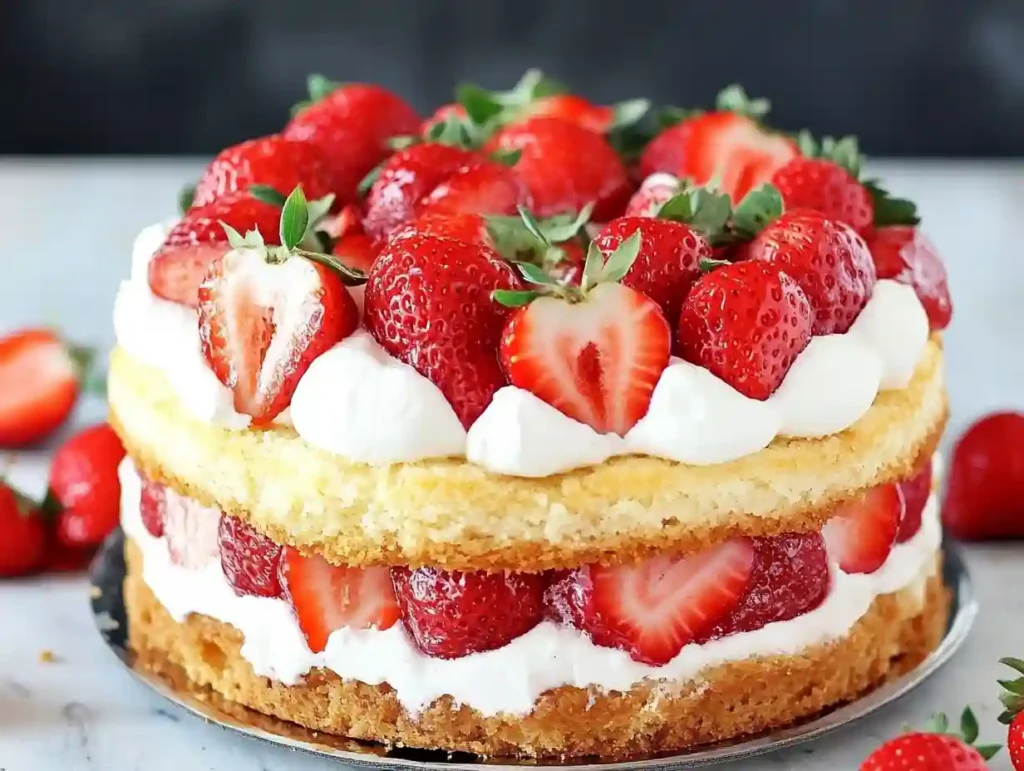
This Strawberry Shortcake Cake is a delightful twist on the classic strawberry shortcake, featuring layers of fluffy vanilla cake, sweetened strawberries, and whipped cream. It’s the perfect dessert for spring or summer gatherings!
Ingredients:
- For the Cake:
- 2 ½ cups all-purpose flour
- 2 ½ teaspoons baking powder
- ½ teaspoon salt
- 1 cup unsalted butter, softened
- 1 ½ cups granulated sugar
- 4 large eggs
- 1 tablespoon vanilla extract
- 1 cup whole milk
- For the Strawberry Filling:
- 3 cups fresh strawberries, hulled and sliced
- 2 tablespoons granulated sugar
- For the Whipped Cream Frosting:
- 2 cups heavy cream
- ¼ cup powdered sugar
- 1 teaspoon vanilla extract
Instructions:
For the Cake:
- Preheat your oven to 350°F (175°C). Grease and flour two 8-inch round cake pans or line them with parchment paper.
- In a medium bowl, whisk together the flour, baking powder, and salt. Set aside.
- In a large bowl, beat the butter and sugar together using an electric mixer on medium speed until light and fluffy (about 3-4 minutes).
- Add the eggs one at a time, beating well after each addition. Stir in the vanilla extract.
- Gradually add the dry ingredients in three parts, alternating with the milk, beginning and ending with the dry ingredients. Mix until just combined.
- Divide the batter evenly between the prepared cake pans and smooth the tops with a spatula.
- Bake for 25-30 minutes, or until a toothpick inserted into the center of the cakes comes out clean. Allow the cakes to cool in the pans for 10 minutes before transferring them to a wire rack to cool completely.
For the Strawberry Filling:
- In a medium bowl, combine the sliced strawberries and sugar. Toss to coat the strawberries in the sugar, then let them sit for about 15-20 minutes to release their juices.
For the Whipped Cream Frosting:
- In a large bowl, beat the heavy cream, powdered sugar, and vanilla extract with an electric mixer on medium-high speed until stiff peaks form (about 4-5 minutes).
Assembling the Cake:
- Once the cakes are completely cooled, slice each cake in half horizontally to create four layers.
- Place the first layer of cake on a serving platter. Spoon some of the strawberry filling (with juice) on top, followed by a generous layer of whipped cream frosting.
- Repeat the process for the next layers of cake, strawberries, and whipped cream.
- Once the top layer of cake is placed, frost the top and sides of the entire cake with the remaining whipped cream.
- Garnish with extra strawberries on top and around the edges for decoration.
- Refrigerate the cake for at least 1 hour before serving to allow the flavors to meld together. Slice and enjoy!
This Strawberry Shortcake Cake is a sweet, light, and refreshing dessert that’s perfect for any occasion, especially during the warmer months when fresh strawberries are in season. It’s sure to be a crowd-pleaser!
7. Chocolate Egg Nest Cake
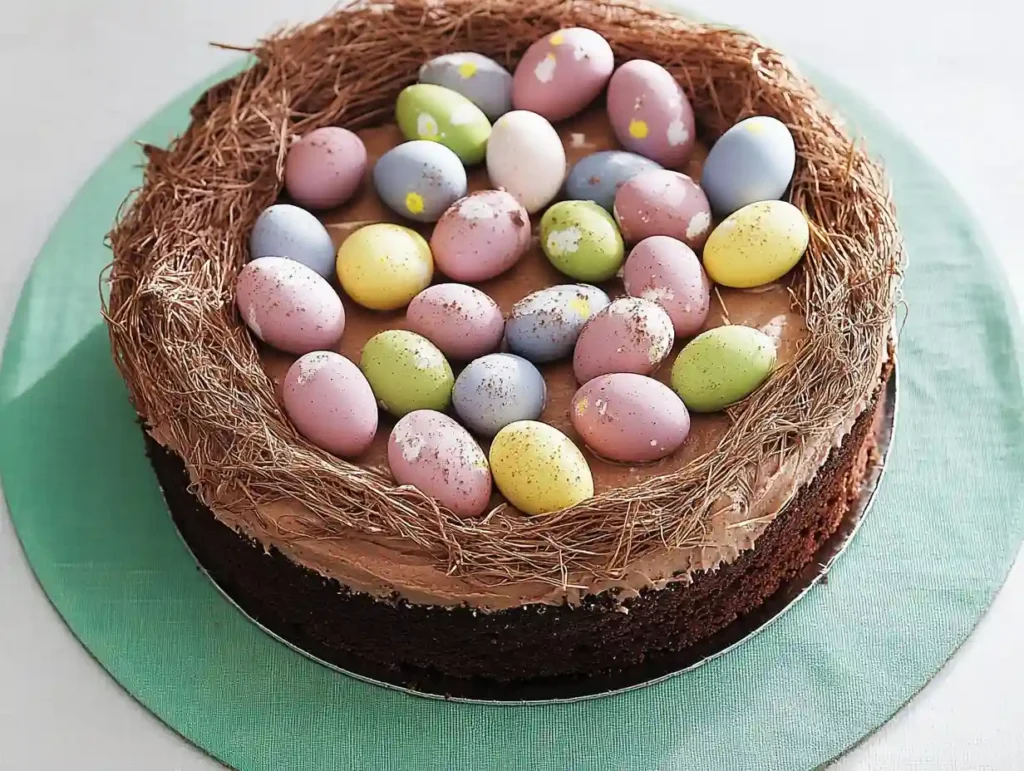
This Easter Egg Nest Cake is a whimsical and delicious dessert that features a rich chocolate cake topped with a coconut “nest” filled with colorful candy eggs. It’s a perfect way to celebrate the Easter holiday with a fun and festive treat!
Ingredients:
- For the Cake:
- 1 ½ cups all-purpose flour
- 1 ½ teaspoons baking powder
- ½ teaspoon baking soda
- ¼ teaspoon salt
- 1 cup unsweetened cocoa powder
- 1 cup granulated sugar
- 2 large eggs
- 1 teaspoon vanilla extract
- 1 cup milk
- ½ cup vegetable oil
- ½ cup boiling water
- For the Frosting:
- 1 cup unsalted butter, softened
- 4 cups powdered sugar
- ¼ cup unsweetened cocoa powder
- 2 teaspoons vanilla extract
- 3-4 tablespoons heavy cream (as needed)
- For the Coconut Nest:
- 1 ½ cups shredded coconut
- 2 tablespoons green food coloring
- 12-16 small chocolate eggs (or candy eggs)
Instructions:
For the Cake:
- Preheat your oven to 350°F (175°C). Grease and flour two 9-inch round cake pans or line them with parchment paper.
- In a medium bowl, whisk together the flour, baking powder, baking soda, salt, cocoa powder, and sugar. Set aside.
- In a large bowl, beat the eggs, vanilla extract, milk, and vegetable oil together until smooth.
- Gradually add the dry ingredients to the wet ingredients, mixing until just combined. Then carefully add the boiling water and stir until the batter is smooth and runny (this helps make the cake moist).
- Divide the batter evenly between the two prepared cake pans and smooth the tops with a spatula.
- Bake for 25-30 minutes, or until a toothpick inserted into the center comes out clean. Let the cakes cool in the pans for 10 minutes before transferring them to a wire rack to cool completely.
For the Frosting:
- Beat the butter in a large bowl until smooth and creamy.
- Gradually add the powdered sugar and cocoa powder, beating well after each addition. Add the vanilla extract and 3 tablespoons of heavy cream. Beat until the frosting is smooth and fluffy, adding more cream if needed to reach your desired consistency.
For the Coconut Nest:
- In a small bowl, place the shredded coconut and add green food coloring. Stir until the coconut is evenly tinted.
- Set the colored coconut aside for decoration.
Assembling the Cake:
- Place the first layer of the cooled cake on a serving platter. Spread a generous amount of frosting on top.
- Place the second layer of cake on top and frost the entire cake with the remaining frosting.
- Press the colored coconut into the sides and top of the cake to form the “nest.”
- Place the chocolate eggs or candy eggs in the center of the coconut nest to complete the look.
- Allow the cake to set for 30 minutes in the fridge before serving to let the frosting firm up.
This Easter Egg Nest Cake is not only delicious but also a showstopper for your Easter celebration. The combination of rich chocolate cake, creamy frosting, and coconut “grass” makes for a fun and festive treat!
8. Easter Basket Cake
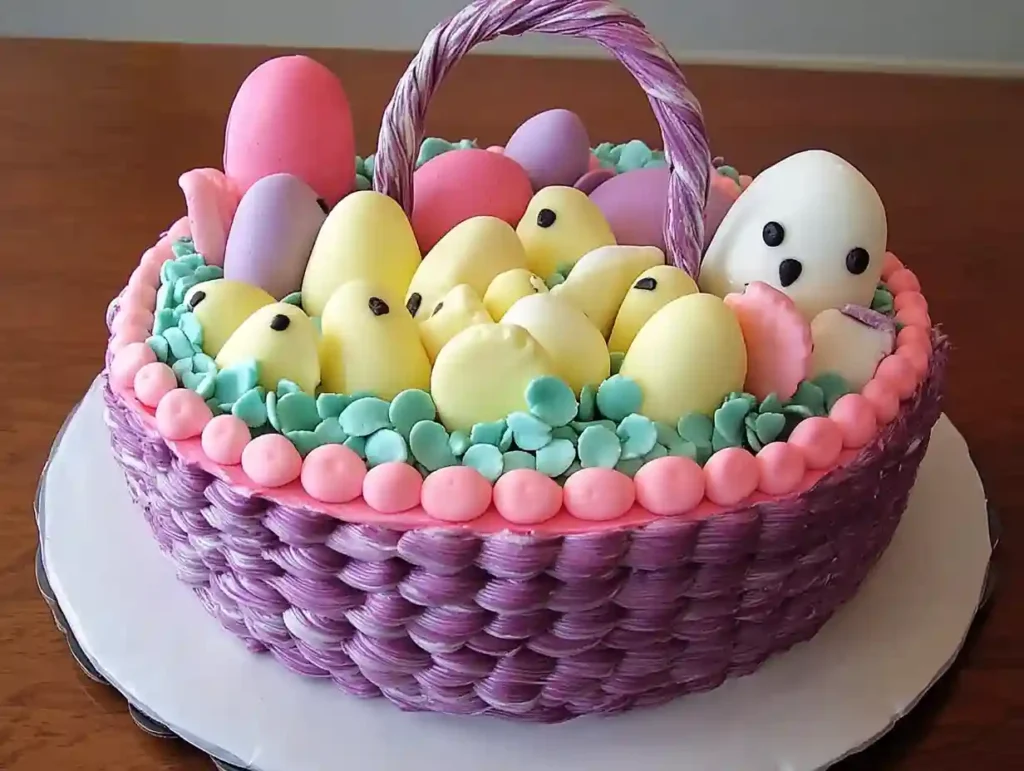
This Easter Basket Cake is a delightful, whimsical dessert perfect for Easter. It features a moist cake layered with fluffy frosting, and the sides are decorated to look like a basket, complete with candy eggs and colorful decorations. It’s a beautiful and delicious centerpiece for your Easter celebration!
Ingredients:
- For the Cake:
- 2 ½ cups all-purpose flour
- 2 ½ teaspoons baking powder
- ½ teaspoon salt
- 1 cup unsalted butter, softened
- 1 ½ cups granulated sugar
- 4 large eggs
- 1 teaspoon vanilla extract
- 1 cup whole milk
- For the Frosting:
- 1 cup unsalted butter, softened
- 4 cups powdered sugar
- 2 teaspoons vanilla extract
- 3-4 tablespoons milk (as needed)
- Green food coloring (optional, for the “grass”)
- For the Basket Weave Decoration:
- 1-2 cups shredded coconut (optional)
- 12-15 candy eggs or jelly beans
- Small chocolate candies (optional, for extra decorations)
Instructions:
For the Cake:
- Preheat the oven to 350°F (175°C). Grease and flour two 9-inch round cake pans, or line with parchment paper.
- In a medium bowl, whisk together the flour, baking powder, and salt. Set aside.
- In a large bowl, beat the butter and sugar with an electric mixer on medium speed until light and fluffy (about 3 minutes).
- Add the eggs one at a time, mixing well after each addition. Stir in the vanilla extract.
- Gradually add the dry ingredients to the wet ingredients, alternating with the milk, beginning and ending with the dry ingredients. Mix until smooth.
- Divide the batter evenly between the two cake pans and smooth the tops with a spatula.
- Bake for 25-30 minutes, or until a toothpick inserted into the center comes out clean. Let the cakes cool in the pans for 10 minutes before transferring them to a wire rack to cool completely.
For the Frosting:
- Beat the butter in a large bowl until smooth and creamy.
- Gradually add the powdered sugar, 1 cup at a time, until the frosting is light and fluffy.
- Add the vanilla extract and milk, then beat until the frosting reaches a smooth, spreadable consistency. Add more milk if needed.
- If you want to create a “grass” effect, add a few drops of green food coloring and stir until the frosting is evenly tinted.
Assembling the Cake:
- Once the cakes are completely cooled, frost the top of one layer and place the second layer on top.
- Frost the entire cake with a thin layer of the frosting, creating a smooth base layer.
- Use the remaining frosting to pipe basketweave patterns on the sides of the cake, using a star or round piping tip for the basket weave effect. This can be done by making horizontal lines across the sides of the cake and then piping diagonal lines in the opposite direction.
- Optional: If you want to create “grass,” you can pipe green frosting over the top and sides of the cake using a grass piping tip, or sprinkle shredded coconut dyed with green food coloring for a more textured look.
- Once the cake is decorated, place the candy eggs or jelly beans in the center to resemble the contents of an Easter basket. You can also add small chocolate candies for extra decoration.
- Allow the cake to set for 30 minutes before serving to give the frosting time to firm up.
This Easter Basket Cake will be the star of your celebration! With its vibrant colors and fun decorations, it’s a great way to bring the Easter spirit to your dessert table. Enjoy the combination of soft cake, creamy frosting, and candy-filled joy!
9. Gourmet Chocolate-Covered Strawberries

These Gourmet Chocolate-Covered Strawberries are the perfect indulgence! Fresh, juicy strawberries dipped in rich chocolate and adorned with various toppings for an elegant touch. Whether for a special occasion or just a treat, these strawberries are sure to impress.
Ingredients:
- 12 fresh strawberries, washed and dried thoroughly
- 6 oz dark chocolate (70% cocoa or your preferred variety)
- 6 oz white chocolate (for drizzling or dipping)
- ½ cup chopped nuts (such as pistachios, almonds, or hazelnuts)
- ¼ cup sprinkles (optional)
- ¼ cup shredded coconut (optional)
- 2 tablespoons crushed candy (such as toffee, peppermint, or cookies)
Instructions:
- Prepare the strawberries: Wash the strawberries thoroughly and dry them completely with paper towels. It’s important that no water is left on the strawberries, as it can interfere with the chocolate coating.
- Melt the dark chocolate: Place the dark chocolate in a heatproof bowl and melt it using one of the following methods:
- Microwave: Heat in 30-second intervals, stirring between each, until fully melted and smooth.
- Double boiler: Place the bowl over simmering water, stirring until melted and smooth.
- Dip the strawberries: Hold each strawberry by the stem and dip it into the melted dark chocolate, swirling it to cover about 2/3 of the strawberry. Allow any excess chocolate to drip off.
- Decorate:
- For nuts: Immediately after dipping in chocolate, roll or sprinkle the strawberry in the chopped nuts for a crunchy coating.
- For sprinkles: Roll the dipped strawberry in colorful sprinkles for a festive touch.
- For coconut: Coat the chocolate-covered part of the strawberry in shredded coconut for a tropical flavor.
- Chill to set: Place the chocolate-covered strawberries on a parchment-lined baking sheet. Let them sit at room temperature for a few minutes to firm up, then place them in the refrigerator for 30 minutes to completely set the chocolate.
- Drizzle with white chocolate: Once the dark chocolate has set, melt the white chocolate in the same way as the dark chocolate. Drizzle the melted white chocolate over the strawberries in a zigzag pattern for an elegant look.
- Add finishing touches: If desired, sprinkle the crushed candy on top of the white chocolate drizzle for added texture and flavor.
- Serve: Once the chocolate has set, serve the gourmet chocolate-covered strawberries on a platter or store them in an airtight container in the refrigerator until ready to enjoy.
These Gourmet Chocolate-Covered Strawberries are a perfect combination of sweet, rich chocolate and fresh fruit. With endless topping options, they can be customized to suit any taste and make a beautiful gift or treat for any occasion!
10. Easter Sugar Cookie Bars
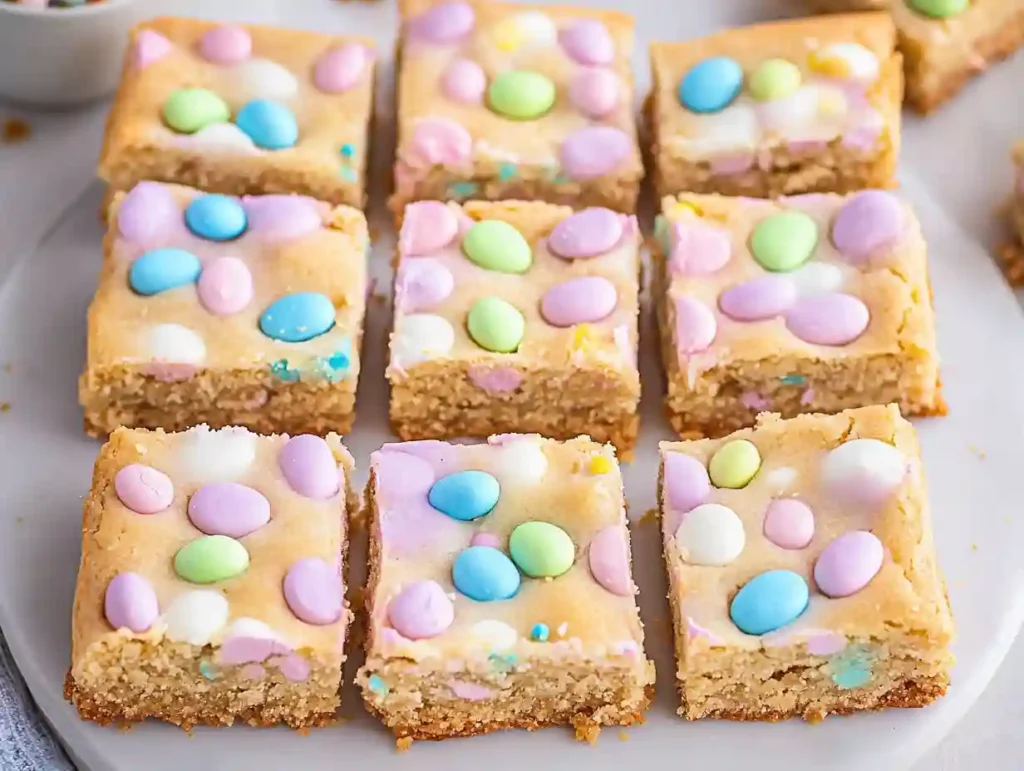
These Easy Easter Cookie Bars are soft, chewy, and bursting with colorful Easter candies. With a simple base of cookie dough, they come together quickly and are perfect for springtime celebrations. Top them with pastel sprinkles or more candy for a festive touch!
Ingredients:
- 1 cup unsalted butter, softened
- 1 ½ cups granulated sugar
- 2 large eggs
- 2 teaspoons vanilla extract
- 2 ¾ cups all-purpose flour
- 1 teaspoon baking powder
- ½ teaspoon salt
- 1 cup mini chocolate chips (optional)
- 1 cup pastel M&M’s or other Easter candies, roughly chopped
- 1 cup pastel sprinkles (optional, for decoration)
Instructions:
- Preheat the oven to 350°F (175°C). Grease a 9×13-inch baking pan or line it with parchment paper for easy removal.
- Mix the wet ingredients: In a large bowl, cream together the butter and sugar with an electric mixer until light and fluffy (about 3 minutes). Add the eggs and vanilla extract, and beat until combined.
- Combine the dry ingredients: In a separate bowl, whisk together the flour, baking powder, and salt.
- Combine wet and dry ingredients: Gradually add the dry ingredients to the wet mixture, stirring until fully incorporated. The dough should be soft but not too sticky.
- Add the mix-ins: Gently fold in the mini chocolate chips (if using), and Easter candies. Reserve a small handful of candies for topping the bars before baking.
- Spread the dough: Transfer the cookie dough to the prepared baking pan, pressing it into an even layer. Sprinkle the remaining Easter candies and sprinkles on top.
- Bake: Bake in the preheated oven for 20-25 minutes, or until the edges are lightly golden, and a toothpick inserted into the center comes out clean.
- Cool and serve: Allow the cookie bars to cool completely in the pan before slicing into squares or bars. If desired, you can sprinkle more Easter sprinkles on top before serving.
These Easy Easter Cookie Bars are a quick and fun treat for your Easter celebration. The soft, chewy texture combined with colorful candy makes them irresistible and perfect for sharing with friends and family!

