Who says sushi is just for seafood lovers? Get ready to fall in love with a dessert that’s taking over TikTok and Instagram — the Oreo Cream Cheese Cheesecake Sushi Roll. This no-bake treat brings together the rich flavors of Oreos and creamy cheesecake in a fun, bite-sized spiral that mimics traditional sushi rolls. It’s the perfect fusion of playful presentation and indulgent flavor — and the best part? No oven required!
Whether you’re throwing a party, craving a late-night snack, or looking for a fun kitchen project with the kids, this Oreo Cream Cheese Cheesecake Sushi Roll is sure to become a household favorite.
Why You’ll Love This Oreo Cream Cheese Cheesecake Sushi Roll Recipe
Here’s why this viral recipe deserves a spot in your dessert rotation:
- No baking required – Perfect for warm days or quick sweet cravings.
- Only a few ingredients – Most are pantry staples you already have!
- Fun to make and serve – The sushi roll look is a total crowd-pleaser.
- Ultra creamy and rich – The cheesecake filling is smooth and satisfying.
- Customizable toppings – Drizzle, sprinkle, and garnish however you like!
Ingredients Needed for Perfect Oreo Cream Cheese Cheesecake Sushi Roll
Here are the core components that make this recipe so delicious:
- Oreo Cookies – Crushed to form the rich, chocolatey outer “sushi” layer.
- Cream Cheese – Provides the signature tang and creaminess of cheesecake.
- Butter – Helps bind the crushed cookies into a pliable rollable base.
- Heavy Whipping Cream – Adds fluffiness and lightness to the filling.
- Vanilla Extract – Enhances the overall flavor with a sweet aroma.
- Chocolate & White Drizzle – Adds a gourmet touch and extra decadence.
Step-by-Step Instructions to Make Oreo Cream Cheese Cheesecake Sushi Roll
1. Crush the Oreos:
Use a food processor to pulse your Oreo cookies into fine crumbs. Set aside a small portion for garnish if desired.
2. Create the rollable base:
Mix the crushed Oreos with softened cream cheese and melted butter. If the mixture feels too dry, add a splash of milk. Press into a flat, even rectangle between parchment paper and refrigerate.
3. Prepare the cheesecake filling:
Beat cream cheese, sugar, and vanilla until smooth. In another bowl, whip heavy cream until stiff peaks form, then fold into the cream cheese mixture.
4. Assemble the roll:
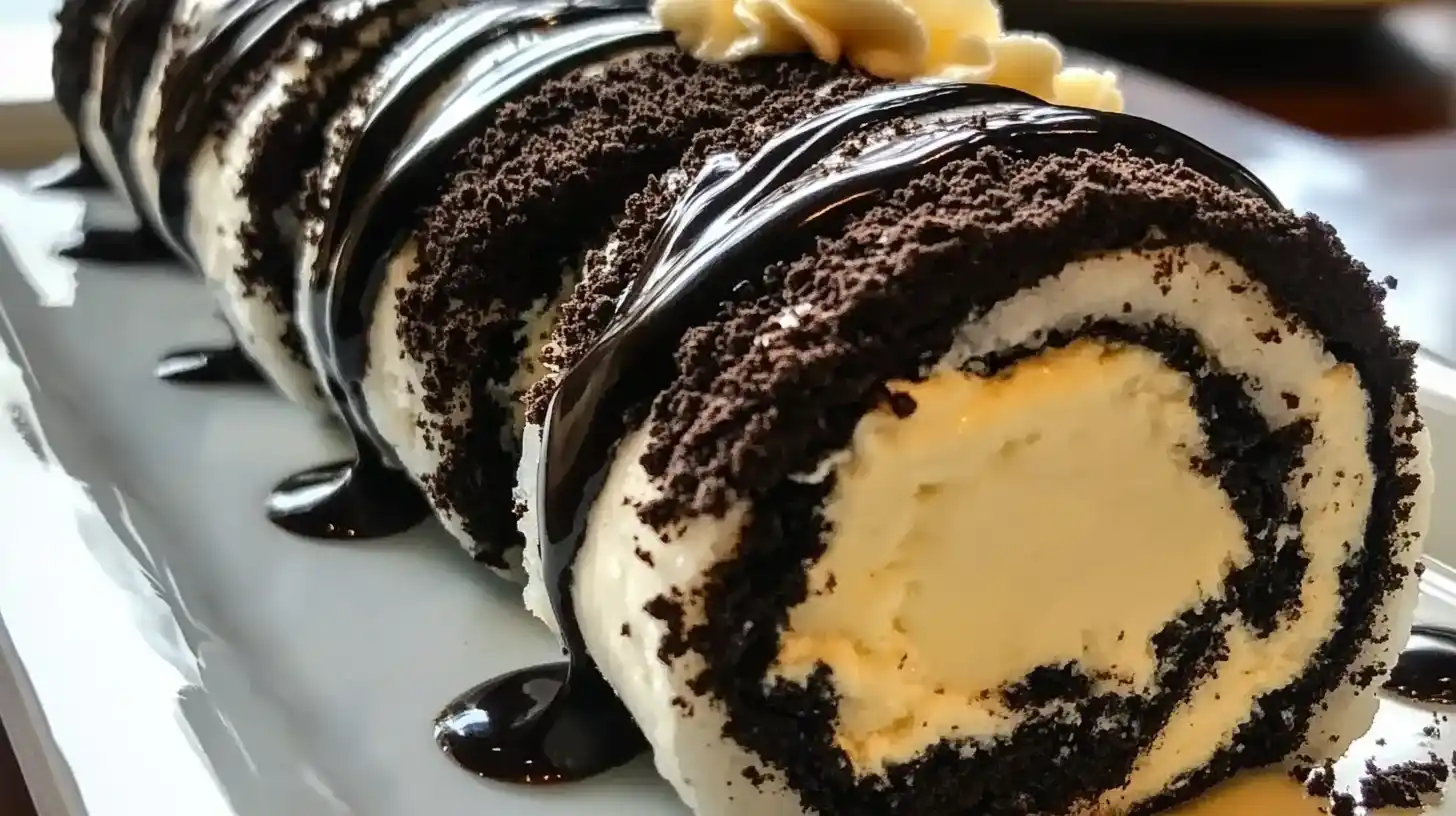
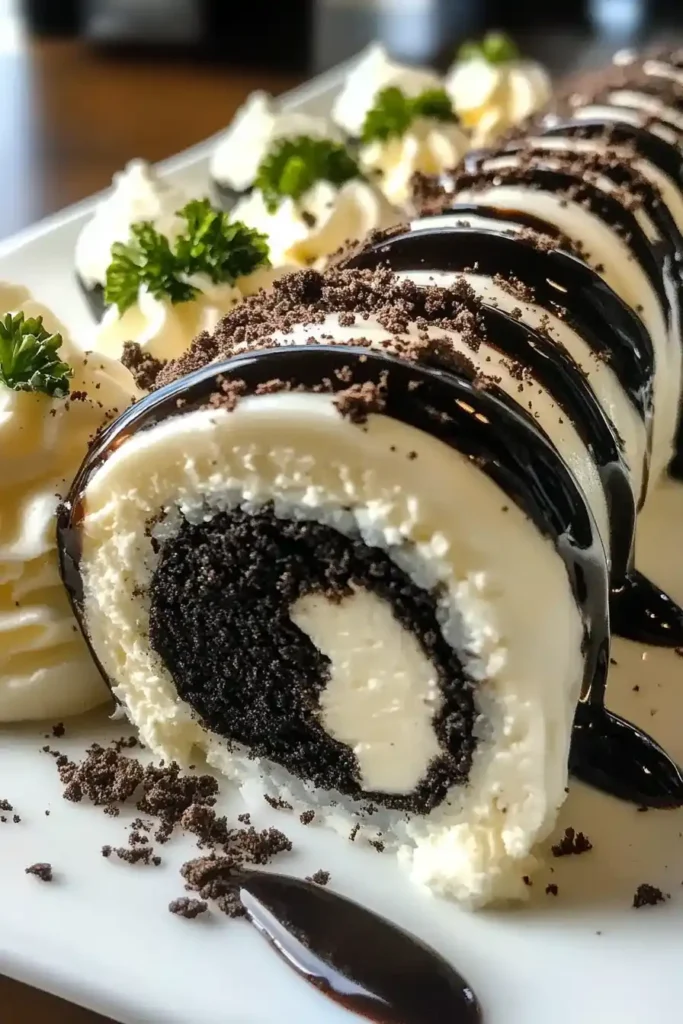
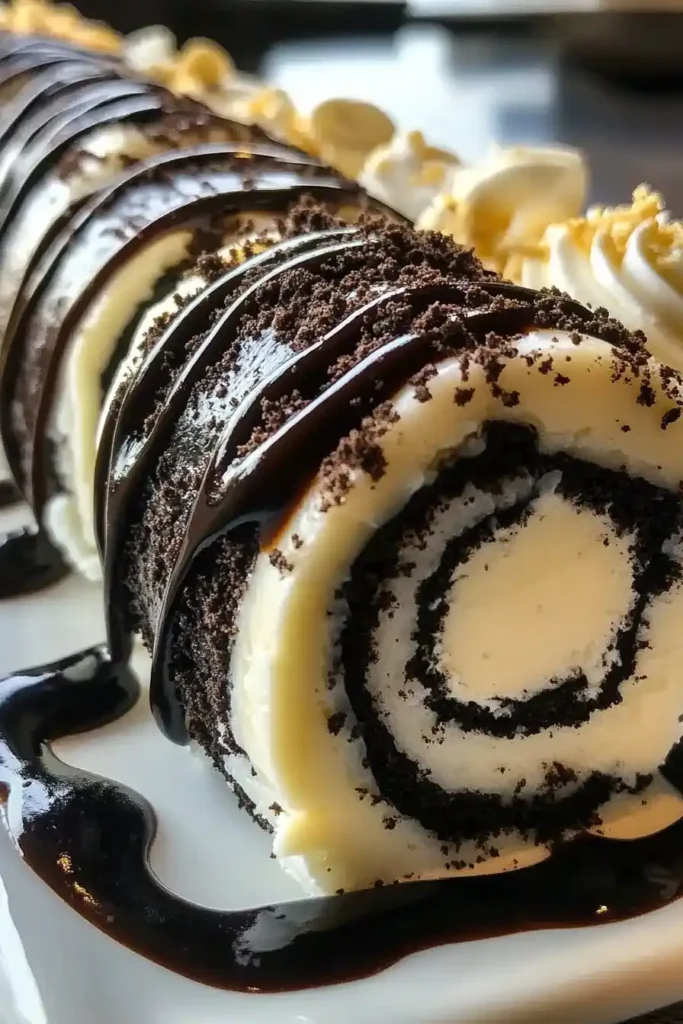
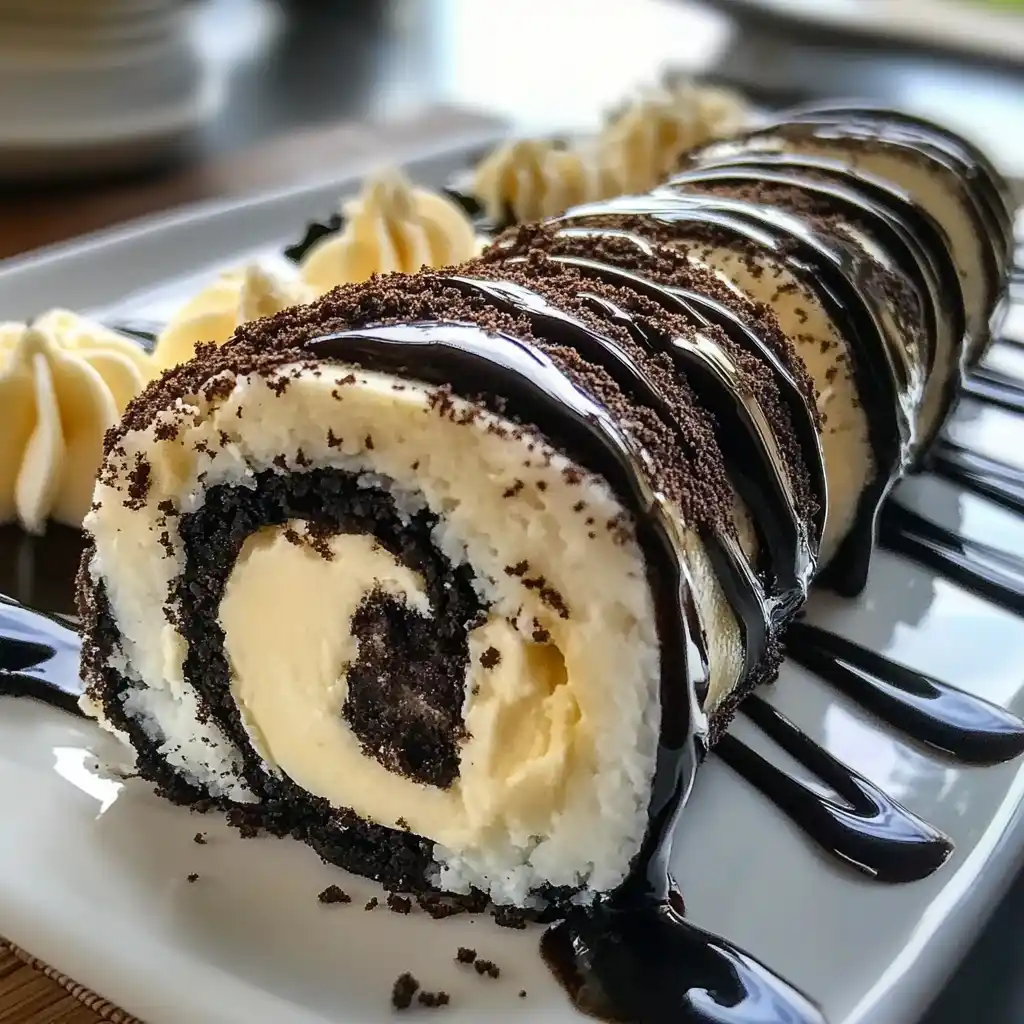
Spread the filling evenly over the chilled Oreo sheet. Starting from one edge, carefully roll it into a log using the parchment paper as a guide. Wrap in plastic and chill for at least 1 hour.
5. Decorate and slice:
Once firm, drizzle with melted chocolate and white chocolate. Add whipped cream and reserved cookie crumbs on top. Slice with a sharp knife into sushi-like rounds.
Expert Tip:
Use a warm knife to slice for clean edges. Wipe the blade between cuts.
Recipe Tips & Variations
- Add fruit – Sliced strawberries or bananas add freshness to the filling.
- Use flavored Oreos – Try Golden Oreos, Mint, or Red Velvet for a twist.
- Make it keto-friendly – Use low-carb cookies and a sugar substitute.
- Vegan option – Use plant-based cream cheese and coconut whipped cream.
How to Store & Reheat
Storage:
Keep your sushi roll slices in an airtight container in the fridge for up to 3–4 days.
Freezing:
You can freeze the whole roll (wrapped tightly in plastic wrap) for up to 1 month. Thaw in the fridge before slicing.
Reheating:
Not applicable – this is a no-bake dessert and best served cold!
Similar Recipes You’ll Love
If you’re a fan of this Oreo Cream Cheese Cheesecake Sushi Roll, you’ll definitely want to try these other creative and indulgent dessert recipes:
- Blueberry Lemon Cream Cheese Sourdough Bread – A zesty and tangy treat with bursts of fresh blueberry flavor and creamy richness in every slice.
- Fluffy Japanese Cotton Cheesecake Cupcakes – Light as air, these mini cheesecakes melt in your mouth with delicate sweetness.
- Fruity Pebbles Cheesecake Tacos – A fun, colorful twist on cheesecake, packed into a crunchy cereal shell for extra flair.
Frequently Asked Questions (FAQ)
What does this dessert taste like?
It tastes like a rich Oreo cheesecake in bite-sized form — creamy, chocolatey, and slightly tangy.
Can I make this ahead of time?
Absolutely! In fact, chilling the roll overnight makes it easier to slice and enhances the flavor.
Do I need a sushi mat to roll it?
Nope! Just parchment paper or plastic wrap is enough to roll it up neatly.
Can I use store-bought whipped topping instead of heavy cream?
Yes, store-bought whipped cream like Cool Whip works well for an even easier version.
If you’re looking for a no-bake dessert that’s as fun to make as it is to eat, the Oreo Cream Cheese Cheesecake Sushi Roll is your go-to. It’s rich, creamy, and picture-perfect — and a guaranteed hit at any gathering.
Try it out, and don’t forget to tag your dessert sushi creations on social media or drop a comment below. For more no-bake delights and creative treats, be sure to follow our blog — your sweet tooth will thank you!
Oreo Cream Cheese Cheesecake Sushi Roll
Ingredients
- 36 Oreo cookies 3 sleeves, finely crushed
- 1/2 cup cream cheese softened (for the crust)
- 2 tbsp melted butter
- 1 –2 tbsp milk optional, for consistency
- 8 oz cream cheese softened (for filling)
- 1/4 cup granulated sugar
- 1 tsp vanilla extract
- 1 cup heavy whipping cream
- 1/4 cup melted chocolate for drizzle
- 1/4 cup white chocolate or sweetened condensed milk
- Optional: whipped cream crushed Oreos for topping
Instructions
- Make Oreo dough: Crush Oreos in a food processor. Mix with 1/2 cup cream cheese and melted butter. Add milk if too dry.
- Flatten and chill: Roll mixture between parchment into a 1/4-inch thick rectangle. Chill for 15–20 minutes.
- Prepare cheesecake filling: Beat 8 oz cream cheese with sugar and vanilla. Whip cream until stiff peaks form, then fold into cream cheese.
- Spread filling: Evenly layer cheesecake filling over chilled Oreo base.
- Roll up: Carefully roll into a tight log using parchment. Wrap in plastic wrap and chill for 1 hour.
- Decorate and slice: Drizzle with melted chocolates, add whipped cream and crushed Oreos. Slice into 1-inch pieces.