Description
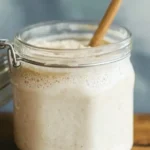
A sourdough starter is a naturally fermented mixture of flour and water used to bake flavorful, homemade sourdough bread without commercial yeast. This step-by-step guide will help you create a healthy starter in just 7 days.
Ingredients
Day 1:
- 60g (½ cup) whole wheat flour
- 60g (¼ cup) warm water (filtered, non-chlorinated)
Day 3 and Beyond (Daily Feedings):
- 60g (½ cup) all-purpose flour
- 60g (¼ cup) warm water
Instructions:
Day 1: Mixing the Starter
- In a clean jar, combine whole wheat flour and warm water.
- Stir until fully mixed into a thick batter. Scrape down the sides.
- Cover loosely and let sit at room temperature (70-75°F / 21-24°C) for 24 hours.
Day 2: Observing Early Signs
- Check for bubbles or a slight tangy smell.
- Stir gently and leave it covered at room temperature for another 24 hours.
Day 3: First Feeding
- Discard half of the starter (this keeps acidity balanced).
- Add 60g all-purpose flour and 60g warm water to the remaining mixture.
- Stir well and cover. Let rest at room temperature for 24 hours.
Days 4-6: Strengthening the Starter
- Repeat the daily feeding process—discarding half and feeding with equal parts flour and water.
- Look for consistent bubbles, a pleasant sour smell, and a starter that begins to rise and fall predictably.
Day 7: Checking for Readiness
- Your starter is ready when it doubles in size within 4-6 hours of feeding.
- Perform the float test: Drop a small spoonful into a glass of water. If it floats, it’s ready to use.
- If it sinks, continue feeding for a few more days.
Instructions
Day 1:
- 60g (½ cup) whole wheat flour
- 60g (¼ cup) warm water (filtered, non-chlorinated)
Day 3 and Beyond (Daily Feedings):
- 60g (½ cup) all-purpose flour
- 60g (¼ cup) warm water
Instructions:
Day 1: Mixing the Starter
- In a clean jar, combine whole wheat flour and warm water.
- Stir until fully mixed into a thick batter. Scrape down the sides.
- Cover loosely and let sit at room temperature (70-75°F / 21-24°C) for 24 hours.
Day 2: Observing Early Signs
- Check for bubbles or a slight tangy smell.
- Stir gently and leave it covered at room temperature for another 24 hours.
Day 3: First Feeding
- Discard half of the starter (this keeps acidity balanced).
- Add 60g all-purpose flour and 60g warm water to the remaining mixture.
- Stir well and cover. Let rest at room temperature for 24 hours.
Days 4-6: Strengthening the Starter
- Repeat the daily feeding process—discarding half and feeding with equal parts flour and water.
- Look for consistent bubbles, a pleasant sour smell, and a starter that begins to rise and fall predictably.
Day 7: Checking for Readiness
- Your starter is ready when it doubles in size within 4-6 hours of feeding.
- Perform the float test: Drop a small spoonful into a glass of water. If it floats, it’s ready to use.
- If it sinks, continue feeding for a few more days.
Notes
- If your starter isn’t bubbling after 3 days, try using rye or whole wheat flour for one feeding.
- Keep your starter at a consistent warm temperature for best results.
- Once active, store at room temperature (feed daily) or in the fridge (feed weekly).
- Always use filtered, non-chlorinated water to avoid killing wild yeast.
- Prep Time: 10 minutes
- Cook Time: None
- Category: Baking
- Method: Fermentation
- Cuisine: Global
Nutrition
- Serving Size: 1 Tablespoon of Starter)
- Calories: 25 kcal
Keywords: sourdough starter recipe, homemade sourdough starter, how to make sourdough starter, natural yeast starter, easy sourdough starter
